Bird--
You need: knife, cutting board, clear finger-nail polish (optional), oh, yeah, a frond might help, too.
Find a palm-frond (that'll stump most of you, I'm sure). A cattail-frond or -leaf or -whatever-you-call-it might work also. TIP- the wider the better. If the frond is too narrow, it will be hard to split.
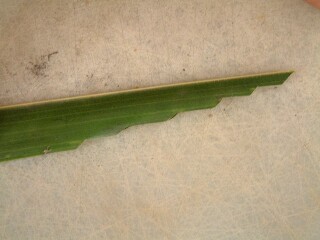
Identify the area for the body and wings. This should be the widest section of the frond, about 1 ft long. Cut the short end off (not the side that tapers down to a point).
Find a point to start the wings (about 1 ft away from the cut end). Fold the frond lengthways along the stem-thing in the middle (or place two fronds together, dull sides in). TIP- It works better if the two are the same width, and both edges match.
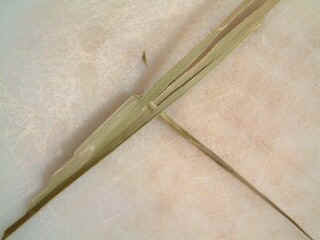
On the outside edge, starting about a foot from the cut end, notch the frond until you get all the way across.
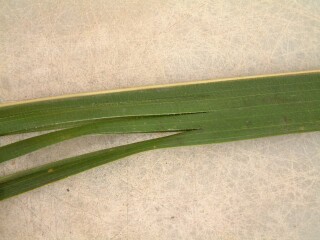
Turn the two fronds, still one on top of the other, around, so the wide end is towards you. Starting about two inches away from the beginning of the notching, slice the two fronds down the middle, then the middle of each half, so they are both sliced into quarters.
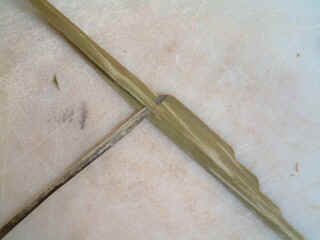
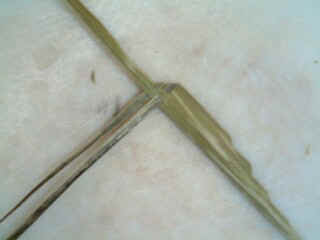
If the two fronds are connected by a stem, cut that off, trying to cut as little leaf as possible. YOU WILL NEED THE STEM AS LONG AS POSSIBLE FOR ANOTHER STEP.
NOW YOU ARE READY TO START WEAVING!
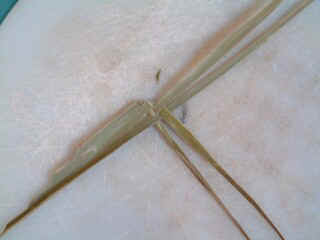
Take one of the two fronds and place it in front of you, wing side towards you, wrong side up, notches to the right. Take the section furthest to the right, and fold it across the other three in a 90° angle from it's original position. Weave it over, then under, then over the other three sections.
Take the second section, now furthest to the right, and do the same thing, over, then under the other two.
Place that frond aside, and pick up the other frond and place it in front of you, wing side towards you, wrong side up, notches to the left. Take the section furthest to the left and fold it over, weaving under, over, under the other three sections.
Do the same with the second section, folding it and then weaving under, over the other two.
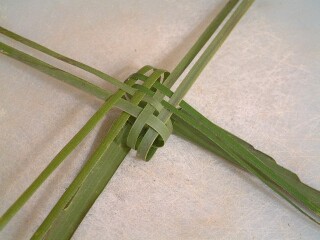
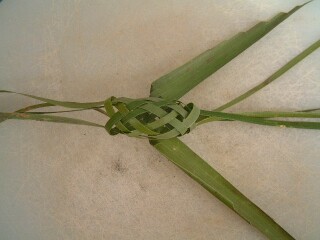
Take the two fronds, wrong side up, wings towards you, notches out, and put them 90° to each other, so that the weaving sections create a square, and continue the weaving.
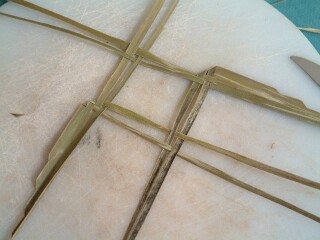
If it looks like the picture, keep going. If not, go back to the beginning of the weaving.
Push the wings together so the weaving tightens.
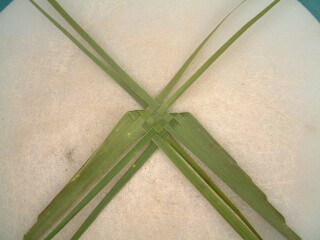
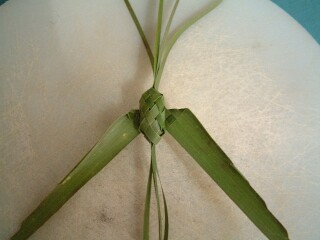
This part gets a little trickier. Take four sections that are opposite each other, and loosely fold them over to the opposite side of the weaving. Make sure they do not cross each other. Loosely fold up the other four sections, and begin weaving once more. If a section came out of the middle of the two layers, it then goes over, under, over, then under the other four sections. If a section came out on the bottom of both the layers, that goes into the middle (under) and then over, under, over. Make sure none of the parallel sections cross. Do not tighten.
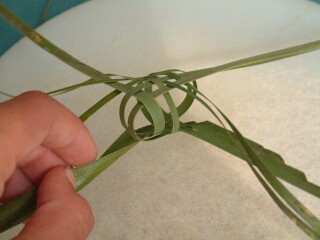
make sure your weaving looks like the pictures.
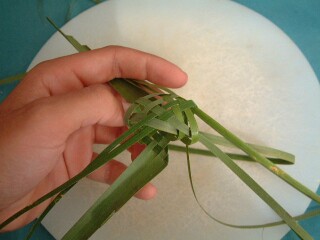
Look at the front and back of the body of the bird. Notice there are holes there at the corners. Place the wings towards you. Take the two strands on the right that are 90 degrees from the right wing. Take one of them, and see what its last weave was. If it just went over, then put it under, then under again the two woven strands (If it just went under, put it over, then under) so that it comes out in the hole at the corner that is the front of the bird.
Do the same with the other strand on the right, and the two on the left at the front side of the bird.
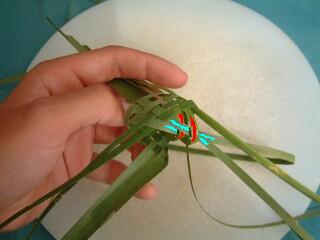
Now turn the bird around, so that the wings point away from you. Do step 8 again for the strands sticking out over the wings, so that they end up under, and inside the hole at the corner.
If the bird does not look like the picture, with four strands sticking out the front and back of the bird, undo your last steps and re-do it until it is correct.
Starting on the head side, separate the four strands. Gently pull numbers 1, then 3, then 2, then 4. Turn the bird around and do the same thing with the other four. 1, 3, 2, 4. You should see the body tightening.
Repeat step 10 as many times as needed, until the body looks tight.
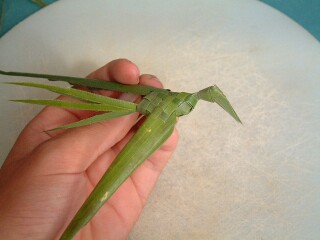
Now to make the head. Gathering the four strands on the head side (not the side with the wings) Tie an overhand knot with all of them so that the beak points down. Make the knot as close to the body as you want (It could be a stork, a seagull, whatever you want). Starting at the top of the strands, close to the knot, cut the four strands off at a steep taper, to create the beak.
On the tail side, you can decide how long you want the tail. Based on this, cut all four strands in a shallow taper, to make them long. Spread the strands vertically.
If you wish, now is the time to put the clear nail polish on. When the frond dries out, the nail polish will stop it from crumbling easily.
Take the stem from the frond, and cut the thick end into a point. Stick it, thick end first, into the "belly-button" of the bird, the middle of the weaving on the underside of the body. Push it up through the body, until it comes out the middle of the weaving of the back. Pull it through until only about an inch and a half remain on the underside. Push this around in a circle, weaving it under several strands, to lock it in place.
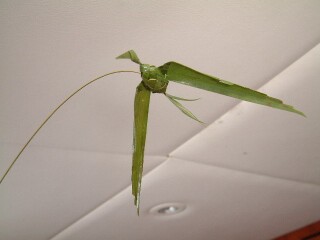
Congratulations! Your palm-frond bird is complete!
Top Level: Home | Destinations | Cruising Info | Underwater | Boat Guests | Ocelot | Sue | Jon | Amanda | Chris | Site Map | Make a Comment
![]()
|
If our information is useful, you can help by making a donation |
Copyright © 2000‑ Contact: Jon and Sue Hacking -- HackingFamily.com, svOcelot.com. All rights reserved.