

One of my assignments from my teachers was to make a carving in the Polynesian method/style/whatever. My art teacher suggested a paddle, but once getting down here again, I noticed that the Tahitian paddles are extremely complex; they're made from many different woods, different pieces of woods, and I'm not entirely sure how they're put together. Not to mention that they're big and require lots of wood. So, after looking through souvenir shops and markets and such, I suggested a bowl and got the OK.
It took a while to find a good carving wood in Tahiti. First of all, all the wood names are in Tahitian, meaning that I had no idea what any of them were. Second, if someone knew them in a different language than Tahitian, it was French. :P that's great help! Finally, though, I managed to get an off-cut of a type of wood that I understand is sometimes used for carving. I'm surprised - it's rather hard.
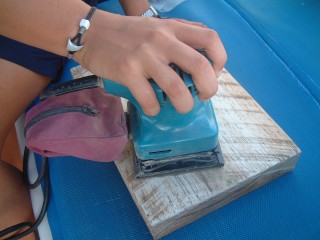
Step 1 - sanding and preparing
The offcut was rather roughly cut, with scratch marks and feathery splinters all over it. Not to mention a decidedly weathered look on the outside. Some fairly heavy electric sanding was required to get it looking nice. As it was, one side of the block was much better-looking than the other, which had deep circular gouges from the hardware store's saw. I decided to use the better-looking side for the top of my bowl, because there wouldn't be as much on the bottom that mattered how it looked.
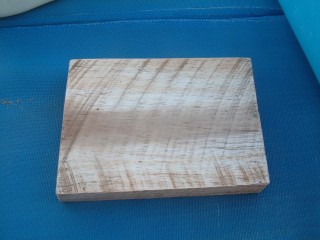
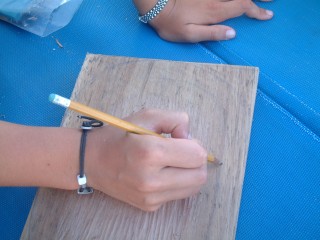
Step 2 - overall design
One the wood looked at least slightly prettier on the top (I didn't worry much about the bottom, which is depicted above), I needed some sort of design, an idea of what the overall bowl would look like. I didn't have one before, because I didn't know what sort of piece of wood I would have. I needed it to talk to me. So I listened. And eventually, it came to me that a wide-rimmed oval-shaped bowl would fit the wood perfectly. So step 2 was the designing of and sketching of the shape onto the wood. Luckily, pencil is easy to use on wood (after all, it's just a primitive version of paper!) and easy to erase, because I had to change my plans several times.
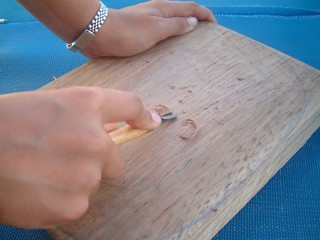
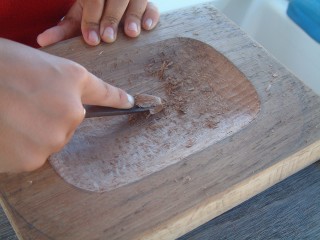
Step 3 - digging out the bowl
Before leaving the States to come down here again, I had bought a set of chisels for the purpose of making this carving. And so, when the time came to start digging into the wood, I had the tools for the job. Sort of. Turns out that the set I had gotten was actually rather small for the job - 3/8 inch, mostly. Also, the end of the main chisel (rounded, for gouging out wood) was flat, though too soft for a hammer, and ended up giving me quite a... callus? blister? bruise? on my hand. It took me several days to decide that if I kept going this way I was going to dig a hole in my hand. A handy Turk's Head knot over the end of the chisel gave me some padding and something to wrap my hand around. Several days later, however, my dad finally managed to find a bigger (3/4 inch, or somewhere around there) rounded chisel, and proceeded to show me how much faster it dug through my block of wood.
Step 4 - sanding
Finally I got the depth of the bowl down to what I wanted it (1.5" deep, or .5" thick on the bottom). It was rather rough, though I had tried to smooth it down and keep it level on the bottom. So out came the wonderful wet/dry sandpaper! Man, I love that stuff... It was really difficult to sand down the end-grain (the wood at either end of the bowl), but I kept after it until it looked all nice and spiffy. It actually looked like a bowl at that point!
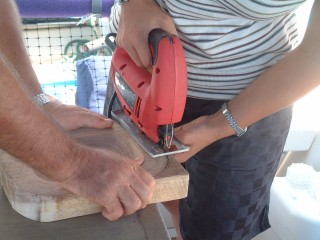
Step 5 - cutting off the corners
Now came the tricky bit. Sure, it looked like a bowl. However, it was square. And that just wouldn't do. The corners just had to come off. Now, you all know I hate cutting corners (hyuk hyuk) but it had to be done. Maybe I wasn't supposed to use any power tools, but cutting the corners off that block of wood would have taken ages. So out came the jigsaw, and choppy choppy. The blade, as jigsaw blades do, wandered a bit at the bottom, but at least it wandered the correct way - out. It made my job of smoothing out the sides a bit harder, but at least it didn't cut away any wood I would need later...
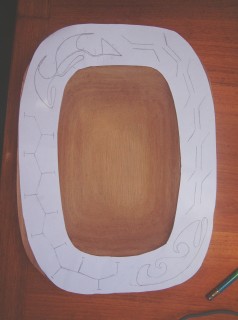
Step 6 - design
Now it really looked like a bowl. But there wasn't anything really all that Polynesian about it. So I went into Papeete and bought - well, my mom bought - a book all about Polynesian tattooing. It was all in French, but never mind that. I figured that any pattern someone could make in skin, I could make in wood. I was wrong, but figured that out before I did any permanent damage. I did, however, get some good inspiration from the book. I decided to have two different singular designs at two of the corners - maybe animals? - with long patterns of some sort going between them around the rim. The animals that jumped out at me from the book were a whale and a manta ray - they looked fairly simple - but after looking at them long and hard, I realized I was crazy. The tools I had were at the least half an inch wide, and those were rather flimsy for carving patterns. My dream of a tiki in the bottom of the bowl was also lost. After experimenting a bit with spare pieces of wood, I found patterns I thought I could probably do. One was a sea-star, the other a frigate bird. They would be connected by two continuing patterns that I liked. One was adapted from the sign for sugarcane, but I couldn't do it all on a rim only 1.5" wide.
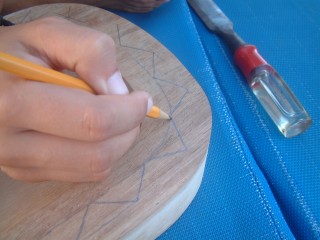
Step 7 - practice and final design
With my pattern drawn out on paper, I practiced like crazy to make sure that when I did the real carving on the rim of the bowl, it would look perfect. The bottom rim of the bowl I would eventually cut off, tapering it, so that's where I practiced. It was made easier by the fact that the space I had to work in was exactly the width of the rim I would finally have to do. Anything I couldn't do on the bottom, I wouldn't be able to do on the top. Finally I was convinced that I had the scale and technique just right, and drew in my pattern - in pencil - on the top rim of the bowl, where I would make the real cuts. Not trusting my eye, I measured everything carefully, even using the tools I would use to get the right lengths of the cuts.
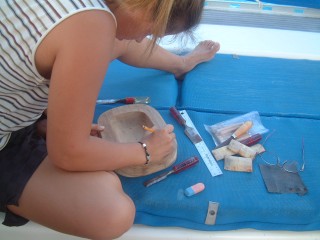
Step 8 - carving the pattern
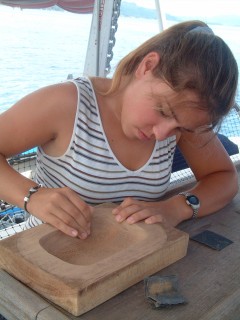
With that, there was nothing else to do but take a deep breath and start carving. Chisel in one hand, hammer in the other, bowl braced solidly... Gentle taps here, gentle taps there, scrape out the splintered wood that resulted, be very very careful... It didn't actually take all that long. Before I knew it, I had neat v-cuts right along all the pencil lines I had made. Deep breath. Wow. I had done it. And I hadn't messed anything up, despite the fact that while I was doing it all, we were also sailing. Huzzah for me!

Step 9 - tapering
After I did the design around the top, the bowl was beautiful, but it just didn't look right. It was too blocky and right-angled. Plus, my practice around the bottom rim looked a bit weird. Luckily, the jigsaw has a 45-degree-angle setup, so Dad and I pulled the thing out again and went to work. But.... I'm not sure what went wrong, but the jigsaw wasn't getting enough power, or the wood was too dense, or something, but the blade wandered quite a bit and it was very hard to turn the corners, rounded as they were. I eventually had to finish it off with the hacksaw (hand saw), because the jigsaw blade was cutting too far into the middle of the bowl, and burning the wood as it went (isn't friction a lovely thing?). The bottom is a bit of a squiff (I don't think that's a word...) oval, but it works okay.
Step 10 - final sanding/shaping
It was quite a bit of work, but the outside of the bowl was very rough and not very smooth. Plus, I wanted to put a bit of a lip on the rim, so it didn't look so weird. This all was achieved with sandpaper. Lots and lots of sandpaper, plus a chisel and a few heavy-duty files.
Overall, the bowl doesn't exactly look like I had thought it would. But I actually think it worked out pretty good. I'm considering either varnishing or oiling it, and using it to serve peanuts or something, but I haven't quite decided which.
Top Level: Home | Destinations | Cruising Info | Underwater | Boat Guests | Ocelot | Sue | Jon | Amanda | Chris | Site Map | Make a Comment
|
If our information is useful, you can help by making a donation |
Copyright © 2000‑ Contact: Jon and Sue Hacking -- HackingFamily.com, svOcelot.com. All rights reserved.