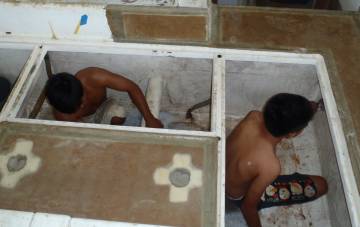
Kao and Jeng cleaning the lockers under the cockpit
43 Bimini Mold
 Kao and Jeng cleaning the lockers under the cockpit |
Summary: We got rain for the first few days but then glorious sunshine and we accomplished a lot. Kao and Jeng cleaned the storage lockers under the cockpit. Both engine hatches were ground back and prepared to receive foam stiffening sheets. The hollow on the outside of the port sugar‑scoop was filled with a light fairing compound. On the bimini project, we cut off the old bimini support bars. While we were at it, we extended the backs of those bars to extend our davits by 7" (18cm) so the dinghy comes up more smoothly. Once the rain stopped we cut 5 forms for the bimini shape we want and assembled them into a good, strong frame. Then we bought 6 sheets of foam and laid them up in 2 large layers, with glass on only 1 side. These will be bonded together to become the new bimini. On the sugar‑scoop steps, small shelves were installed around the inside of the port sugar‑scoop and the 2 steps were epoxied onto them. Then the edges were fileted and glassed. The upper starboard step had to be taken apart and reassembled, as it was originally built as an exact copy of port, not a mirror image. Then it was trimmed down until it matched the port steps. Mee installed some cute gutters around the starboard forward hatch, but he kept getting pulled off that project to help elsewhere.
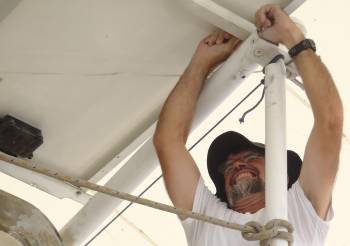 Struggling to get bolts loose while perched precariously |
Monday, August 27:
Pretty wet today so not much got done. It drizzled much of the morning and then in the
afternoon we got one of the biggest deluges we've seen in a long while.
When we arrived, Kao and Jeng were cleaning the lockers under the cockpit. For some reason, these lockers have gone black in some places. Golf wants to re‑gelcoat these lockers, but first they have to be thoroughly cleaned.
Mee couldn't work with any fiberglass so he took our port engine hatch and ground out some of the filler that had been smeared in where the teak had been. We now want to put a layer of foam where the teak was and then cover the whole hatch with a couple layers of fiberglass and a skin of antiskid. The engine hatches get too much sun for us to want teak on top of them.
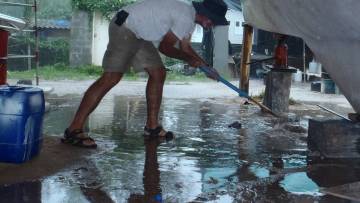 Jon frantically building dikes against the flooding waters |
We were a bit more productive, but only a bit. First we built a platform above our aft‑deck so Jon could (just) reach some of the bolts securing the solar panels to our davits. The fronts of the solar panels have been loose for some time, so the guys could fiberglass the targa‑bar. Now we wanted to remove the 4 bolts securing the backs of the solar panels to the davits, as we want to extend the davits aft 4‑8" (10‑20cm). This should allow the dinghy to be lifted without it scraping along the back of Ocelot. How far we extend the davits depends on how far the existing support poles let us.
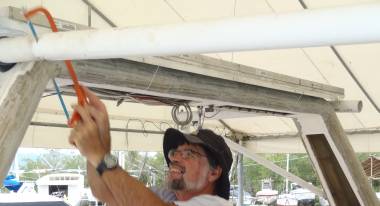 Cutting off the stbd bimini support (port already cut, behind) |
Getting the bolts out was extremely fiddly. Apparently, when Jon built the solar panel supports in St. Maarten, he was in "belt AND suspenders" mode. Much of the davit support area had to be disassembled first to get at the solar panel bolts. Jon has already redesigned the mounting system so it will be a bit more maintenance friendly in the future. Next steps here are to cut the big aluminum bimini support poles (which become the davits) and then see how far we can push the davits out.
We also moved some work‑tables around under our neighbor's boat, so we have enough room to build our bimini. But then the deluge hit so we ran back to Ocelot, only to find the water levels rising and lakes forming under Ocelot. So Jon and Amanda played flood control engineers, building dikes around Ocelot to keep the water out and building trenches to carry the water away.
Once we dried out the area under Ocelot, we sanded down our last 2 frames for the bimini. They're looking pretty good, but we still need to put them all together and sand them all to the same shape. (OK, yes, we probably should have done that in the first place...)
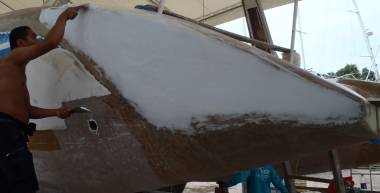 Golf getting down & dirty, smearing filler on our port sugar-scoop |
Tuesday, August 28:
A strange day. It threatened rain all day, and Golf even gave the workers the morning off
because it looked so bad, but
it actually got better and better as the day wore on. It was also nice and cool, so we weren't
sweating as much.
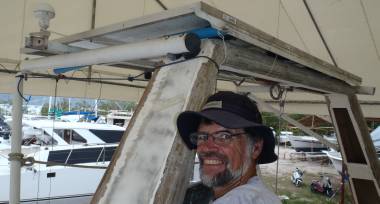 Our new, extended, stbd davit (unfinished portside in background) |
Team Hacking made the most progress. Our big work was on the davits (they hold the dinghy up at night and when we're sailing). Each side is composed of 2 heavy aluminum tubes - a horizontal one that attaches to the top of the targa bar before continuing forward to become our bimini support, and a vertical tube bolted to the back of Ocelot.
First we cut both of the big aluminum tubes that used to hold our bimini up (they won't be used on our new bimini) and unbolted them where they come down to the cabin‑top. Once the bimini parts were gone, we unbolted what was left from the targa bar to see how far back we could extend the davits. We needed to see how far aft the vertical tubes would let us go comfortably - turned out to be about 7" or 18 cm.
The horizontal tubes have gotten a bit beat up over the years, so we cut new sections from the parts that formed the bimini support. Then we drilled them out with the correct holes - a bit of a challenge as the angles for the holes have to be quite exact. After a lot of head scratching we got the starboard upper davit tube bolted in place. Tomorrow we should be able to get the port one done.
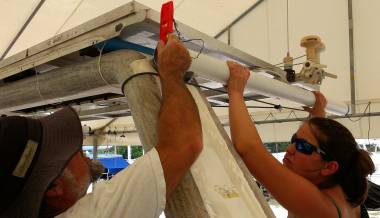 Jon & Amanda aligning the port davit to mark it for drilling |
We also clamped our bimini frames together and sanded them until they were all the exact same shape. Tomorrow we hope to build them into a mold for the foam that will become our bimini.
When Golf and the guys arrived they decided that it was dry enough to try some epoxy work, so Golf took off his shirt and continued filling in the hollow on the outside of portside wall coming down to the swim platform. We will need about ½" (13mm) of filler, but we can't put it all up at the same time or it will sag - it has to go on in layers. We'll probably need 1‑2 more layers.
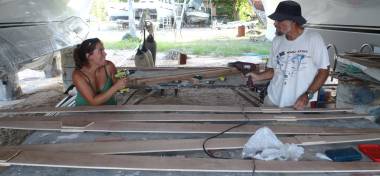 Amanda & Jon with the frames & their dueling screw-guns |
Houa trimmed down the lower step of the port sugar‑scoop and got it fitting nicely. Then, in a rather bizarre move, he started epoxying it in before he'd put the side supports on. Not like Houa at all - he's usually quite meticulous. But it's a good thing we were right there watching and could ask him to take it off and clean up the epoxy mud he'd put down. The mud was quickly used to help smooth the inside wall of the starboard sugar‑scoop wall, which has a pronounced ridge.
Wednesday, August 29:
Finally, a beautiful clear day! Golf was gone for the afternoon so nobody was cracking the
whip, but Team Hacking still accomplished quite a bit.
First we tackled the port davit. Having done starboard yesterday made port go much faster. We still didn't know exactly where to drill the mounting holes, but we knew how to find out where to drill them, which was the long part yesterday.
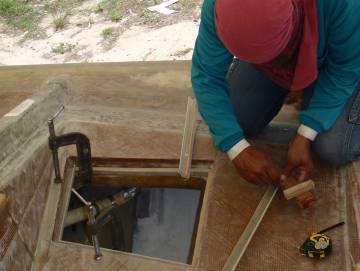 Mee fitting small gutter sections around the hatch opening |
We're still feeling our way through building the new bimini. A boat‑builder friend came around and offered his advice. His advantage is that, having built several boats, he knows he can just dive in and if he gets stuck, his experience will pull him through. Jon feels the same way about programming - but not necessarily about building boats... Today we cut several bits of wood, all aimed at holding the frames in the right places. We super‑glued them in place and then drilled pilot holes and screwed them together. Still quite a bit more to do before we feel that the frames are ready for the foam and glass, but we hope to get there tomorrow.
Up front, Mee was still working on the gutters for the forward hatches. We're forcing him (and Golf) to think differently, as the hatches are small enough that we really need the gutters to be as small as possible while still effectively catching the water that gets past the hatch. It's easy to make big gutters, but making small ones takes more sophistication. Luckily, they're very willing to take our advice and direction.
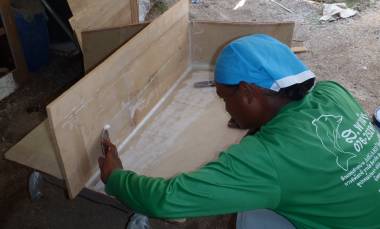 Houa glassing a central support to the underside of a step |
Houa was working on the sugar‑scoop steps. He added the central support to the starboard steps and glassed them on. But he spent most of his time making small foam shelves to be glassed onto the insides of the sugar‑scoops. Then the steps will rest on them when they're in place. This is the step that Houa forgot when he started sticking the starboard steps in yesterday.
In the morning, Kao was sanding the filler that Golf put on our port flank yesterday. He took off the highs but then he left after lunch - didn't tell anyone where he was going and never came back. Not sure what's going on there, because it was a beautiful day for adding another layer of filler there.
Sue spent much of the day emptying out Jon's toolbox and cleaning up his tools. Keeping tools working correctly when they're constantly exposed to a moist, salt atmosphere is a never‑ending task.
Thursday, August 30: Major Milestones!
An excellent day! The weather was bright and breezy, and we accomplished a couple of major
milestones.
The exciting work was happening on Ocelot. Houa finished the framing pieces he was working on yesterday and today he glassed them into the port sugar‑scoop. These framing pieces are what the steps rest on. Once the epoxy was hard, the lower framing pieces were covered in epoxy mud and the lower step was positioned over them and tapped into place! WOOT! But they didn't stop there. The mud wasn't even cured before they mudded the upper frames and installed the upper step as well! So now Ocelot has 2 beautiful steps in her port sugar‑scoop. They'll get a filet of mud and some fiberglass strips around the outside tomorrow, which will add both strength and nice lines, so the steps blend in with the sugar‑scoops.
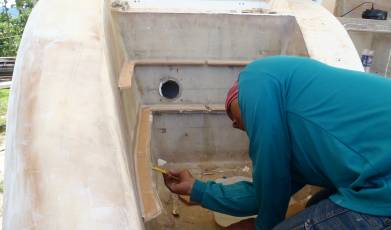 Mee glassing the frames for the steps into the sugar-scoops |
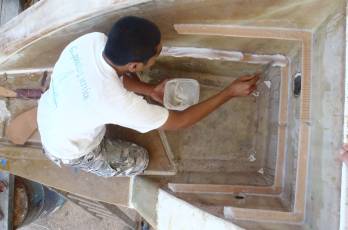 Golf spreading epoxy mud on the lower step |
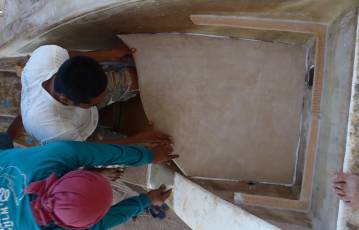 Golf and Mee installing the lower sugar-scoop step |
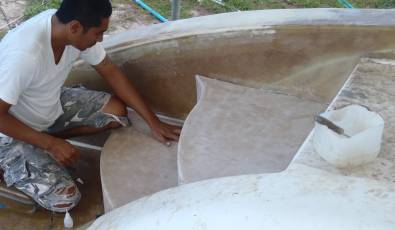 Golf with both port sugar-scoop steps now installed |
In the work‑shed, Golf got 2 layers of glass on the outsides of the starboard steps, so they should be ready to install tomorrow.
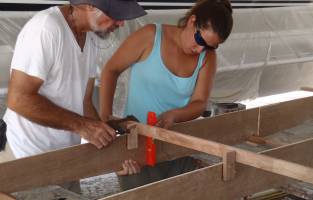
Under our neighbor's catamaran as shelter, Jon and Amanda started assembling all the bits that they've been
making for the bimini frame. They'd get a piece correctly positioned, mark where it went,
super‑glue both sides (since the wood is pretty porous), hold the joint together for 10 seconds
until the super‑glue hardened, then drill 2 pilot holes and screw the joints together as well (they
had 2 drills - 1 to drill the pilot holes and the other as a screw‑gun). They assembled the
frame pieces to cross pieces, making sure everything was level and square, but it was still a bit
floppy. Then they added the 2 diagonal braces and the whole thing became super stiff.
Over 150 screws and about 1½ bottles of super‑glue later, we now have a good frame to lay our foam
and fiberglass onto. Jon is extremely chuffed with it all.![]()
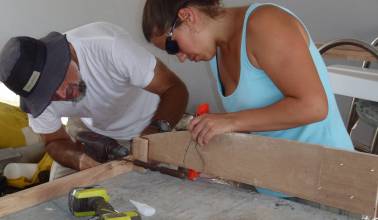 Attaching the first frame to the first cross-piece |
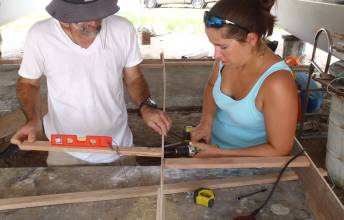 Adding spacers to keep the frames separated correctly |
 Adjusting the frames until they're vertical |
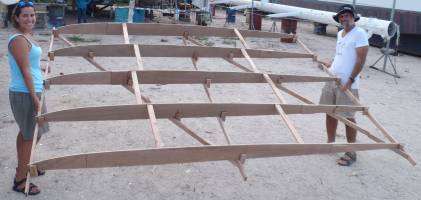 Our finished bimini mold! |
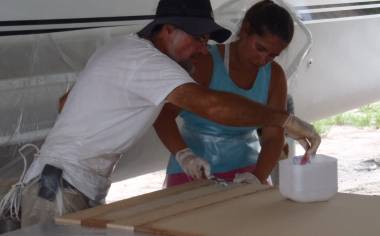 Jon & Amanda buttering foam joints together with epoxy mud |
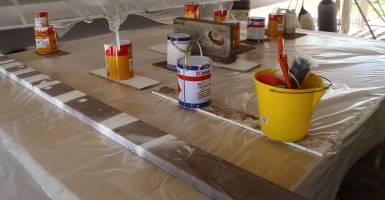
This morning, Golf and Sue went out to buy the first 4 sheets of bimini foam (at $130 each). We've worked out that we can cut 3 sheets of foam to exactly make each layer of the bimini, but we'll need another sheet of foam for reinforcing strips around the edges of the bimini. The main part of the bimini should have (from bottom to top) 2 layers of glass, 12mm of foam, another layer of glass, another layer of foam, and 3 more layers of glass on the top.
Tomorrow we hope to start piecing the foam together, and with luck, we'll get a skin of glass onto the bottom layer of foam as well. Once the epoxy cures we'll see how well it fits on our frames. If it's too stiff to bend around the frames, we'll slit the foam so it bends more easily.
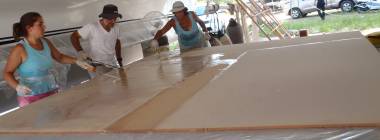 Spreading epoxy resin on the 9x10.6' (2.75x3.25m) bimini foam |
Friday, August 31:
Two steps forward and one step ... sideways, but the weather was beautiful again!
The most progress happened on Ocelot's bimini. We moved a 3rd work table into our work space under a neighboring catamaran and then leveled all three up as best we could. They're still not as big as the bimini, but they're close. The bimini will be made with 2 layers of foam, and each layer requires three 8x4' (1.22x2.44m) foam sheets. That means the bimini will be just under 100 square feet or 9 square meters. That's a lot of area to fiberglass in one whack. The bimini is almost square, so reaching the middle gets interesting. We cut polyethylene aprons for ourselves to protect our clothes if/when we accidentally leaned against wet epoxy.
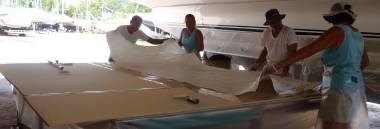 Positioning the first sheet of biaxial fiberglass on the bimini foam |
We covered the tables in 2 layers of polyethylene sheeting, which the epoxy won't stick to. Then we got down one of our sheets of foam and measured how it needs to be cut. Two of the foam sheets can be kept intact, but the third has to be cut into 5 pieces to make the required 9x10.6' (2.75x3.25 m) rectangle for the bimini. Super‑glue won't stick foam together so we had to brush epoxy on all the internal edges of foam and then "butter" each edge with a layer of epoxy mud. Then we pushed the foam together, scraped off the excess mud, and told the foam sternly to stick together while we stuck the fiberglass on.
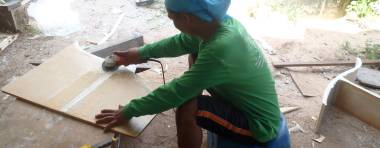 Houa cleaning the top of the step, cut off from the rest (right) |
Golf mixed the epoxy for us, but he let Jon be the Director and Master of Ceremonies, with the ever helpful Mee cutting the fiberglass and helping us roll out epoxy and Golf's wife Mai taking the photos and encouraging us with her delightful smiles. After buttering the edges and pushing the foam together, we spread epoxy resin over the top of the foam. Then we put the first of 3 strips of biaxial fiberglass on top and worked more epoxy into the glass, continuing until we'd covered the entire bimini in fiberglass. We'll put more glass on later, but for now we only want a single sheet of glass, so we can bend it around our form/mold. One internal foam joint in a corner needed some weight on it to keep the bits of foam aligned, but the rest of it looks very nice. We'll be very interested to see how it looks tomorrow morning.
In the work‑tent, Houa ran into a problem. When they made the port sugar‑scoop steps, they used them as a pattern to make the starboard steps. But the starboard steps need to be a mirror‑image of the port steps, and someone accidentally made the upper starboard step an exact copy instead of a mirror copy. So instead of mounting the starboard steps today, the upper step had to be cut apart, turned around, and reassembled, which took Houa the entire day.
Saturday, September 1:
Another beautiful day for us!
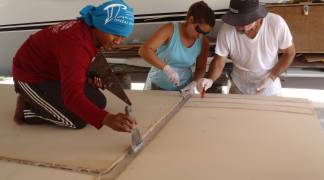 "Buttering" the edges of the foam with epoxy mud |
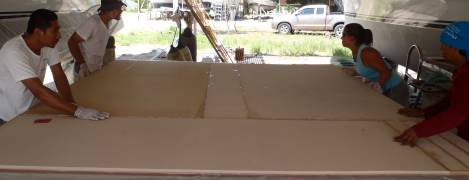 Pushing the sections of foam together to make a single large sheet |
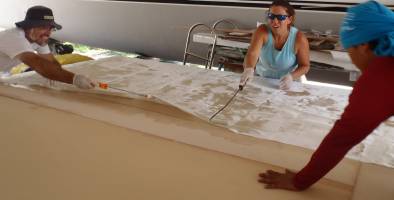 Making sure the glass lays down smoothly, with no wrinkles |
 Our finished layup, covered in polyethylene & weighted down |
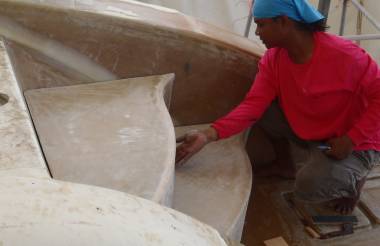 Houa fitting the starboard side sugar-scoop steps |
Our first step was to go out and buy the remaining 3 sheets of foam for the bimini. After feeling how floppy yesterday's foam turned out, Jon decided to buy 15mm foam instead of 12mm foam. It doesn't matter if the 2 layers of foam are different thicknesses, and the incremental cost of 15mm foam is less than its increased strength. Unfortunately, one of the sheets had a pretty severe bend to it, and this made it more difficult to get it to join up seamlessly with the other sheets.
We decided to use yesterday's sheet as the table for today's sheet, which made things easy - we just trimmed off the excess fiberglass from yesterday's sheet, sanded the edges, and draped another sheet of polyethylene over it. By 10:45 we had measured and cut the foam, and it was ready for fiberglassing. The whole operation went faster this time, and the layup was finished and we were ready for lunch by 12:15. The major panic was that Golf ran out of epoxy at the last minute and Houa had to rush out by motor scooter and buy 4 kilos at the local chandlery.
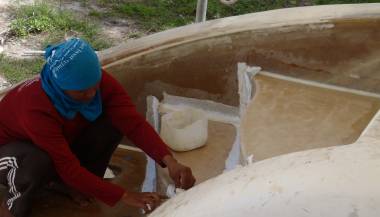 Mee fileting & laying strips of glass in the corners of the steps |
Because of the warped sheet of foam, we decided to cover the whole layup with a sheet of polyethylene and then put weights here and there to flatten the foam. It should actually turn out flatter than our first sheet.
On Ocelot, Houa finally finished repairing the top step for the starboard sugar‑scoop. Unfortunately, since it wasn't made at the same time as its port counterpart, it wasn't quite the same size. We spent a fair amount of time comparing the steps and trimming little bits off here and there before we were satisfied with the size and shape of the starboard steps.
After helping us layup the bimini, Mee spent some time long boarding the outside of port hull, where we've had to fill the hollow. We think this is a bit premature, as that hollow still needs a bit more filler.
Mee also put a nice filet of epoxy mud around the edges of the portside sugar‑scoop steps, and laid a strip of fiberglass over them. They're looking very smart!
Thai Refit:
Ocelot Pages:
Top Level: Home | Destinations | Cruising Info | Underwater | Boat Guests | Ocelot | Sue | Jon | Amanda | Chris | Site Map | Make a Comment
|
If our information is useful, you can help by making a donation |
Copyright © 2000‑ Contact: Jon and Sue Hacking -- HackingFamily.com, svOcelot.com. All rights reserved.