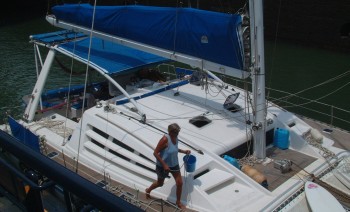
Our original cloth bimini and support bars (Panama, 2003)
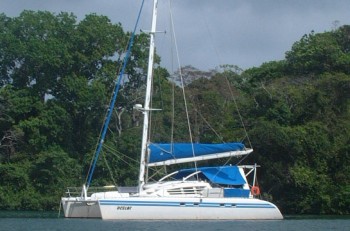
Our original small side shades (Panama, 2003)
Bimini
New Hard Bimini (cockpit shade): This was originally one of our "optional" projects. It's something we've wanted to do ever since we bought Ocelot, but we've never had the time or the facilities. Our original bimini was formed by the horizontal davit poles that came forward over the cockpit and then curved down to the cabin‑top. The original cloth bimini was wrapped around these poles. But cloth doesn't last forever. We replaced it with a reinforced PVC fabric in Fiji in 2004 (for $1,000) and again in South Africa in 2009 (for another $1,000) and by 2012 it was already starting to deteriorate. But now we had the time and the resources to build a better bimini.
 Our original cloth bimini and support bars (Panama, 2003) |
 Our original small side shades (Panama, 2003) |
Our requirements included that our new bimini must be:
|
|
The major jobs needed to accomplish this included designing and building a mold, building the bimini itself, adding bolt‑rope holders, spraying the bimini with gelcoat and polishing it, building and mounting the front legs, adding water‑catching elements, and attaching the dodger and side awnings. We've also included a section on things that could have been improved (although it all went together better than we expected). Throughout the text we've provided links back to the individual days when those specific jobs were done, which will provide more detail. Since many jobs took more than just 1 day, readers should look at the next few days as well.
Bimini Mold:
When Amanda came to work on Ocelot after her graduation, she downloaded
Sketch‑Up, a solid‑modeling program from Google. She used this to model
several of the modifications we wanted to make to Ocelot, including the bimini. We wanted the bimini to have a
gentle curve along its whole length, with a more pronounced curve at the front. We decided that it could be flat
from side to side, primarily because it would be easier to build, but we now realize it wouldn't have been hard to crown
it a bit at the front, and this would have made it a bit stronger and allowed the water to drain better.
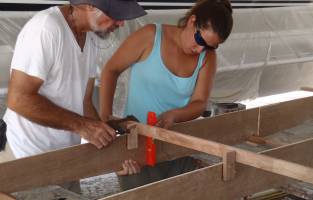 Adjusting the frames until they're vertical |
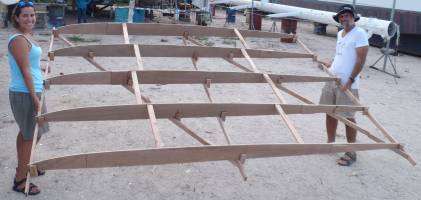 Our finished bimini mold! |
From Amanda's drawings, we extracted distances to a theoretical straight line from the front to the back. We scribed these distances onto a sheet of 10mm (3/8") plywood and cut 5 plywood templates, which we clamped together and sanded until they were identical. These templates were about 20cm (8") wide at their widest, which made them strong enough not to bend when loaded from the top. They were mounted on a frame of 25x50mm (1"x2") wood beams with spacers to keep the templates positioned correctly, and the whole mold set on 2 of our strong work tables and leveled with a laser. The mold was a bit smaller than the finished bimini, about 2.7m wide, 3.2m long, and 25cm high at its highest point (9'x10.5'x10").
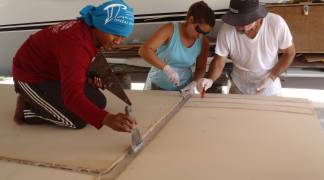 "Buttering" the edges of the foam with epoxy mud |
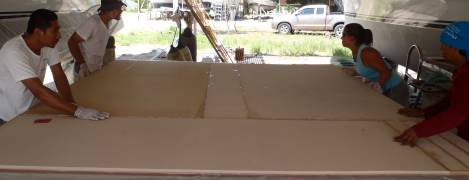 Pushing the sections of foam together to make a single large sheet |
Building the Bimini:
We couldn't get 25mm (1") thick foam, so we used 2 sheets of foam, 12mm and 15mm thick, epoxied together. The foam came in 4'x8'
sheets (sold in metric dimensions, 1.2x2.4m) and it took 3 full sheets for each layer. Two of those sheets didn't
need to be cut, but the third had to be cut into 5 pieces to get the rectangle we wanted. The inside edges of the
individual pieces of foam were "buttered" with epoxy mud, then pushed together while the top
was glassed. We only glassed one side of each sheet, as we still had to bend the foam sheets over our mold.
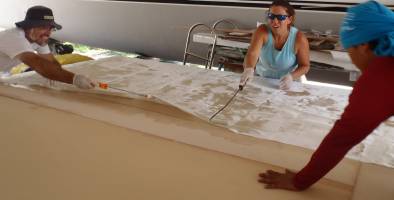 Making sure the glass lays down smoothly, with no wrinkles |
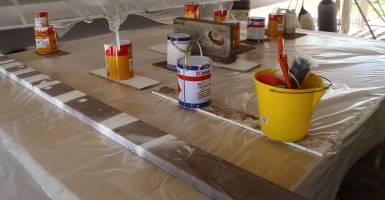 Our finished layup, covered in polyethylene & weighted down |
The bottom sheet of foam was bent over the mold with the glassed side down. The foam was slit across its width to facilitate it bending at the front, and the whole thing was fastened securely to the mold with tie‑wraps (cable‑ties). Then it got a layer of fiberglass and some extra epoxy on top, and the second sheet of foam was laid on top and fastened down with tie‑wraps and weighted boards.
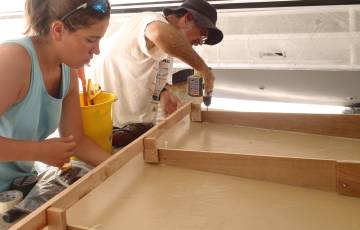 Drilling holes through both the glass/foam & our wood frame... |
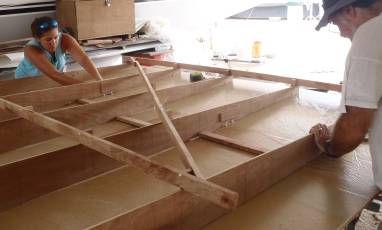 ... and joining the frame to the foam with tie-wraps (cable-ties) |
This didn't work as well as we'd hoped, as there were significant voids between the layers of foam. The top sheet really should have been vacuumed down, but we couldn't work out how to do that (see below). When Jon tested the strength of the finished part, it flexed more than he liked. So he drilled a grid of small holes over the entire top surface of the bimini, about 15cm (6") apart. These holes went through the top layer of fiberglass and down to the middle layer. Then we used a syringe to see which holes were sealed at the bottom and which had voids. The holes into voids were marked and a total of about 3 liters(!) of epoxy was injected into them to fill the voids. This made the bimini much stronger.
To increase the strength and to make nice hand‑holds, 3‑4 layers of foam were epoxied on top of each other around 3 sides and up the middle of the upper side, with a strip of fiberglass between each layer of foam. These were then shaped, sanded smooth, and glassed over. The central spine needed a hole at the very front so water on one side could flow to the other. We also decided to add a second layer of biaxial fiberglass to both the top and the bottom of the bimini, to stiffen it even more.
The aft edge of the bimini had to bolt to the top of the targa‑bar, so the bimini foam had to be cut away on the underside of the aft edge and the area reinforced with fiberglass. Since this is an area of stress concentration, the foam was rounded and shaped to minimize sharp transitions, but the built‑up edges were left intact to provide strength. Then the underside of the aft edge was reinforced with several layers of fiberglass and covered in a smooth sheet of polyethylene to minimize wrinkles and sanding. When the excess glass was cleaned up, bolt‑holes were drilled in the mounting surface on 10cm (4") centers. The top of the targa‑bar was match‑drilled once the bimini was in position, and the targa‑bar holes were tapped for 10mm (3/8") bolts.
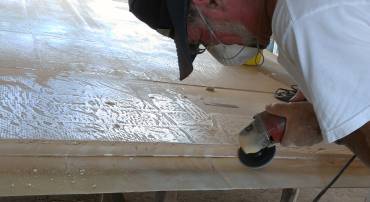 Sanding a nice taper into the foam to make a gradual transition |
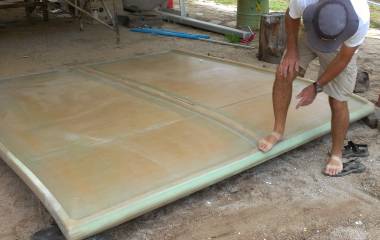 Jon testing the flex of the new bimini - Nice & strong now! |
Bolt‑Rope Holders:
We wanted to attach a dodger (windscreen) and side awnings to the bimini. Attaching cloth to fiberglass is
usually easiest with a bolt‑rope, a small rope with the cloth of what you want to attach wrapped around it, which then slides into a slot.
Aluminum extrusions with molded in slots can be bought, but we didn't want to screw the aluminum extrusions to the sides
of the bimini, as the bimini wasn't reinforced and the screws would mostly be going into foam.
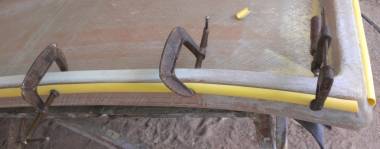 Clamping half-pipe bolt-rope tracks on before super-gluing them |
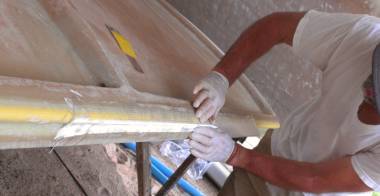 Covering the yellow PVC half-pipes with strips of biaxial glass |
Instead, we took a length of 19mm (3/4") PVC pipe and slit it in half lengthwise. Jon cut it with a hack‑saw and then had to long‑board the cut smooth, but it probably would have been better to use the table‑saw, even with its wider cut. The PVC was stuck to the 2 sides and front of the bimini with super‑glue. Then each side of the PVC got a filet of epoxy mud and the whole thing was covered in 2 layers of biaxial fiberglass, with significant overlap onto the bimini itself. When the epoxy cured (and after the bottom and sides of the bimini had been gelcoated) a slot was cut through the glass and PVC with a grinder (and a steady hand). We wrapped coarse sandpaper around a pencil and slid that up and down the slot several times to smooth the edges and straighten out the slot. Voila! A strong and beautiful slot for accepting a bolt‑rope.
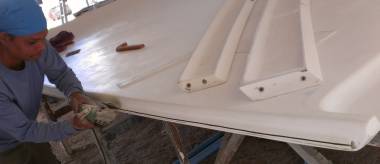 Houa cutting bolt-rope slots in the sides of the bimini |
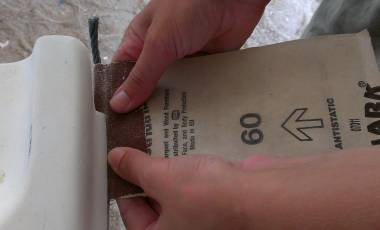 Our makeshift tool for sanding the insides of the bolt-rope holders |
Gelcoat Finish:
Gelcoating the bimini was much easier done before the bimini was mounted. The bottom and sides were sprayed, polished, and
masked to preserve the finish. Then it was flipped over and 4 large pieces of non‑skid were glued to the top and
masked before it got shot with gelcoat and polished. Then the whole thing was hoisted on deck and the back
bolted to the targa‑bar with the front supported by whatever was handy until the front legs
could be built.
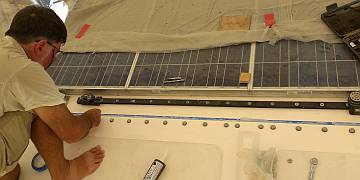 Bolting the back of the bimini to the top of the targa-bar |
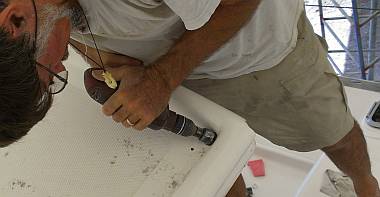 Drilling out the water-catch hole to the bimini leg |
Water Catches:
AME provided nipples at the bottoms of the legs so we could attach plastic hoses. But the bimini itself needed
big holes in the corners to let the water drain into the legs. These were cut
with a hole‑saw from the top and the bottom. Then some foam around the hole was removed and a PVC pipe was epoxied
into place to feed the water from the top of the bimini to the inside of the legs.
But the insides of the legs could not be easily cleaned (or even reached), so we needed strainers for the top that would prevent things from falling into the legs, but would still let water through easily. Flat strainers wouldn't stay in place, and would fill up too easily, so we realized that conical strainers that fit down inside the legs would work best. So we made some molds out of cardboard, and AME made us some custom strainers out of perforated stainless steel.
Front Legs:
We were originally going to build the front legs by grinding back some of the deck gelcoat, building legs using PVC pipe
as forms, and glassing the PVC from the bimini to the deck. This would have been strong and flexible, but would
have created a bit of a mess, and we would not have been able to remove the bimini without cutting the legs. We
have no real need to remove the bimini, but AME offered to build us custom stainless
steel legs, and claimed it would only take 2 days. Of course, it actually took 12 weeks, as the
stainless steel had to be sent to Bangkok for electro‑polishing, but that's the option we went with.
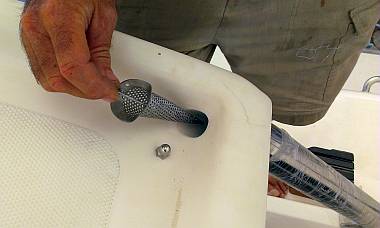 Cute drain strainers for our water-catch holes in the bimini |
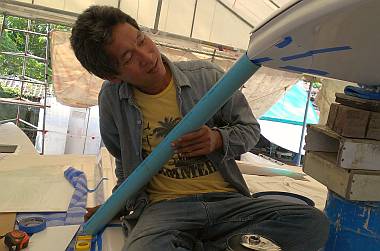 AME metalworker making the bimini leg templates |
But stainless steel legs brought their own problems. Bolting them to the deck would be reasonably easy, but bolting them to the bimini meant that the front corners of the bimini, where the bolts would go in, would need special reinforcing. And the large water‑catch hole would get in the way of any bolts. So once we got the legs back, we plotted out where the bolts had to go. Then we drilled out the foam for those areas, de‑coring much of each corner and providing at least 12mm (1/2") of clearance around each bolt. Then came the interesting part. We coated long stainless steel bolts in a release‑wax and ran 2 nuts onto each one, leaving 1 nut about in the middle and the other near the end of the bolt opposite the head. We mixed up some epoxy with fillers and lots of tiny fiberglass strands and started injecting it into each bolt‑hole, pushing the bolts in when the holes were half full and continuing to inject more epoxy as the bolts were pushed home, and then clamping everything in position. Once the epoxy cured, we cracked the bolts out (which is why we needed a good coating of release‑wax), cut off the last 6mm (1/4") or so of the bolt, cleaned up the cut end, and then ran the bolts back in and tightened them up. We had to cut off their ends in order to tighten them, or they'd run into the ends of their holes. This resulted in an excellent, strong bond between the bimini and its legs. Note that we made a test‑run first, waxing a bolt and embedding it in epoxy, then seeing if we could remove the bolt once the epoxy had cured.
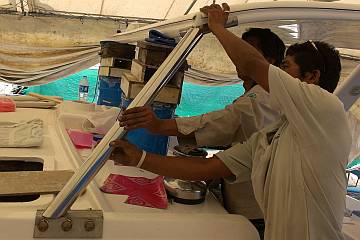 Test fitting the bimini support leg components |
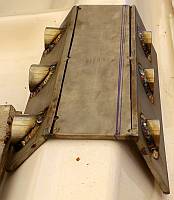
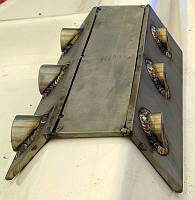 Before & after shots of the portside bimini leg lower bracket |
The bottoms of the bimini legs were much easier. These went over 8cm (3") wide fiberglass ridges that run forward on each side of our cabin‑top, and AME provided built‑up holes with flats so the bolts wouldn't bend. Once the legs were correctly positioned, the holes were match‑drilled through the fiberglass ridges. The front of the bimini was lifted (with the legs), the bolting areas were masked, cleaned and covered with 5200, the bimini was lowered back into position, the legs were bolted into place, and the area cleaned up. With 3 12mm (1/2") bolts holding each leg down, they're not going anywhere very soon.
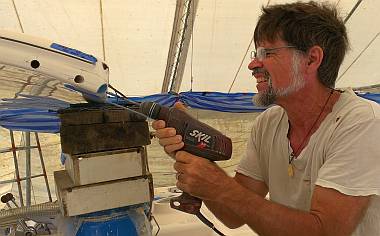 Jon finished de-coring & preparing the bimini for epoxying bolts |
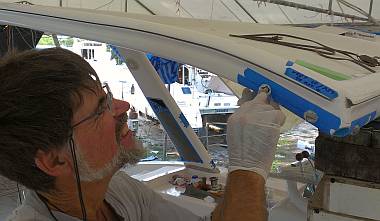 Pushing one of our last bolts home - note other bolts in position |
Dodger (windscreen) and Side Awnings:
We talked to a couple of awning specialists in Phuket, and eventually went with Thai Sailing, who have a building just
up from Villa Market shopping center and the Ao Chalong circle, and they were happy to work with our design
requirements.
They speak passable English and were very conscientious, coming by 3 times in the final weeks to check the fit and to
ask our opinions. They even delivered the final products a day earlier than promised.
We wanted the dodger to roll up down onto the deck, not roll up to the bimini where it would block some of our forward vision. So it had to be clipped to the deck (there's a raised bit of fiberglass there that seems to be made for the purpose, although Ocelot came with no dodger - her first one was built in Venezuela in 2002). Like our last dodger, studs were screwed into that raised bit of fiberglass for the dodger to clip onto. The top would have to be zipped to the cloth that attached onto the bolt‑rope. We wanted the highest quality clears that we could find, so they'd last. But since the dodger spends the vast majority of its time rolled up, we wanted the bottom several inches to be Sunbrella, to protect the clears from UV when it's rolled up.
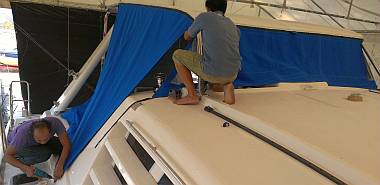 Thai Sailing came for another fitting check - looking nice! |
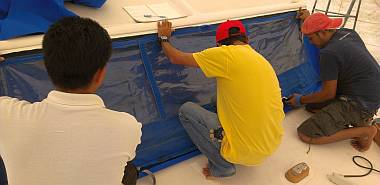 Fitting Ocelot for a new dodger (windscreen) and side curtains |
Our previous side‑awnings zipped to the bimini and then tied to our life‑lines. They provided shade, but not much protection in inclement weather. We wanted our new side awnings to provide both functions. So the new awnings were made longer and were designed to snap onto studs screwed into the side of the main cabin and into the ridge that divides the outer deck from the cockpit cushions along the sides of the cockpit. Reinforcing patches were required where the webbing‑strap ties were sewn to the Sunbrella, to spread the load. Zips were provided at the top so the side awnings could be removed from the bolt‑rope if necessary, but Velcro closures were also provided so the side‑awnings could be rolled up to the bimini and stored there when not needed. Although we used to unzip our previous side‑awnings when we didn't want them deployed, we tend to leave our new side‑awnings rolled up against the sides of the bimini when they're not needed, so they're always accessible when we need them.
With the side‑awnings snapped down to the deck, the cockpit was well enclosed, but there was still a triangle of open space between the outer edges of the dodger and the fronts of the side‑awnings, between the cabin‑top and the bimini. So we asked Thai Sailing to provide us with triangular sections that could zip into those corner areas. This enclosed the cockpit completely except for the back, but we decided not to worry too much about rain back there. We may decide to enclose the back of the cockpit in mosquito netting one day, but for now we're very happy. The side‑awnings provide both sun and rain protection, depending on how they're deployed. We've even had the windward side deployed while sailing in 25 knot beam winds that kicked up seas that broke into the cockpit. The awnings block our vision to windward in those situations, of course, but they keep the cockpit absolutely dry and much nicer for the watch‑keeper on duty. We're VERY happy with them!
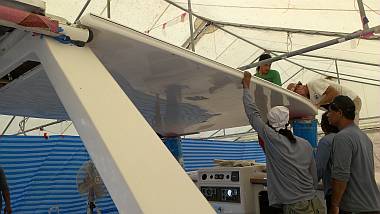
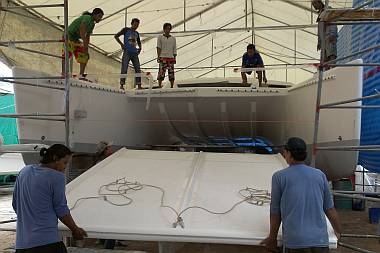 Houa, Heru, Jon & Pla moving the bimini towards Ocelot's bow |
Possible Improvements:
This whole project actually went together very well, especially considering the scope of the project and that we'd never
done something like this before. But looking back, there were a few places where things could have been
improved...
Trying to join the 2 pieces of foam together on the curved mold was a mistake. We either should have looked harder for 25mm (1") foam, or joined the thinner sheets of foam together while still flat. This would have allowed us to use vacuum (even if only our shop‑vac) which would have resulted in a much stronger bond. With fiberglass between the sheets, we would have needed a circular saw to cut the slits up front so the foam would bend around the mold, and we would have needed more slits, and those slits would have needed to be filled before the top skins of glass went on, but it still would have resulted in a stronger and lighter structure. Or even better, perhaps we could have bonded them together on the curved mold, but used vacuum to suck them together and weights and/or boards and clamps to make sure the foam followed the curve of the mold.
 The bimini is snuggled into place on the targa-bar |
We should have paid more attention to where the bimini legs would bolt into the front of the bimini. As it was, we let AME (who built the legs) decide where the holes should go, but their positions interfered with the large water‑catch hole and also interfered with each other.
Even though Ocelot floats pretty flat, rain water tends to flow only down one bimini leg or the other, not both. This isn't really a problem, but it means that the water jugs have to be changed on that side more often. If we'd crowned the front of the bimini slightly, water would have drained down the 2 sides more evenly. More importantly, the curve probably would have made the front stronger. This could have been accomplished simply by mounting the mold template about 50mm (2") higher at the front, with the flanking templates about 37mm (1.5") above the outermost templates, to give a smoothly rounded crown. But this would have made the forward reinforcing and dodger more complicated, so probably not worth the trouble.
The clear vinyl used by Thai Sailing for our dodger is much thicker than our previous clears, and distorts vision considerably. Thai Sailing claim that this is a necessary feature of the high quality, long lasting vinyl, but our last clears lasted 10 years with no signs of yellowing or getting brittle. Perhaps we should have done more research here. Of course, we can replace them fairly easily if it bothers us too much, but so far it hasn't been a big problem.
Also, Thai Sailing sewed the dodger so tightly that zipping it to the bimini was breaking the critical ends of the zippers. So when Amanda visited us a year later, she re‑sewed the zippers to be a bit looser, and now we can put the dodger up even in the dark with a squall approaching and not worry about damaging the zipper ends.
Thai Refit:
Ocelot Pages:
Top Level: Home | Destinations | Cruising Info | Underwater | Boat Guests | Ocelot | Sue | Jon | Amanda | Chris | Site Map | Make a Comment
|
If our information is useful, you can help by making a donation |
Copyright © 2000‑ Contact: Jon and Sue Hacking -- HackingFamily.com, svOcelot.com. All rights reserved.