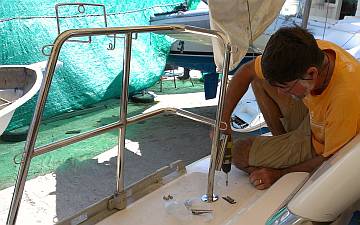
Jon spent most of the day mounting pulpits and pushpits
110 Gelcoat Salon
Summary: The jobs are getting smaller, so in theory we can finish them faster. This week focused mostly on sanding and gelcoating the subfloor of the salon, and working on our dinghy, Tomcat, but many smaller jobs were also worked on. Team accomplishments this week include:
|
 Jon spent most of the day mounting pulpits and pushpits |
Monday, December 9:
A good start to the week although Ben and Baw were out sick. But we sure kept everyone else
busy. There area so many small jobs now that Sue posted a new list on the hull.
The painted interior of Tomcat, our inflatable dinghy, got a full day's attention by Chambron. He began with a power sander, trying to grind back the paint, but Sue produced a can of TOA Paint Remover and he gloved up and set to work with a chemical stripper. Much faster, with less dust mess. We last painted Tomcat's aluminum floor in Fiji (August 2005) but had only sanded down to aluminum where the paint was peeling, then we re‑painted the entire bottom with white 2‑part paint. This is why we are finding areas with no primer, and other areas with primer.
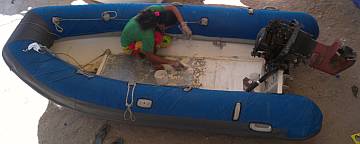 Chambron got most interior paint off by the end of the day |
Pla took over the battery compartment gelcoating job. He brushed tinted Thai gelcoat on some of the hard‑to‑reach areas, but before he could do the big walls Sue did a clean‑check. Oops. Some of the yellowish areas cleaned up with acetone and a hard wipe. Pla was happy to stop the gelcoating and spend the afternoon really cleaning the walls, even though he would not have time to do more gelcoat today. So be it. Better to do the job right than to have the gelcoat fall off again in a few months.
Sue and Heru went over the new Things for the Men to Do list, and he offered to work on the sail‑drives. That was great, as this is an important job and we know he worked with Jon on the rudder project doing a similar job of hand sanding wet epoxy into the metal. The fiddly part of the sail‑drive cleanup is getting the insides of each water intake hole sanded. For this Heru made himself a tool: sandpaper glued onto a perfect size flat stick. He cleaned the aft edges where the big round anodes are mounted (per Jon's instructions) then carefully taped that area off. When he was finished with the sanding (some of which he did with the wool wheel and the grinder) it was 3:30 and Jon asked him to wait and do the epoxy tomorrow so we can build up 4 layers wet‑on‑wet throughout the day.
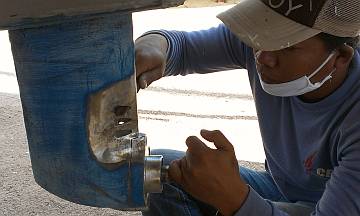 Heru prepared the sail-drives for several coats of epoxy |
Houa moved right into putting up the last 2 pieces of teak trim around the entryway door. These are thin plywood with teak veneer, now varnished, that create an interesting corner above the nav‑table. Houa sanded and cleaned the fiberglass backing, fitted the pieces "dry", then applied Hartford epoxy glue to the fiberglass as a waterproof barrier, and Sika 295 to the backs of the 2 teak pieces. They fit like a glove (of course!) and give the companionway a lovely inside trim. The inside bottom of the door still needs some work by Baw and Houa but we're getting there!
Houa's next project was to fit the exterior teak grate into the space just outside the entryway door. It gets a lot of traffic and a lot of water as we often shower right there. But Houa (long ago) cleaned up the teak grating and rounded the edges of the holes. The problem now is that where the grate fits has been completely rebuilt, so the walls are slightly different. With some judicious trimming of the grate, Houa was able to make it sit flush with the door frame, just the way we want it. He super‑glued temporary supports to blue‑tape to test the fit. Tomorrow he will de‑core small places for the screws, and then Sika and screw the final supports in place.
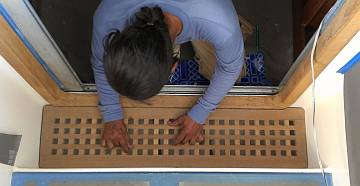 Houa started fitting the grate outside the entryway |
Sue started the day working with Jon to set up a siphon to vacuum the bottom of the starboard water tank. Not much sediment came out so we put on a new thick gasket and re‑sealed the tank. Then Sue moved over to the portside water tank and removed the access panel, but then Lek needed to varnish the step in that cabin so that job was put on hold. Later she and Yando worked together to replace the inner aluminum trim on the portside salon windows that were installed yesterday. It took 4 hands to get the frames in place and the first couple screws in, then it was a 1‑person job. The messy bit was putting a smear of Duralac (anticorrosive goop) onto each of the 40 screws before screwing them in. None of us are as deft as Jon at such a job, so together Sue and Yando got fairly well Duralac'd themselves. But the frames are now in place, and the salon is looking a bit more real.
Jon had every intention of concentrating on the deck hatches today, but somehow the call of the starboard pushpit was too strong, probably because he had to step over and around the pushpit itself and all its mounting bits to get to the hatch project! Although the aft decks were changed from teak to foam and glass, their shape stayed true enough for the pushpits to still fit (mostly) but most of the bolt holes had to be re‑drilled. The holes through the deck were tapped and the bolts gooped in silicone to make them as waterproof as possible, and Sue added lock‑nuts below.
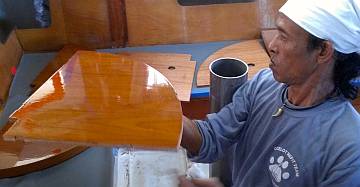 Lek examines his varnish with a critical eye |
From starboard aft pushpit, Jon moved up to the port pulpit, and repeated the whole mounting procedure up there. One leg goes on the aluminum forebeam and needed a fiberglass pad (slathered in lanolin grease) to isolate the stainless steel from the aluminum. The middle leg mounted to the deck itself, and those holes were also tapped (with lock‑nuts underneath). The final pushpit needed more work as all holes had to be re‑drilled, including 2 into the stainless steel itself. Late in the afternoon Jon got everything drilled and prepared but he needs to buy 5 bolts in the morning before he can finish the installation.
Lek continued applying and sanding the many layers of polyurethane and varnish that we're applying to Ocelot's interior. The polyurethane cures fast enough that he got the final 2 coats of gloss applied to the underside of the peninsula shelf. He got a 3rd coat of gloss polyurethane on each of 8 trim pieces by the formica kickboards in the cabins. Then in the afternoon, he was able to sand those strips and get the first of 2 coats of Epifanes satin varnish on. Sue had been about to mount the shelves in the galley round cabinet, but saw that the bottoms were unvarnished. So Lek got 2 coats of satin on them. It will be nice to get some more of the lockers finalized and closed up. Wow. Maybe we can start putting things inside some of them!?
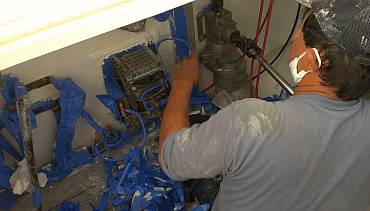 Pla removed tons of tape from the battery and electrical locker |
Tuesday, December 10:
A happy, busy Tuesday, with the feeling of a circus, once again. Things happening all over the place!
Work inside Ocelot was quiet for most of the day, with Lek sanding and repairing rough satin varnish (not what Baw sprayed last week). He got the second (and final) layer of satin on all 8 bits of teak trim by the formica kickboards in the cabins, and a first (and only) coat on the underside of the peninsula shelf above the fridge. Otherwise he was finding door trims that were not smooth, or the odd places where blue tape had pulled off a thin veneer of varnish. Better to repair it now.
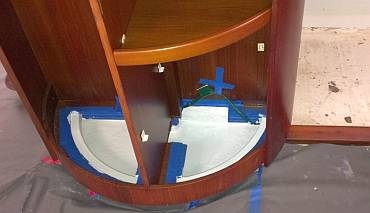 New gelcoat (& new fiberglass repair) in our rounded cabinet |
Sue asked Heru to clean and gelcoat the inside floor of the rounded lockers. This is a small semicircular area that no one sees but Sue, but she wanted it done. No sooner had Heru sanded it back than Sue realized the vertical 4" (10cm) of wood at the back was soft and hollow. It was a bit of junk wood Jon had put there when he built the fridge, just to seal the foam insulation in. Heru stripped the wood back and coated the exposed foam in epoxy, some filler, and a couple layers of fiberglass. By afternoon the epoxy was cured enough to let Heru get a coat of fresh white gelcoat in the area.
Pla spent the day in the battery compartment, mostly. It took hours (literally) to strip back all the very carefully blue‑taped wires and all the electrical connections. Unfortunately one thing that was revealed in this newly painted compartment, was that one of the guys painting or sanding had sat on the batteries and broken 2 terminals. <sigh> At least Pla isn't afraid to point these sorts of things out.
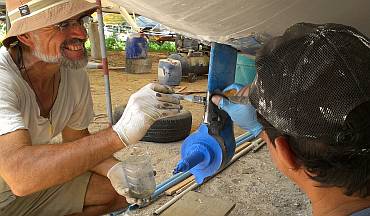 Jon and Pla coat exposed areas of the sail-drive in epoxy |
Pla's other job was to follow up on yesterday's sail‑drive preparation. Heru had sanded patches of bare aluminum, and today Pla re‑sanded, then with Jon's help brushed on epoxy and sanded the aluminum through the wet epoxy. This prevents the aluminum from oxidizing and allows the epoxy to bond well to the aluminum. Pla followed up with a new coat of epoxy (wet‑on‑wet) 4 more times throughout the day, every hour.
Yando and Chambron worked in the dinghy, getting the last of the aluminum primer and old white paint off the insides. Then they removed the outboard and the wheels so they could work on the transom as well. The outboard was delivered to Billy, the outboard mechanic next door, to be checked out, have the carburetor cleaned and the gear oil changed (the impeller was apparently fine). Our 25 hp Mercury was ready for pickup at 5pm, purring happily.
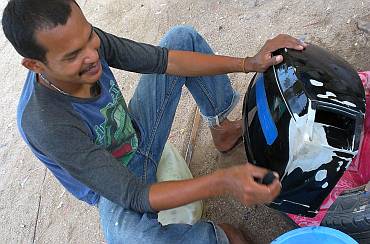 Baw spent a lot of time with our outboard motor cover |
Houa worked on getting the entryway grating put in place. After several discussions with Jon, they decided to epoxy a shelf of solid fiberglass to the step and let the aft side of the grate rest on that, with a strip of rubber to protect the teak from the hard fiberglass. Houa cut the shelf out of a piece we've been carrying for years, sanded it to the correct shape, and epoxied it to the wall late in the afternoon.
One of the men removed all the mirrored cabinet doors from the heads, and Baw removed one of the mirrors with a razor blade. We carried the mirror to the local glass shop and were pleased to learn that a new mirror, cut exactly to size and ready in an hour would cost $4. Okay, The Chancellor of the Exchequer approves this purchase. Tomorrow we mount them!
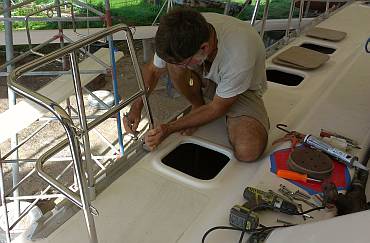 Jon finally installed the port pushpit |
Jon started the day by buying the bolts needed to mount the last pushpit. The stainless steel needed some attention with Jon's new Dremel so the mounting bolts wouldn't bind but after an hour or so it was solidly mounted to Ocelot's port aft‑deck. Between helping and consulting and overseeing the work, he also mounted the seats on the pulpits. The only job remaining there is to install the lifelines, but we've decided that job can wait until after we're on the water.
Baw likes fishing and seems to have fallen in love with our outboard, as he spent much of the day lovingly repairing its top cover. He has plans for an elaborate paint job for it, which we're fine with as long as the reflective strips along the sides are retained. Distinctive outboards tend not to get stolen as often. We also want a durable foam pad glued to the back, so it doesn't damage Ocelot's hull when we hoist it in the davits every night.
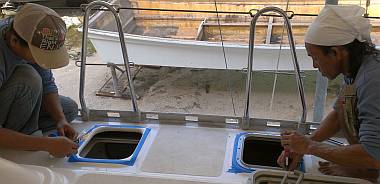 Heru and Lek masked off where the small deck hatches will go |
Wednesday, December 11:
Are we allowed to have a FUN day at the yard? Hope so, because we just did. With a high
overcast the day was cooler than usual, although the thermometer on deck read 94°F/34°C.
It was cooler on the ground or when the ocean breeze blew in.
Sue ran scooter errands all morning, both locally and into Phuket town to the big hardware and paint stores. Then in the afternoon she played vacuum assistant to Jon "The Hatch Man" as he drilled and tapped over 140 bolt holes for the 10 deck hatches and the 2 big new Lewmar hatches. It was hard to keep up with the photos of all the activities but she tried.
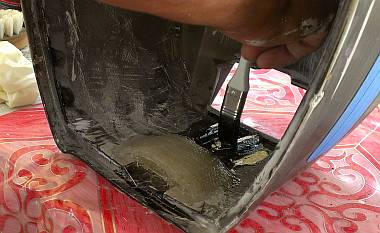 Baw ground off then built up the areas where the hatch latches go |
Baw spent time removing the battery compartment gasket that is too thick, but Jon explained that we're running out of things for the men to do and requested he do things that the men cannot do. He tinted (by eye) a new batch of white Thai gelcoat to match Ocelot white. Then he turned his creative talent to repairing the forward and aft latches on the outboard cover. The inserts that Mercury used disintegrated so Baw ground it all back and built it back up with fiberglass. Jon will then drill and tap the fiberglass so we can remount the latches.
Yando and Chambron finished hand‑sanding the floor of Tomcat, and moved on to the messier work of grinding the floor smooth with the power grinder and wool wheel like we used on the mast and boom. They also got the transom all scraped back. Maybe we'll be ready for primer tomorrow? Fingers crossed on the weather.
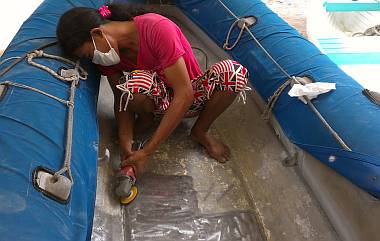 Chambron used a woolly wheel to remove the last of the paint |
Ben was with us again today and happy to see a few more polishing projects. He cleaned up the last of the small deck locks and our custom stainless steel bracket and lock that holds the outboard to the dinghy. He got a break from polishing to sand the epoxy on the 3 piece man overboard pole and then spray paint it bright fluorescent orange. Next step will be clear 2K topcoat to hold the orange in place. Ben spent the afternoon twirling a rag with Weenol polish on it around the newly tensioned rod rigging.
Inside, Pla sanded the bottom of the peninsula shelf and Lek brushed on the final coat of satin varnish. Lek and Pla then got the floors put back in the cabins and installed the Perko ring pulls in the floor hatches so we have beautiful, complete floors again. Further to completing the interior, Baw and Heru mounted all 4 of the new mirrors onto the cabinet doors. They used double stick tape made for holding car trim, so it's strong. Then they mounted the cabinet doors themselves, so we have new bright mirrors in all 4 heads.
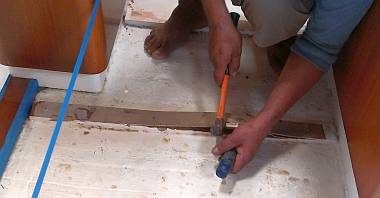 Removing a damaged floor support in the salon |
Houa turned his attention to the plywood floor supports in the salon. He found a soft one near the galley, which Heru chiseled off. Then before we knew it, Houa had epoxied down a new one and was checking the level of all of them. Once the floor was declared ready, Pla sanded the floor supports and got epoxy on many of them. It was the lack of epoxy on the old supports that lead to their destruction when water got under the floor and soaked the plywood. We don't want to repeat that.
Houa also finalized the brackets for the teak entryway grate, with a long piece of teak mounted against the door sill, teak side pieces, and a long fiberglass bracket on the aft wall. Gosh it's nice to step onto the teak grating once again going through the entryway! The final step was to get epoxy resin on the underside of the grate along the edges that lie on the brackets, so they don't wear away as fast as bare teak would!
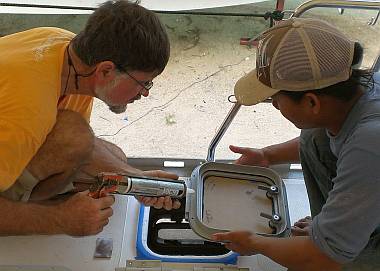 Jon and Heru installing the starboard aft small deck hatch |
While Jon was drilling and tapping the deck hatch bolt holes we realized that the men could follow along and get the hatch rims ready for the mounting. Heru and Lek took on that project, which involved laying blue tape around the top of the rim, then temporarily mounting a hatch base so that the blue tape could be cut away carefully to just the right size. Once the base was removed, they cut out the rounded corners and sanded the gelcoat with 80 grit to rough it up for the silicone.
Just after 4 we decided to go ahead and mount the first of the small deck hatches. Jon and Heru worked together with the silicone gun, Tef‑gel (an anticorrosive goop between the stainless bolt and the aluminum hatch) and a variety of 5mm bolts. After getting the bolt lengths sorted out, it all went relatively smoothly. Sue hopped into the aft cabin to work the washers and nuts into place on the bolts that came all the way through (others were secured with the tapping) and VOILA! Our first mounted deck hatch!
Okay, maybe not everyone would find this to be a very fun day, but we're easy to please! ![]()
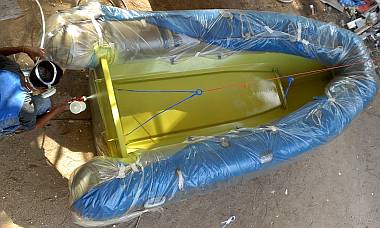 Tomcatgetting new etch-primer sprayed on |
Thursday, December 12:
The cooler weather has stayed with us, making it easy to get all this work done!
Tomcatgot a lot of attention today. Having cleaned and polished the inside, they flipped it over and Ben had the fun of removing very old antifouling paint from the bottom of the aluminum hull. We'd put this paint on years ago, but we won't replace it, as we hoist the dinghy every night so it doesn't get much chance to grow weeds or barnacles.
Then the fun started. Tomcatwas flipped right side up again and masked in plastic and blue tape before the aluminum was washed with oxalic acid. Then Baw sprayed on 2 coats of green Sherwin Williams etch primer that we'd found at the big TOA store. Tomcat's interior gets such hard wear from carting us and our gear around it will be interesting to see how the paint holds up. Baw wants to spray a Jotun High Build mid‑coat tomorrow, and then a topcoat of 2‑part enamel.
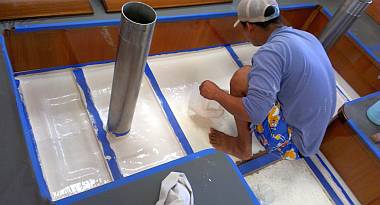 The new gelcoat in the salon looks wonderfully clean! |
Jon moved right into hatch installation mode, and got a real rhythm going. With Sue as his sidekick down below, each hatch took only about 20 minutes. First he measured the thickness of the hatch coaming to know what length bolts were needed where. Then the fiberglass and hatch rims got an acetone wipe‑down before he sploobed on silicone and lowered the the hatch into place. Every bolt hole got a generous dab of anticorrosive Tef‑gel. He used his battery drill to insert the long bolts first, the ones that go all the way through the coaming. Down below Sue could then put the washers and nuts on those 4 while Jon drove in the remaining 7 bolts that are tapped, so don't get nuts. Then with Jon holding the bolt head with a screwdriver, Sue ratcheted home the nuts until they were snug. By day's end we had all 10 small deck hatches mounted! Only 9 more hatches to go, but some of those need work before they can be mounted.
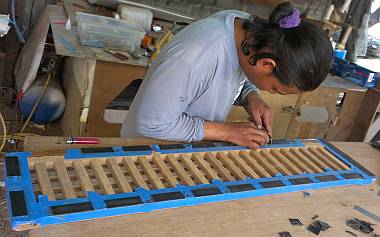 Houa gluing rubber pads to the bottom of the teak grate |
Houa finalized the entryway teak grate by putting small rubber strips on the underside as padding. Instead of laying a continuous strip of rubber he cut out channels so that the water can run between the rubber and drain away from the teak. He also build a small "water dam" on the floor just inside the entryway to help ensure that water gets directed to the drain hole, and doesn't go meandering back under the galley sink. But his big job of the day was starting the teak repair under the engine‑driven freezer. This teak was water damaged so he's re‑creating the actual wall, and will scarf in the new teak piece for cosmetic reasons. More on this tomorrow.
In the salon, Lek, Pla and Heru continued the sanding and acetone cleaning of the gelcoated sub‑floor. We had them pay special attention to the gelcoat around the rim of the galley and on the base of the 2 big stainless steel posts that support the tables. These areas showed signs of the gelcoat cracking, and we wanted them sanded smooth and new gelcoat applied to help seal out any water. They got the whole forward floor sanded, cleaned, and taped off, then Heru brushed on the new tinted gelcoat.
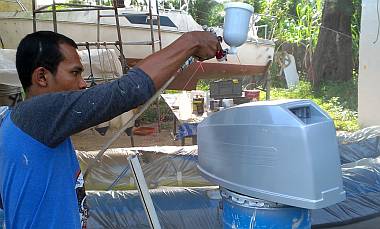 Baw sprayed the outboard cover silver, then over-coated it in clear |
In the aft section of the salon, Pla sanded the last couple plywood floor supports and got epoxy on them before lunch. This area will get sanded for gelcoating tomorrow. It's amazing how a fresh coat of paint (or gelcoat) brightens up an area, even when it's a subfloor and no one will see it except Sue or someone lifting the floors.
Lek was at loose ends in the afternoon, so Sue pointed out an under‑bunk locker that could use some cosmetic work. So he sanded, cleaned, acetoned and then gelcoated the storage locker in the aft starboard cabin. As long as the guys are around, we may as well point them at small jobs that we may not bother to do ourselves but which make the boat look extra good.
Baw had some fun with other spraying projects. In the morning he applied body filler to the outside of the outboard cover, then sprayed on a coat of silver 2K paint (like what we used to touch up the aluminum hatches). Two hours later he was able to spray a 2K clear coat on top to seal it. He also sprayed clear coat on the overboard pole and the 20 small plastic locker knobs that had been sprayed with silver paint a while ago. With the clear on top, they should hold their paint jobs longer.
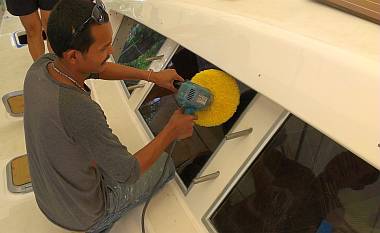 Baw polished the 3 portside salon windows |
Sue and Heru used Houa's special bent and sharpened screwdrivers to scrape the old silicone from the gasket gutters on the 2 salon port‑lights. Once these are cleaned up we can install new gaskets and get them remounted.
Friday, December 13:
Friday the 13th, and they even fear it here in Thailand. With a couple minor setbacks
Sue thought it might turn out to be a bad luck day, but boy was she wrong! It was a good day,
after all!
The setbacks were really minor in the big scheme of things. First problem was that the gelcoat in the aft cabin bunk locker didn't cure. Not sure why, but our guess was that not enough monowax was added to the Thai gelcoat, an understandable mistake given that we've been using "Ocelot White" gelcoat from parts unknown for months and it didn't need monowax. Lek sanded it back and cleaned it with acetone and later in the day Baw said it was all finished. Other minor problem was that after Baw sprayed clear 2K finish on the little locker buttons, the men returned the push buttons to the latches. But they did it with the door closed, and one of the buttons stuck. Really stuck. The only way to get it out is if the door is open. But Jon was finally able to pry it out (ruining the button, but we've got spares now).
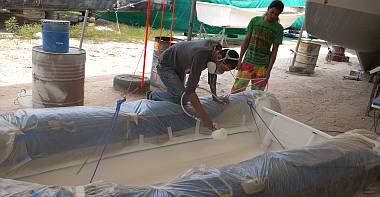 Baw sprayed 3 layers of high-build mid-coat on Tomcat |
It was all roses after that awkward beginning to the day. Baw and Chambron sanded the green primer in the dinghy and Baw sprayed on 3 coats(!) of Jotun High Build, an epoxy based primer. Lots of coats means they can easily fill the corrosion indents to smooth out the dinghy bottom.
Baw also polished up the portside salon windows, which means we can now mount the 2 louvers over those windows. The galley window still needs polishing, but that will have to wait until the guys aren't gelcoating inside.
Lek and Pla spent the day preparing the salon subfloor for more gelcoat. We've had to do it in patches in order to maintain walk‑ability. They did a lot of sanding and scrubbing with acetone to clean the surface. Then all the floor supports were blue‑taped. At 3pm they turned it over to Heru to actually brush on the gelcoat.
|
Heru using a fiber wheel to clean the side port-lights |
The men alternated throughout the day working on the gaskets for the 8 small port‑lights in the side of the boat. These port‑lights are about the only hardware we didn't remove for the refit, as they use stainless bolts into the aluminum frames, which usually seize solid. Removing the old gaskets was easy, but removing the old silicone wasn't, especially when it has to be done in situ. It involved scraping and digging the springy silicone out of the gasket groove with various picks, then scrubbing it with the power drill and a special nylon bristled brush, being careful not to scratch the window. We never got a final count on how many port‑lights were finished as the gelcoating in the salon kept us from jumping in and out.
Houa worked only half day for us, and in that time he got the new teak cabinet trim put under the old fridges down in the port passageway. With that glued in place, he then cut a facing piece on which he glued teak veneer. This will all be assembled tomorrow, with elegant scarfs (of course). Then he can move on to finishing that last passageway floor section and its stringers. The other floors are all finished and looking great.
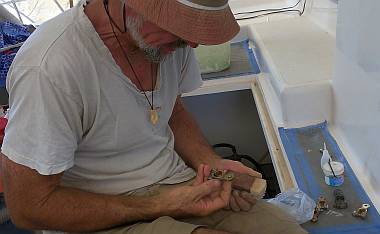 Sanding the battery lugs for better electrical performance |
Jon replaced the 2 broken battery lugs as his first project. Surprisingly, in this very metricated country, the lugs came with SAE bolts, which made it a bit harder to replace them with stainless. Once he had all the bits, he cleaned up all the contact surfaces, applied some anti‑corrosion grease, and bolted everything together.
Jon next moved to the port water tank. This tank only gets watermaker water, as the watermaker membrane can't tolerate any chlorine that might be in city water. With Sue's help he inspected the interior, vacuumed the bottom to see if there was any sediment (some discoloration of the stainless steel, but no sediment) and then sealed it back up with a new rubber gasket.
Sue spent the morning cleaning out the silicone from the gasket grooves on the salon port‑lights. The nylon brush attachment for the drill was really helpful. Once everything was declared silicone‑free and was acetone wiped, Jon squeezed in a bead of new silicone and we embedded the new Goiot soft gaskets and clamped the hatches closed to set the gaskets. Next step: mounting them into the front of the salon under the "eyebrows."
|
Cleaning the last remnants of silicone out of the gasket grooves |
We needed to retrieve our newly tuned up and checked out outboard motor from Billy, the motor
mechanic next door. But we can't mount it on Tomcatyet, as he's still getting painted.
So Jon scrounged the yard for a hefty piece of wood and using cheap U‑bolts built it a mounting
bracket on the scaffolding. Then Jon and Chambron walked next door to get the motor, and Jon
got lots of ribbing about whether he was strong enough to carry his half. The men were duly
impressed and declared "Mr. Jon not old man!" We heartily concur! (When
the guys were having difficulty starting the compressor, Jon walked up all bent over and mimicking
walking with a cane, grabbed the starter rope from one of our young studs, gave it a good tug, and the
compressor obligingly started...![]() )
)
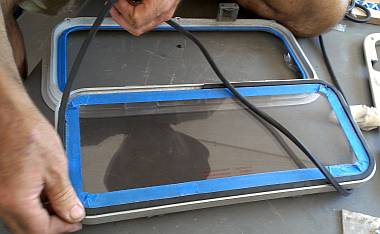 Pushing the new gasket into the pre-siliconed groove |
Late in the day Sue produced the huge fo'c's'le hatches and all their attendant bits and plunked them down in front of Engineer Jon. What a jigsaw puzzle of parts! There are rods and hinges and bolts and huge springs and plastic washers and metal ones with tabs on them. And somehow it's all supposed to go together. After some fiddling Jon was pretty sure he knew how it all went together. But Sue wants to see if we were smart enough to take pictures of the whole contraption before it was disassembled 2 years ago!
Saturday, December 14:
A good end to the week, but no major accomplishments today. More of a potpourri of little jobs
worked on.
Baw, Ben and then Yando spread yellow body filler on the dinghy floor and then sanded it smooth, but it made us realize that we don't want a smooth, slippery dinghy floor. Some sand in the paint would make a nice antiskid. Sue did some research and learned that Top, the local chandlery, sells liters of International silica in several different grades/sizes, but only the finest (#1) can go through a spray gun and it's so fine it's only good for varnished floors. #6 is brown in color, and the smaller #5 is white, but too big for a gun. It needs to be sprinkled on wet paint, then painted over. AwlGrip's silica can be sprayed on (and it's bigger than International #1) but it's $95/liter and the International silica is only $6/liter. Too bad all decisions aren't that easy.
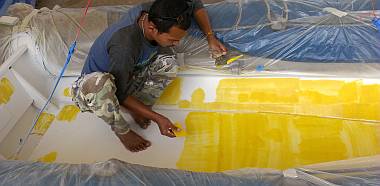 Baw spreading yellow body filler onto Tomcat's floor |
Sue cleaned up the portside louvers, getting them ready to mount. Unfortunately they may have a bit of overspray on them, as they are not slippery smooth like newly polished gelcoat is. Baw offered to re‑polish them, but it didn't happen today. Sue wasn't around much to organize things as it was pay day with the big bank run, plus many small errands. We're trying to find another upholsterer to buy firm foam from for our salon cushions, and someone who can change the damaged Sunbrella panels on the cushions with new Sunbrella. You'd think it would be easy. Mr. Peh, from Chamninson seems too busy right now, so we're looking elsewhere.
Jon connected the fuel hoses to the deck fills in the engine rooms. He cleaned up our Baja Filter (a big funnel with 3 sizes of mesh to filter fuel) and poured the first 23 liters of diesel into our port tank. Many more to go.
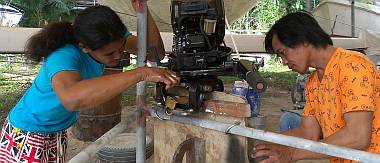 Chambron and Yando working on Tomcat's engine |
Chambron and Yando used our no‑longer‑viable 2‑year‑old dinghy petrol to scrub down the outside of the outboard. Since we want to paint the outboard body it needs all the new gooey grease removed, as well as any loose paint. Jon and the men re‑mounted the outboard on a table under Ocelot where it's easier to work on.
Houa worked on the L‑shaped teak veneer and plywood piece that fits under the portside freezer. This piece of cabinet trim is down at our feet in the passageway, and was virtually never seen. It wasn't until Jon was working inside the lower locker that he realized the wood needed repair. Houa has cut out all the soft wood (water damaged from the freezer) and created a new L‑shaped piece. He made long diagonal scarfs to make it stronger and more aesthetic, and clamped it in place overnight to let the Hartford Epoxy glue cure.
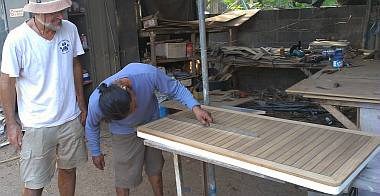 Houa sanded the teak on the cockpit battery hatch |
Then Houa moved into the cockpit, where he sanded the teak on the battery hatch nice and smooth. The extra fiberglass on the underside of the hatch has made it a bit too high, so we've had to remove the thick gasket. The hatch rocks slightly now so we'll grind down some of the excess fiberglass on the underside until it sits flat, then glue a thinner gasket in place. That will define the height of the hatch, and Houa can then sand the teak top until it matches the rest of the cockpit around it. We'll probably have to follow a similar protocol for the other 3 big cockpit hatches as well, as they've all had their undersides reinforced with foam and glass to make them stronger.
Lek began the day in the salon with the orbital sander making a big mess as he sanded back the new fiberglass subfloor just inside the companionway. Hooray for R2D2, our shop vac! With the subfloor sanded and acetone cleaned we had to walk carefully all day, because they didn't plan to gelcoat it until 4pm or so. Baw smeared polyester filler over the vertical sill under the sliding door. It cures so fast he was able to gelcoat over it later in the day.
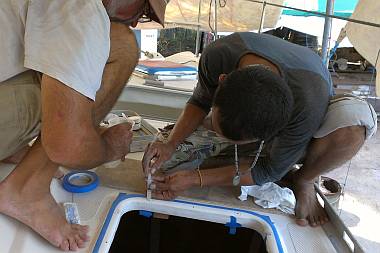 Filling misplaced bolt holes with epoxy mud |
Heru was also in the salon working a bit on the subfloor, but mainly fitting the jigsaw pieces of the teak and holly floor together. Some of the 8 pieces under and around the table were too big (from epoxying the edges) and he had to carefully sand them down to fit. Once the pieces were in place he covered them with vinyl cloth.
Jon set up to install the 2 large Lewmar hatches over the forward cabins. Port went fairly well but for some reason the pre‑drilled holes for starboard were incorrectly placed. Either Jon drilled them incorrectly (inconceivable!) or the 2 hatches are not the same (Jon had used the portside hatch as the pattern for where to drill on both sides). So late in the day we dug out a syringe and some epoxy with silica and filled up the 6 offending holes. We'll have to wait until Monday to re‑drill the holes so we can mount that hatch. Jon also looked at mounting the big fo'c's'le hatches, but he needs different screws for that and Sue had the scooter for much of the day, so that job also got postponed.
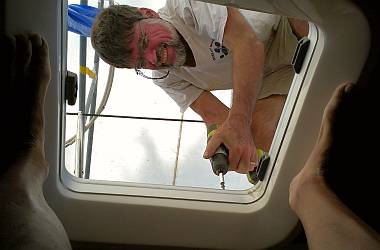 Sue on her back, legs spread while Jon screws ... the hatch down |
Lek was going to move off Ocelot and work on another boat in the yard starting Monday, but that job finished and we still have several small jobs for folks good at sanding, masking, and gelcoating. We've asked all 8 workers to return on Monday, and we'll re‑assess the situation of what work there is to be done by the men. The outboard needs a couple more days of sanding and painting, as does the dingy both inside and on the bottom. Inside Ocelot there are lockers and bilges to be cleaned and gelcoated if we want to. Given that Jon still has the lion's share of work (with Houa in second place), it's his timing that will determine just when we're ready to launch. It won't be 2013, but we sure hope it will be early 2014!
Thai Refit:
Ocelot Pages:
Top Level: Home | Destinations | Cruising Info | Underwater | Boat Guests | Ocelot | Sue | Jon | Amanda | Chris | Site Map | Make a Comment
|
If our information is useful, you can help by making a donation |
Copyright © 2000‑ Contact: Jon and Sue Hacking -- HackingFamily.com, svOcelot.com. All rights reserved.