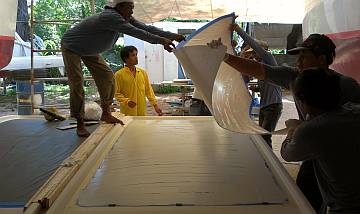
Receiving the big, gooped up sheet of nonskid for the bimini
92 Finish Nonskid
Summary: Our big accomplishment this week was that we (finally!) finished gluing down the nonskid! WOOT! Our other accomplishments this week include:
|
 Receiving the big, gooped up sheet of nonskid for the bimini |
Monday, August 5:
Another workday without rain forecast, so we scheduled Mike to come oversee more nonskid, and the
weather cooperated! Yay!
Sue arrived a bit late at the yard, having scootered more than a hour south, from Ao Po. The weekend was great: a champagne brunch with bagels, lox and cream cheese, fresh Thai fruits, and good coffee. Massage and a hike for Sue, and scooter exploration of northern Phuket for Jon, followed by a dip in the chilly (rain‑cooled) infinity swimming pool overlooking Phang Nga Bay. Evening BBQ with good friends, old and new. All good fun.
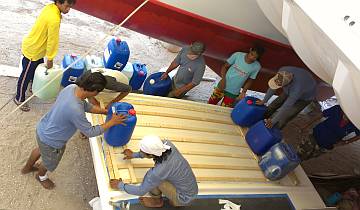 Building the lattice for all of the bimini water-jugs needed |
First order of the day was to prepare the starboard side of the bimini for nonskid. This meant orbital sanding (which Baw assigned to both Yando and Chambron) and then acetone cleaning. Everything was sort of in reverse order today, as usually Jon and Baw have shaped the nonskid (Jon was doing that while the sanding was in progress) and then they fit the piece and lay out the blue tape perimeter with the little positioning‑blocks, and white glue‑catching tape. Those last steps got done just before lunch, with Mike due to arrive just after 1pm. Whew. Close. But they got it done!
Yando and Chambron also sanded the port swim platform little square areas. Lek and Pla cleaned the backs of the nonskid pieces. Baw had to use a plastic grinding wheel to get the sticky gunk off the piece going on the port engine hatch. That's the one that got glue put on it by mistake weeks ago, so it was sticky!
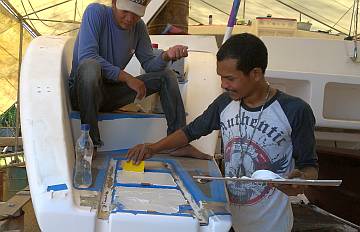 Heru & Baw spread glue on the last nonskid areas on deck |
During all this nonskid preparation, the men were also in and out of the cabins sanding the varnish from Saturday, getting everything ready for the next coats. Baw wants to spray the last coat of satin varnish on the cabin bulkheads and trim and for that he needs real flooring to stand on. Until now, the floor boards have been off the boat, stacked carefully in the store room because they were partially varnished last year. But this leaves the "floor" nothing more than stringers and deep bilges to fall into. Not ideal when using a spray gun and needing to watch the spray, not your footing.
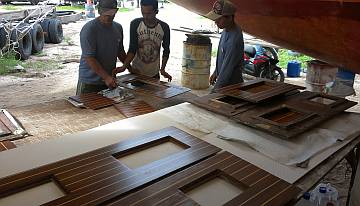 Pla, Baw, and Heru try to sort out all of the floor boards |
So Sue, Lek and Pla mounted an excursion to the store room with dolly for transport, and managed to find all the floor boards and their access hatches. The trick was getting them to fit! We already have more varnish build up than we used to, and we had asked Houa to put epoxy on the open‑grain ends of the boards. So some don't fit! No worries. Baw sanded them down as needed, and the epoxy will be re‑applied once we determine how thick the varnish will be!
Jon stopped off at AME in Boat Lagoon in the morning for the bolts he needs to finish the targa bar project. In the afternoon he used the bolts to fasten the tensioning support rod for the mainsail track to the back of the cockpit seat. Once he tensions up the rod with the 3 bolts in the center of the mainsail track he'll be able to check off that project.
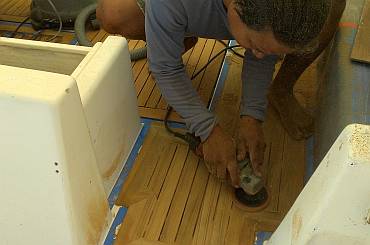 Houa making a professional mess in the cockpit, sanding teak |
Tuesday, August 6:
A day that shall live in Rainy Infamy. By far the wettest day yet! But, as Baw says "No
rain inside Ocelot!"
So that's where the men worked, inside, sanding, sanding and more sanding. Chambron and Yando are cutting back the 3rd coat of gloss varnish in the port cabins. Lek, Pla and Heru were all seen at different times in the main salon, fine sanding the epoxy trim in anticipation of its polyurethane finishing coats.
The biggest step forward was the total masking of the starboard cabins and passageway, getting ready to spray the final satin varnish layer on the bulkheads (big walls). We have decided to leave the lockers and locker shelves with one less coat than elsewhere just because of the difficulty and time to sand and brush varnish or (spray varnish) into those little spaces. Baw is in charge of this project and says it's OK to spray varnish in wet weather. He won't do epoxy or polyurethane, though, and we trust his painting/varnishing judgment.
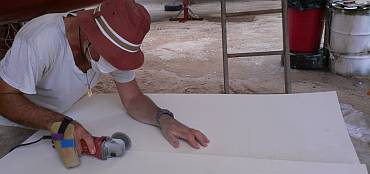 Jon cutting out the last 2 nonskid panels with a grinder |
Jon spent the day finalizing the nonskid project. The last 2 pieces to do are the small rectangles at the aft end of the bimini (aft of the big full sheets). He measured and cut the rectangles, then sanded the edges of the nonskid straight and cut the rounded corners. He even did the sanding on the bimini and cut 5 new bimini mounting holes at the back! Now all we need is a sunny day!
On a more personal note, Jon went to meet the cruising family who just hauled out their Wharram catamaran. The woman is a very nice occupational therapist from Western Australia and she gave Jon some much needed pointers on how to care for his broken finger. Basically, his cast is fine for the day, but he needs to remove it at night and keep the mobility in the hand. Nice to have some expert advice!
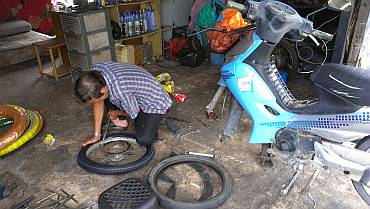 A Thai tire repair shop - his bed is in the upper left |
Sue began the day with what would have been routine errands on the scooter, except that it was pouring rain and she was heading half way into Phuket town to a big paint store. Add to this, the fact that half way there, she pulled on the brakes and the bike vibrated like crazy and wobbled so she pulled into a minimart parking lot. Oops. Big rip in the front tire! Flat, flat flat. A Thai customer at the shop offered to drive her to the nearest tire repair shop, so she hopped on his scooter, and not a block away was a shop, closed. As was the next one down the line. So he drove her back.
She called the yard (Jon was not on a scooter, so couldn't come to the rescue) and Baw sent Pla. Between Sue's gestures, Pla's (very) rudimentary English and his Thai we learned that the repair shack (hard to call it a shop) wouldn't open until 10. So together they rode to the paint store, bought 2 gallons of polyurethane varnish, a gallon of thinner, and returned to the broken scooter. Then Pla escorted Sue on the wobbly bike to the shack, and returned to Ocelot with the varnish. Fifteen minutes and $17 later Scooter has a new front tire and inner tube. And Sue has had a very Thai morning.
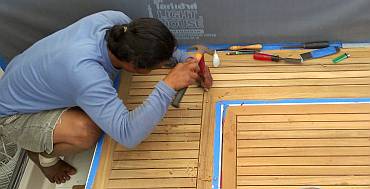 Chiseling open the grooves so they can get Sikaflex calking |
Houa added to the sanding chaos in the morning by using a sanding wheel on his grinder to smooth the new teak section on the starboard side of the cockpit. Lovely brown fragrant teak dust everywhere! So much so that we had to enter and exit Ocelot through either an emergency hatch or a forward cabin hatch. He did clean up nicely, though and the teak looks gorgeous! The next step before putting in the Sika 290DC calking is to smooth out and make uniform the grooves along the edges of the frames and at the end of the small planks. To this end he used a hammer and a variety of chisels, working his way up and down each plank. With all the rain, he can't apply the Sika calking yet.
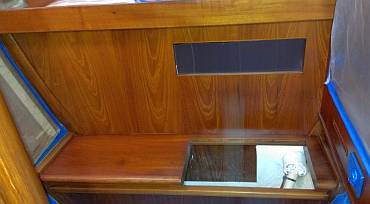 After the spray - the satin varnish makes the teak look very nice |
Houa also scarfed together the long teak boards for the frame around the aft‑deck. For 14mm (½"+) thick boards he made 25cm (10") scarfs, which is much better than the book calls for. Over the next few days he can continue framing and sizing planks for the aft deck and the companionway step.
Wednesday, August 7:
Mid‑week, and a nice change in the weather from a rainy morning to a sunny afternoon. So lots
of projects got done on board.
The morning rain didn't stop the inside progress of the Major Sanding Adventure. We once again had the 3 Indonesians, Heru, Chambron and Yando on port side getting that gloss ready for satin varnish. It seems to be taking longer to get each respective coating ready for the next, or maybe we're just getting a bit lost in the detail. Or they're using finer sandpaper and can't go as fast... Something to ask Mr. Baw.
Baw and Pla worked together on starboard, finishing the touch‑up sanding and the enamel paint color repair. Baw was pretty confident he could improve the look of the darkened, water‑damaged teak in the starboard aft cabin. This is where water has crept down from the companionway door for years. (Finally, on this refit, we were able to find the channel that the water was taking, and hopefully got it sealed up, with an alternative hole for water to drain through.) The teak itself is not buckled or physically damaged, just darkened. Using yellow and red enamel Baw applied thin streaks of color to try and blend in the real teak color with the darkened areas. Unfortunately we didn't get to check it before the satin spray, and it's not quite what we want. So there may be some re-touching necessary. We'll look at it more closely tomorrow.
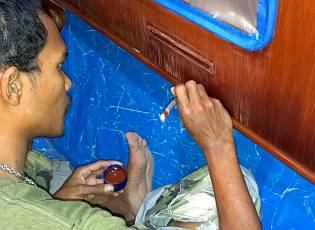 Baw coloring the water-damaged aft cabin teak |
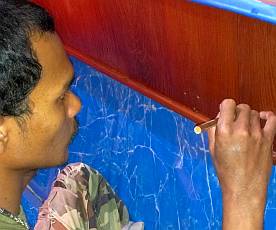 Not perfect, but certainly much better |
The last hour before the spray was the big wipe down with alcohol and checking the masking. To spray varnish, they had to mask off the front of each locker, both heads, the bulkheads (walls) above and beside the bunks, the bunks themselves, and the companionway steps from the salon. They put the big yellow worm extractor fan set‑up out the emergency hatch and then sealed it all off around the edges. Big job. Lots of hours. Mid‑afternoon Baw and the team lugged the big compressor back from a neighboring boat (who were renting it from us, but couldn't spray paint in this weather). The final spraying of the second coat of satin Epifanes varnish only took about half an hour. Baw laughed about it. "All day get ready. Half hour spray finish!" The satin finish is beautiful. Very smooth and rich.
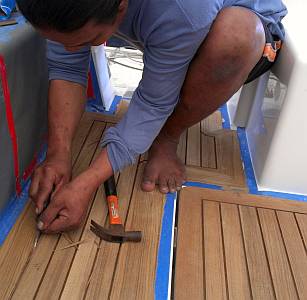 Cleaning out the grooves between the teak planks |
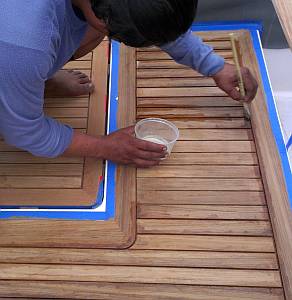 Painting the Sikaflex Primer into the grooves |
Houa spent the morning communing with his last 2 teak sections in the cockpit proper, the long multi-angled one on starboard, and the work locker hatch next to it. Yesterday he sanded the tops smooth and today he finished chiseling and cleaning all the grooves. Then he applied acetone, Sika Primer, and finally, the black Sika 290DC calking. With that area blockaded off, we all had to step carefully around the companionway! Late in the afternoon he was back in his workshop, sanding the long scarf joints he put in the athwart ship frame for the aft deck, and making the fore/aft frame pieces.
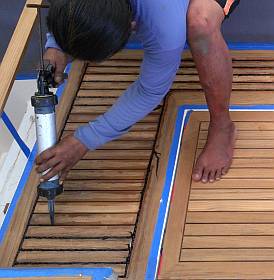 Shooting the Sikaflex calking into the first area |
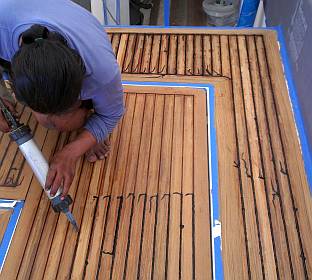 Houa calked the starboard cockpit hatch as well |
Jon worked on the battery hatch drains. The battery hatch originally had only 2 drains, that drained back onto the floor of the cockpit (of all silly places). We redirected those drains to go through the bridge‑deck into one of our wave‑breakers, which drain out the back. We also added 2 more drains, so water wouldn't pile up in the hatch gutters and spill over into the battery compartment.
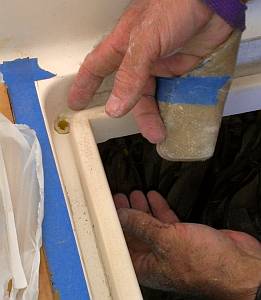
Jon had 1 more hole to drill, and all the PVC pipes (which will act as hose nipples) to cut and prepare to be epoxied in. By afternoon, when the sun was warming things up and had lowered the humidity, he decided to go ahead with the epoxy job. He first painted straight epoxy resin onto the PVC nipples and into the holes. The remaining epoxy he mixed with silica for a strong, stiff mud, which was smeared on the PVC nipples and on the insides of the holes. Then the nipples were gently pushed into their holes and the extra epoxy mud spread around the base of the nipples to give them additional support. Once he cleans up the edges and attaches the hoses, we'll have one more project checked off the seemingly endless list.
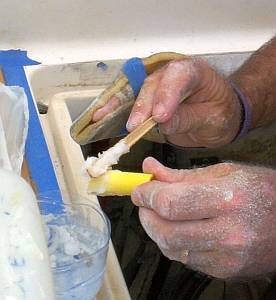 Gooping epoxy mud on a PVC nipple |
 Pushing nipple up through its drain hole |
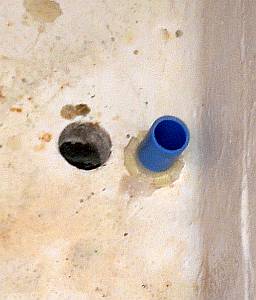 Jon put 4 nipples through the bridge-deck |
Sue did her usual run‑around, checking things out, taking pictures, planning the next projects. She also attacked about 3 pounds of screws that were all thrown into a big jar together. Many were identifiable as the stainless screws used to hold our old teak decks in place, but at least 80% of those disappeared along with Golf way back when. The other screws fit into about 5 categories and we'll have fun trying to figure out what can be used where. We're looking for the screws that hold the hatches to the deck, plus dozens of other smaller jobs. Hind sight being what it is, we should have insisted on being present when any deck fittings were removed, or done it all ourselves. It would have saved a lot of time and agony now, at the point of re‑assembly.
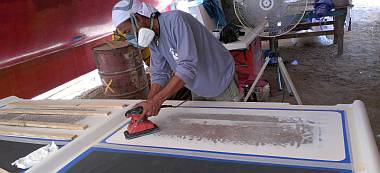 Preparing the last 2 areas for nonskid, at the back of the bimini |
Thursday, August 8:
Today is Hari Raya Aidilfitri also known as Feast of Breaking the Fast, or the Sugar Feast, and is
an important Muslim holiday, marking the end of Ramadan. So we were short‑handed at the yard,
but it was a landmark day as we got several projects FINISHED!
With the Phuket weather radar showing no rain on the horizon, the sun peeking through white clouds, and patches of blue sky, we decided to go for the job of gluing down the LAST of the nonskid! We figured with Houa to mix glue and hardener in the right proportions, and Baw, Pla and Lek to take their normal nonskid preparation and glue-spreading jobs, we were good to go These guys have done this so often that they can probably do it in their sleep. So Baw and Lek laid out the blue and white tape around the perimeter of the last nonskid pieces at the aft end of the bimini. They used the orbital sander to scratch it up well, wiped the areas with acetone, then checked for shiny places, and finger sanded with 40 grit to rough up the edges. Lek sanded the backs of the nonskid pieces, and he and Baw taped the edges and covered the pieces in plastic.
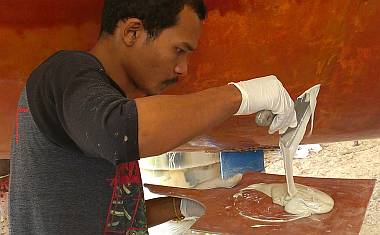 Baw mixed up the polyester glue, with 0.6% catalyst |
All ready to go, but no Mr. Houa! We tried phoning but no answer. Oh well. These things happen. We just hope he's OK. So Baw very competently mixed our glue, and with Pla on the nonskid pieces and Lek and Baw on the bimini they got both pieces down, no drama. WOW! We're done! And yes, they did roll the glue to the edges, making sure it sploobed out all the way around, put on water jug weights, and finger‑wiped multiple times to keep the edges clean. Yay! A real landmark! We gave the guys each a little money to buy themselves lunch (or whatever they wanted).
We knew Baw was going to leave at mid‑day, so after lunch it was just Pla and Lek who stayed to work. Luckily they had plenty of sanding to do down in port cabins to get it all ready for tomorrow's satin varnish spray. They're wet‑sanding with 400 grit so everything's pretty smooth.
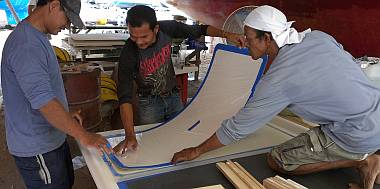 Positioning the gooped up nonskid panel against mini-blocks |
Sue scootered to the apartment to do accounts and list‑making and things on the computer. Jon had 3 small projects he wanted to finish and didn't need Sue's hands.
The first job was to finish the mainsail‑track / tensioning‑rod project. The tensioning rod for the targa‑bar ends at the bottom with a plate that bolts into the back of the aft cockpit seat, and that was all put together on Monday. The top of the rod ends in a triangular bit of steel inside the targa‑bar. Three nuts are welded to the triangular steel, and they're for the 3 middle bolts of the mainsail track. We had to get the bottom of the rod placed correctly and bolted down before we could tension the bar with the 3 mainsail track bolts. The outer 2 bolts have nothing interfering so they can be any length, but the middle bolt has to be very close to 75mm (not quite 3"). Too short and it doesn't grab the nut. Too long and it runs into the end of the rod. So Jon had to cut a bolt down (and then clean up the threads) a couple of times before he got the right length. Then he filled the holes with silicone, put a dab of Duralac (corrosion inhibitor) under the heads of the bolts, and tightened them up.
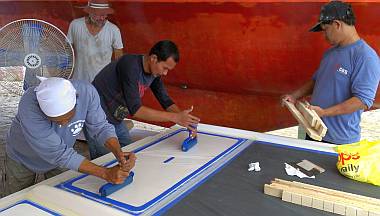 Pressing out the air and any extra glue with rubber rollers |
The next job was to finish the mounting holes at the back of the bimini, where the bolts will go into the targa‑bar. This job is cheating a bit, as Jon drilled 5 new bolt holes a few days ago, but although he marked out where the last 2 have to go, he forgot to actually drill them. It took longer to organize the electricity, gather the tools, and put everything away than it did to actually drill the 2 holes.
The last job was the hoses for the drain holes around the battery compartment hatch. Jon couldn't find the correctly sized hoses in our hose pile, so he borrowed Pla's scooter to find the right hoses. At the end of the day he also borrowed an electric water kettle. He soaked the ends of the hoses in a cup of hot water to soften them up a bit, and then he could (quickly) push them onto the PVC nipples that he'd epoxied into the hatch gutter and through the bridge‑deck yesterday. So now it's all spiffy and plumbed for water draining!
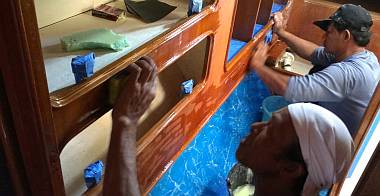 Lek & Pla spent the afternoon sanding the port aft cabin with 400 |
The only down side to the day was poor Pla returning to the yard after leaving for home, saying he had a flat tire, and it wasn't flat before Jon borrowed it. Oh dear. Bad tire karma with the Hackings this week. We gave Pla $6 to pay for the repair and tube. If that's the worst for the day, we're happy!
On a happier note, the Occupational Therapist on a neighboring boat came over to look at Jon's hand, and pronounced that he needs to remove his cast and start exercising it. This is encouraging news indeed! It's only been 20 days since Jon's accident. Jon found that spreading his fingers is easy, but that little finger doesn't really want to bend very far (so he's been walking around all evening with his little finger in the air). He can type with it, but it will take some practice to make a good fist. Still, it's nice to have the cast off and wrappings off, even if it's only for the evening. Apparently he's very lucky that it broke in the middle of the bone, and not over towards a knuckle.
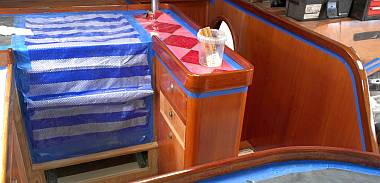 The high-wear areas are looking very nice now! |
Friday, August 9:
Bit of a strange day at the yard today, with Houa still out from his leg injury and Jon not feeling well.
Sue held the fort with Baw and his 5 workers. Today, being sunny, the men concentrated on getting as many coats of polyurethane varnish put on as they could. In the salon and galley they worked on the high‑wear areas - grab rails, fiddles, etc. These already have 3 coats of epoxy, but epoxy has no ultraviolet inhibitors, so varnish has to be applied on top of the epoxy to protect it from UV damage. Baw, Lek and the Indonesians worked all morning on sanding, masking and cleaning up in the salon and galley, and they got the first layer of gloss polyurethane brushed on just after lunch. Within a half an hour it was dry to the touch so they dry‑sanded it all very lightly with 400 grit paper, wiped everything with methyl alcohol, and brushed on a second coat.
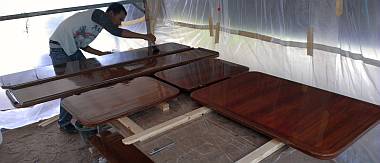 Baw varnishing the outdoor (far) and indoor (near) tables |
Out under the neighboring boat where we have an authorized workspace, Heru, Chambron and Yando wet sanded the cockpit table pieces and the three salon table sections, getting them ready for polyurethane. Baw was able to brush on 2 layers before 4:30.
While that was drying, Sue led an expedition to the store room so that the 8 doors (for cabins and heads) could be gathered and taken back to the yard. They then returned for the 20 locker doors. These will all get sanded lightly (as the old varnish is still in good nick) and have 3 coats of Epifanes gloss varnish brushed on, then a final 2 coats of Epifanes "Rubbed Effect" (aka satin) varnish so that they match the bulkheads in the cabins and passageways. This should keep the guys busy for a few days.
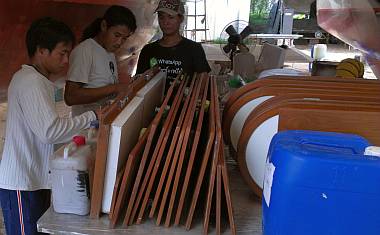 The 20 locker doors (left) and the 8 people doors (right) |
Pla seemed to get the "dungeon" work today, as he was almost all day down in port hull finalizing that side for its satin varnish which Baw hopes to spray on tomorrow. We did see Pla briefly as he was running errands for rolls of plastic film and methyl alcohol. Sue isn't talented enough yet on the scooter to balance a 5' (1.5m) roll of plastic all alone!
Sue spent a few hours dealing with the filiform corrosion on the mast. It seems fairly clear now that the worst area is one that she did long ago, with a very thin first coat of Nyalic hand‑applied with a rag. In hind sight, this was probably too thin, and moisture got under that layer and and began its nefarious work. Working with Nyalic in this rainy season is difficult. We now realize that we need a full day to prepare and brush on the Nyalic, then a following 48 hours with no rain so the Nyalic can harden properly - a total of 3 rainless days. Looking back, we've had several runs of 3 days with no rain this summer, but it's hard to predict when they'll happen. Today's forecast was for rain all day, yet we had sun and only a 20 minute deluge at 5pm. It's probably better to have rain forecast (and thereby stop us from applying Nyalic) than to have sun forecast and end up with rain and ruined Nyalic!
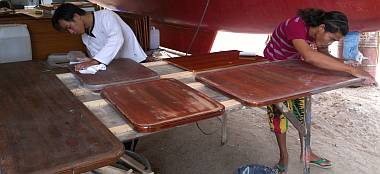 Sand it flat, paint more on, repeat ad infinitum |
Word on the absent men -- Jon is feeling better and we hope he'll be back in action at the boat tomorrow. Houa called to say he would be out for the rest of the week, and maybe Monday as well. We are worried about how that gash in his ankle is healing, or not healing. We may scooter to town and meet up with his sister to learn more.
Saturday, August 10:
A quietly productive end of the week, with morning rain squalls that didn't really affect us.
Everyone but Houa was at the yard.
Our 3 Indonesians, Heru, Chambron and Yando helped organize the work area under Ocelot so that the sanding and varnishing of the doors and tables can happen right there, instead of under the neighboring boat. They worked on the cockpit and salon tables first, getting them ready for another coat of polyurethane. Then they spent the rest of the day seated together, chatting and sanding many of Ocelot's 28 interior doors.
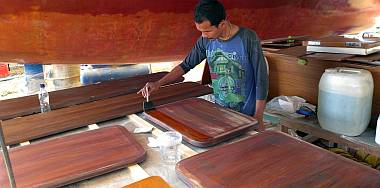 Varnish makes the sanded surface beautiful again |
Baw did a quick dry sand of the polyurethane trim in the salon and galley, cleaned up, then applied the 3rd coat of gloss polyurethane. From there he moved down to the tables under Ocelot's stern and got a shiny coat on them as well. He basically hopped back and forth from the salon trim to the tables all day, getting the 3rd and 4th coats on the trim inside and the 2nd and 3rd coats on the salon table. The cockpit table bottoms apparently need more sanding before the next polyurethane layer.
We were going to leave all the hardware (door locks and button pulls) in place, but Baw said it would take a very long time to blue tape them all carefully enough, and felt it was more efficient (not his word) to take the hardware off. So he spent less than an hour on that. We'll see how fast it goes back on when the varnishing is done! He did say he'd like to spray paint the button pulls to shine them up. They look pretty tarnished and worn, so that can't hurt them.
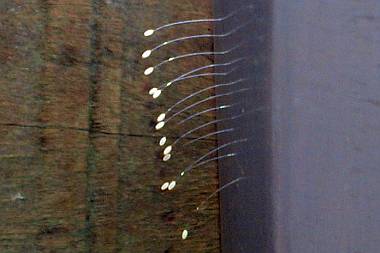 Anyone have any idea what this is, growing out of our forebeam? |
Sue communed with the aluminum spars, checking where the filiform corrosion has appeared and where it has not. The verdict is still unclear as to what happened and when. A check through our history may let us figure out if we got rain too soon after some of the Nyalic Sunday's that were Amanda and Sue's forte for the past year. One curious phenomenon is that we seem to have developed a tiny aluminum tree. Or maybe it's aluminum fungus, growing right out of the Nyalic. Thin strands with white oval tops. Curious.
Jon got to check off an important item today. We dug out the new ($85) aluminum thimbles from Colligo that will hold our new Dyneema‑Dux diamond rigging stays. Working with the thimbles and the appropriate tangs on the mast, Jon was able to measure things and come up with a good technical drawing of the 16 stainless steel straps we need to have machined for us. We expect a quote back from Lob, our nearby machinist, soon.
|
Left side goes up, chevrons help keep water away from speakers |
Once the drawings were copied and delivered to the machine shop, we dug out the outside speakers, and Jon prepared to mount them in the targa bar. They actually mount in 2 of the vertical access panels on the inner walls of the targa bar. Jon laid down 2 chevrons of silicone above where the speakers will mount so that any water getting into the panels will run to the sides and not into the speakers themselves. This is theory, but we're pretty sure it has worked in the past. Never give up a good system if it worked before!
Houa is still absent, but we couldn't get to town to see him or his sister today. Hope to do so tomorrow or Monday. We are concerned that he may not have gotten the correct medical attention. Medical work is cheap here in Thailand, and ridiculously cheap for locals, but it can still take a dent out of a paycheck when most folks live hand‑to‑mouth. Our local Occupational Therapist is concerned that Houa doesn't have his foot in a walking cast to support his ankle, and she should know what's needed.
Thai Refit:
Ocelot Pages:
Top Level: Home | Destinations | Cruising Info | Underwater | Boat Guests | Ocelot | Sue | Jon | Amanda | Chris | Site Map | Make a Comment
|
If our information is useful, you can help by making a donation |
Copyright © 2000‑ Contact: Jon and Sue Hacking -- HackingFamily.com, svOcelot.com. All rights reserved.