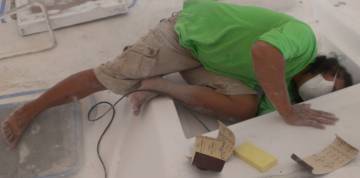
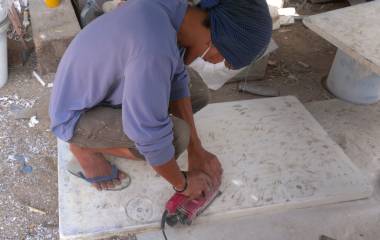
New worker Kee sanding up under the starboard eyebrow
63 Spray Deck Gutters
 New worker Kee sanding up under the starboard eyebrow |
Summary: Two big accomplishments this week: First, the underside of the bimini was sanded to 2000 grit and polished, giving it a mirror-smooth reflective finish. Second, the team prepared the cabin‑top and Mike sprayed all the areas outside of where the nonskid will go (the "gutters") with gelcoat. This involved applying more durable masking to the windows and filling all 100 mounting holes with epoxy, de‑coring the 22 holes that still needed it. The team from Luck reworked the sugar‑scoop grab‑rails so they fit better, then took them off for final polishing. Houa was pulled off the bathrooms and put onto making new plywood for the headliners, to replace the water‑damaged ones. These were then epoxy coated. Lots of work in the cockpit, and Jon remounted the starboard side aft cockpit door, as well as de‑coring the area around the emergency steering bearings and the engine room hatch pulls. Several other small epoxy jobs got done, including filling the holes in the starboard chain‑locker and in the bottom of the life‑raft locker and where the backrest bolts to the aft cockpit seat. Jack kept sanding the hatches and the cockpit seat, preparing them for gelcoating.
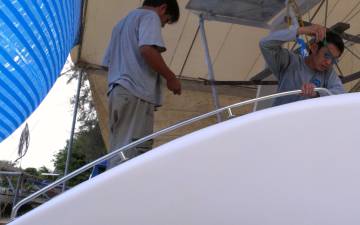 Luck's men refitting stbd rail - middle pads are still too high |
Monday, January 14:
Hot and sunny, very little wind, and a good day at the boat yard. By 8:30 Cris and Baw had
already assigned the workers to 3 main tasks: cabin top, bimini, and aft‑deck. It has been
really helpful to have someone like Baw to oversee the general direction of the projects, and Cris's
bilingual ability to help make it happen.
The top priority now is to get the cabin top ready for AME to gelcoat. Baw, Chai, and a new worker, Kee, spent the day sanding and cleaning the large surface that will get 6 pieces of nonskid. Sue and Amanda spent some time drawing out and discussing the sizes and shapes of the future nonskid, which is complicated by the trapezoid shape of the cabin top and the three hatches.
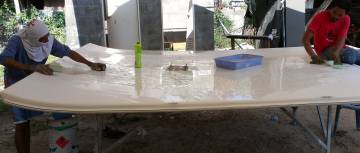 Lek and Tu wet-sanding the bottom of the bimini - still on 400 |
We have decided to mask the cabin hatches from the inside so that the tops and interior rims can get gelcoated. If we leave them with the old coating, there is a chance that the newly sealed hatches will peel off the old gelcoat and we'll get leaks. By cleaning them up now and applying new gelcoat we can be more assured of a watertight fitting. Since these hatches were originally masked on the outside with silicone, there's a bit more sanding and cleaning to be done.
Chai also worked on the cabin top after lunch, and his main job was to put on really good masking over the salon windows. When the guys pulled off the old polyethylene masking they found areas of damaged acrylic window where acetone had gotten on. Nasty melting of acrylic. Dang. But Baw assured us that with successively finer grades of sandpaper (up to 1500) he can fix them. We sure hope so. We were not counting on replacing the salon side windows.
Our 2 guys from Luck Engineering were back with our sugar‑scoop grab‑rails all nicely welded up. Unfortunately, the final welding must have warped something, because the rails didn't go down very well. So they found a convenient fork in a tree and used that to tweak the rails until they laid down correctly on the walls again. They'll do a final polishing and then bring them back to us tomorrow.
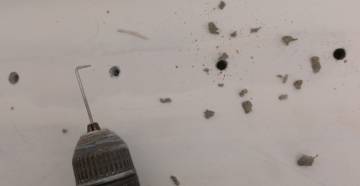 Jon's de-coring tool - bent & sharpened stainless rigging wire |
Jack spent the day with the last of the hatches, finalizing the filler and sanding on the second engine hatch. There's a bit more to do on one surface of the helm seat, and there's the whole backside (which is visible!) to do as well. But it will have to wait. Tomorrow Cris is moving Jack over to a power boat that needs attention elsewhere in the yard. We hope to have Jack back soon.
On the bimini, we had Lek and another new worker, Tu (replacing Yoong), who sanded away with 400 grit and water and Sunlight detergent all day. They are about 95% finished, and we hope they move up to the next finer grit paper tomorrow. It sure is looking shiny and beautiful! And that's just the bottom side!
Nut, Bank and Kwan all took turns working on the final filler on the shaping of the aft cockpit and the sill under the small cockpit doors. We will be bringing up the finished doors tomorrow to see how they fit.
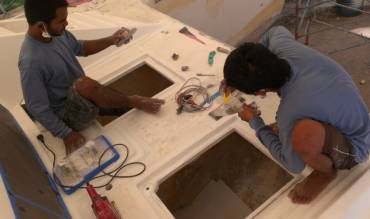 Kwan and Bank working on the forward chain locker hatches |
Jon was back at work today, and although he wasn't 100%, he got some good things done. He de‑cored several bolt‑holes in the top of the salon, preparing them to be filled with epoxy before being re‑drilled. He also returned the staple‑gun (that we'd bought when we thought we'd do the headliners ourselves) to Bangkok Hardware in exchange for the 20,000 additional stainless steel staples that TMT needs for the headliners. In 1 day they had already used 5000 staples! They're really moving ahead quickly.
One screw‑up is that we forgot that the headliners in the forward cabins have to be re‑made to fit the new larger Lewmar hatches that we installed. Oops. One step forward, half step back. We'll be scootering out to TMT in the morning to identify those 4 big headliner pieces and pull them out of the work lineup. Unfortunately, when Jon was there he saw that they had already finished one of them.
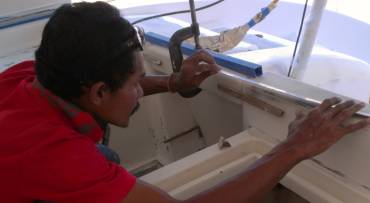 Baw loves to think - working on our aft cockpit doors |
Further on the headliner front, we took Houa off the head project, and asked him to work on making the remaining 5 mm marine ply headliner boards, replacing those that were water damaged. The folks from TMT arrived before lunch with 4 more pieces that were damaged, that we hadn't even seen. Once they started taking off the foam and vinyl it was obvious that the underlying wood was too soft. More work. More time. But Ocelot will be so happy to have beautiful new headliners!
Tuesday, January 15:
A quietly successful day. We could wish for more like this. The day started quietly and
just kept chugging along without any (noticeable) mishaps or set‑backs. Touch wood...
Baw had the workers divided into several stations once again. Lek, Tu and sometimes Chai were the bimini sanders. They had a few more areas needing 400 grit, but just after lunch they asked for 800. Then, to our happy surprise, at 3:30 they were ready for 1000! The bimini is looking wonderful! Yes, there are a few little defects like where a bug landed on the wet gelcoat and tried to wiggle its way out, or where there are little pinholes (not many, though!), or places that got too thin, like on an exterior curve. Exterior curves are tough places, as the spray of the gun doesn't settle so thickly there, and its so very easy to sand through the layers on the external curve without even realizing it. Fixing it ... well, that's to be determined between Baw and Mike, but we're sure to be in the middle of the discussion.
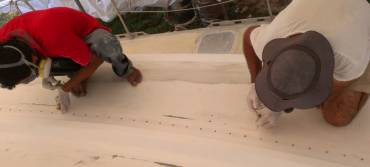 Baw and Jon injecting epoxy into the sail-track bolt-holes |
Baw and our newest worker Kee spent the day trying to fit the little cockpit doors that border our cockpit aft seat, filling a bit here, sanding a bit there, trying to get them to hang true. These funny, fat, shapely little doors swing open to the back, and fold behind the aft cockpit seat. But they are made of strange angles and curves, as are the walls (bulkheads) they are mounted on. It was nice to see Baw doing some clever thinking about how to simulate the swinging doors, using long bars, clamps, levels, etc.
The primary job for Team Ocelot today was to fill the 100 or so bolt holes that hold the sail tracks, winches, spinlocks and line guides on the cabin top. Given that we are due to have the cabin top sprayed with gelcoat later this week, it was imperative to get this done NOW. Jon, Sue and Amanda spent the morning cleaning out the holes of the dust from sanding, silicone, old gelcoat, and the cocoons of some sort of wasp that obviously thought these little places were very cozy. The dry cocoons weren't so bad, it was the mushy, squishy ones that weren't so fun. After we poked and prodded the debris out, we vacuumed each hole, poked it again, vacuumed again, then sealed the lower (inside the salon) end with duct tape. After lunch Baw mixed us up a couple hundred grams of epoxy resin with silica. He and Jon used small syringes to fill each hole while Sue and Amanda wiped up the excess, popped bubbles in the resin, checked for leak‑throughs, and generally kept an eye on things. Tomorrow we should be able to sand the tops of the holes and deck.
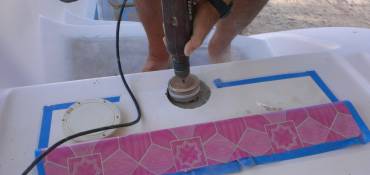 Jon enlarging the hole above the emergency rudder bearing |
Jon also spent time on the emergency steering bearings. These bearings are mounted just under the deck, above the rudder‑posts and just aft of the engine‑room hatches, where we can stick an emergency tiller down to connect to our rudders if the steering gear ever fails. These bearings need to have cover‑plates over them, which we have. But those plates used to mount on the teak that was above the bearings, and now there won't be any teak there, so the holes had to be enlarged a bit to take the cover‑plates. Unsurprisingly, this area had also not been de‑cored, so Jon cut back the exposed foam and told Baw, who will fill them in the morning.
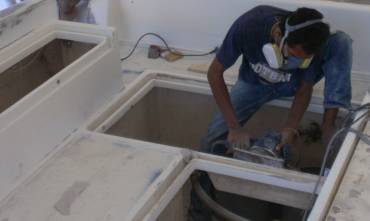 Baw sanding inside our cockpit lockers - looking better! |
Bank and Kwan filled a last few little places on the cabin top in anticipation of the big spray later in the week. That meant putting filler on little nicks on the compass edge, the drain holes aft of the compass, and the rims of the cabin top hatches. Once they'd finished those areas they spent time on the rims of the anchor and chain lockers on the foredeck. Things are looking really good!
Many of the team spent time in the morning carefully masking the salon windows with thick vinyl plastic -- the kind of stuff we think of as plastic tablecloth. We used a special sealing tape from AME to put future board in the salon hatches. It's a bit dark inside now, but it will be nice to be finished with the major sanding projects. Gelcoat, luckily, is sanded wet, so no dust.
Over in the workshop, Houa continued cutting the plywood panels for the headliners that need replacing. He has to scarf join several, and he used his router to take off a layer of ply from these pieces, so he can join them seamlessly.
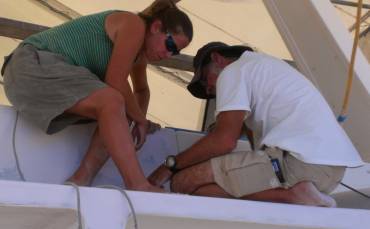 Jon and Amanda working to get the aft cockpit doors hung right |
Jack was not stolen away for the power boat today, so we had him still working on the helm seat, which was great.
Wednesday, January 16:
Another beautiful day in paradise, but hot at the yard, as usual.
We had a hoard of workers today, but they pretty much stayed on their own stations. On the sugar‑scoops we had Bank, Nut and Kwan sanding the Ocelot White that Baw sprayed on last week. It had some sags and defects, so it will be interesting to see how it turns out. At this point Baw is asking for it to be over sprayed. In other words, what went on was a sacrificial layer. The good thing about an under layer of the final color is that if someone over‑enthusiastically sands through the top coat, what's underneath is the same color and same stuff.
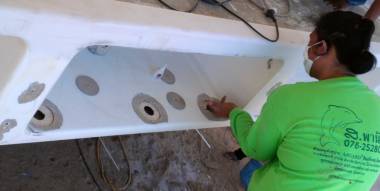 Kee using an interesting technique to fill big blind holes |
Jack ground back some of the damaged rim of the helm seat, and started putting on filler. We're not sure they believe us when we say they have to do all 4 sides of the bench seat because depending on its orientation we see each of the sides.
Houa's scarfing of 2 pieces of 5mm plywood look just great. This makes a single piece more than 3 meters (10') long for the salon headliners.
Back in the cockpit and on the cabin top we had Baw's undivided attention all day. He and Jon syringed in a few more drops of epoxy to the bolt holes they started yesterday. Baw said, "Goodbye epoxy," which was appropriate because it had sunk clear out of sight in some of the holes. Then Baw worked on the rims and gutters of the 3 big cockpit lockers in the floor. This is an area that has been massively ignored, to the point that epoxy was allowed to dribble into the gutters, and now has to be chiseled out. Oh, for a bit of masking, in hind sight!
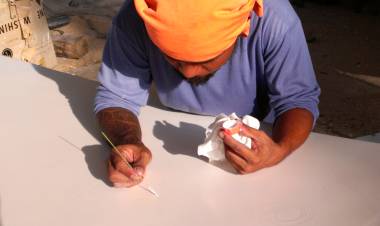 Chai putting down tiny points of gelcoat to fill spray pinholes |
Our new worker Kee worked nearby Baw. He used an interesting technique to fill some big blind holes in our liferaft compartment, using super‑glue to hold in half‑donut shelves before epoxying in the centers. Kee also sanded the hardened epoxy holes in the afternoon, and also used the dancing sander on the vertical walls of the cockpit. Things are looking nice and white now! A quick once‑over tomorrow and we hope to declare the cabin top ready for the AME team to come spray gelcoat on Friday.
 Jack sanding one of our big cockpit hatches to get teaked |
Jon and Amanda worked on mounting the little aft cockpit doors to see how they hang and open, and if they have enough clearance. This whole area has been majorly rebuilt, so with the addition of filler and energetic sanding some shapes have changed and it was not at all clear that the doors would fit properly. There's more still to do on the port door, as it hangs a bit low, but Jon will attend to that tomorrow.
The bimini team, Lek, Chai and Tu, worked with 1000 grit today, then near the end of the day dried the surface off and pencil marked all the dozens of little pinholes. Baw and Chai took our gelcoat, mixed with catalyst, and dabbed it into the pinholes with little sticks. The gelcoat stood proud, and we hope to see in the morning that is is nice and hard, ready for fine sanding.
Thursday, January 17:
It was another hot, sunny day in Phuket and things are going well in the Ocelot corral.
Although we had 2 fewer workers today, it was actually OK, as we still had teams on the major areas,
and there was a bit less chaos, which suited us just fine!
Jack spent the day prepping the cockpit hatches for their eventual covering with teak. Instead of using polyester filler to fix any dings and defects, he'll be using epoxy filler. Epoxy is the chosen substrate for the teak, according to Houa. This works whether we set the teak planks with epoxy or with Sikaflex. The jury is still out on that. Any opinions? Epoxy holds the teak firmly but the oil in teak prevents a good bond. Sikaflex lets the teak and the deck expand at different rates in the heat, but is more expensive.
Jon positioned and then de‑cored the foam from where the pull handles go on the 2 engine hatches. There was a bit of discussion about the orientation of the pulls, in that Sue and Amanda would have placed them 180 degrees from how Jon placed them. But given that Jon lifts the engine hatches the vast majority of the time, he should be allowed to mount the pulls the way he wants! And it's no big deal to flip them around later if we want.
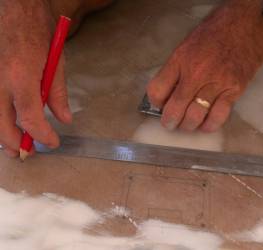 Marking out where the engine hatch pulls go |
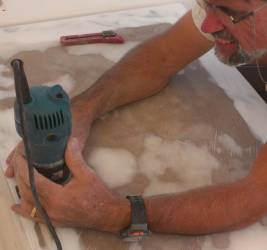 Cutting out glass & foam with a router |
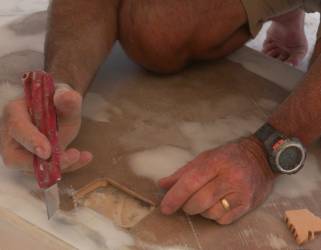 Cutting back foam underneath, to be epoxy filled |
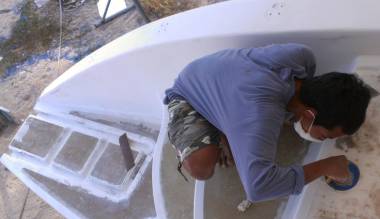 Nut filling de-cored areas around the emergency tiller bearing |
Houa was sort of trapped in his workshop with sheets of 5mm marine ply which he is endeavoring to turn into headliner pieces. Sometimes we wish we could just ditch the whole headliner thing, thereby saving lots in money, time and weight. But the ceiling of the salon is very unfinished, and needs some covering, plus these ply/foam/vinyl headliners offer not only a softer landing for the occasional head banging, but they insulate us from the tropical sun that pours down onto the cabin top!
Back in the cockpit, Baw used polyester filler to put finishing touches to the trim and edging around the coamings. He worked a long time on the aft cockpit door on port side, bringing the wall up and adding some filler on the bottom where Jon had noticed some discrepancies. Baw was also the overseer on the small epoxy jobs done by Nut and Bank.
Nut and Bank were the epoxy kids today. They cleaned out and mudded foam circles (cut by Baw) into the strange, un‑wanted holes that go from the anchor locker to the new tank locker on the starboard foredeck These holes look like manufacturing accidents, which were then poorly sealed with silicone. Now we've done a proper repair job.
Nut and Bank also attacked the area on the ends of the aft cockpit seat, where the backrest comes down to bolt to the seat. The bolt holes have worn themselves into slots, mainly because the glass isn't too thick and the foam had never been de‑cored. Jon cut de‑coring holes long ago and today Nut and Bank finally got around to filling those holes with epoxy mud and swatches of cut fiberglass cloth. This will give us much stronger attachment points for the backrest. In the afternoon they got the 2 emergency tiller bearing areas and the 2 engine hatch pull areas (where Jon had cut back the foam) filled with epoxy mud as well, to seal the foam.
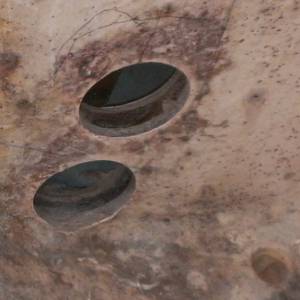 Mistake chain locker holes after Jon decored them |
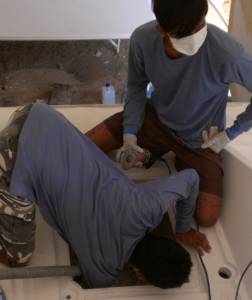 Nut & Bank cleaning & preparing to repair |
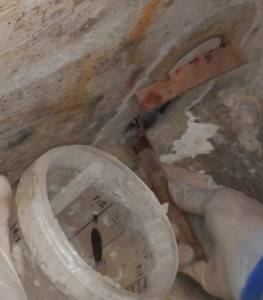 Filling holes with glass & reinforced mud |
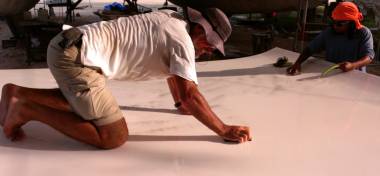 Jon gets down & wet with Chai, sanding the bimini with 1500 |
Up on deck, Sue and Amanda measured out the gutter lines on the cabin top. We figure the most aesthetic design of the nonskid up there will be a long sheet down from the cockpit forward to the middle of the hatches, then a smaller piece going down towards the front window. There will be 3 sheets across the width, and we'll make the gutters between the sheets follow the curves of the ridges that run along the top of the cabin. This gives us 6 pieces of nonskid on top of the cabin. Given the curves and shapes, nothing will be straight lines, but we won't have any small orphaned pieces. Tomorrow Mike, from AME, will be coming by and we'll run the ideas past him to be sure he can cut and position the nonskid correctly with this idea. Our day to spray new gelcoat on the cabin top is now Saturday, all day. And we hope to get it all done in one day!
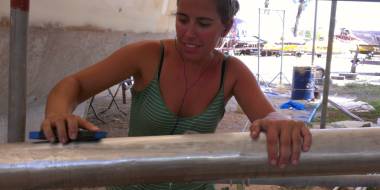 Amanda rocking out while sanding our new prod |
On the big, beautiful bimini bottom Lek and Chai moved up from 1000 grit to 1500! This was after they gave all those little dit‑dots of gelcoat from yesterday a nice sanding and blending in. Tomorrow they want to start with 2000 grit, for a true mirror finish. Jon even climbed up on board in the afternoon to give it a go. Why not? It was the coolest, cleanest place to work, what with hose water running over his hands and knees!
Friday, January 18:
With a mini‑step back, and a major leap forward, we are gearing up for tomorrow's big day of
spraying the cabin top gutters. Sue and Amanda arrived at work to find a full contingent of
workers again and everyone settled into their own work areas without much ado. Houa had bought
us a new shade for the stern to replace the one that had disintegrated yesterday, so Jon and Amanda
spent much of the morning getting it reinforced and hanging correctly from our tent. Amanda
also spent several hours sanding our new prod to get it ready for Nyalic.
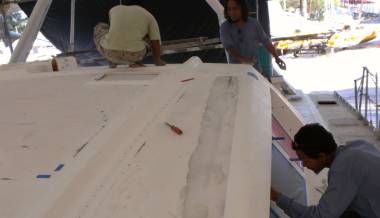 Nut, Chai & Baw preparing the cabin top for tomorrow's big spray |
Some of the epoxy that Nut and Bank mixed yesterday didn't cure, so they had to dig out the gummy epoxy from the engine hatches where Jon had de‑cored the foam. But within 20 minutes they were mixing up a new batch and fixing the problem. The other areas all cured nicely and got sanded smooth. Nut and Bank took on a variety of small jobs today, from sanding the gutters in the cockpit lockers to touching up places on the cabin top that need to be "perfect" for tomorrow's big spray.
Kee worked on the aft deck area most of the day. He got the epoxied areas in the life raft locker sanded down nicely, and new filler put on the rims of the lockers and sanded smooth.
Jack was still keeping Houa company in the work shed area. Jack's main job was getting the cockpit locker hatches ready for teak, but he also has more work to do on the helm seat. It's pretty hard to convince the guys that we need all 4 sides of the helm seat to be beautiful, because we actually see all of them, depending on the seat's orientation!
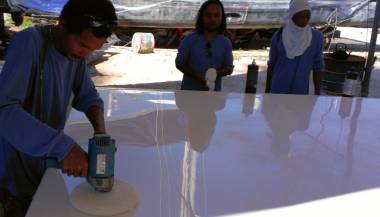 Baw polishing the bimini - check out that mirror reflection! |
Houa was doing some fancy carpentry with the very curved headliner pieces that frame parts of the salon. These curved pieces of plywood were originally glassed into shape, but water got behind and messed up the plywood on several of them. So Houa is having to remove one bad piece of ply and reattach a new piece to fit the same curve. Better him than us! He's doing a great job!
Baw worked on the port cockpit door for a bit, then helped out on the cabin top prep. He also spent time prepping the cockpit hatch gutters. But probably his favorite time of the day was agreeing with the bimini guys that they were done sanding!
Chai and Lek were the bimini guys again, and we were happy to provide them with the requested 2000 grit sandpaper about mid‑morning. By 3:00 they had finished with the 2000 grit - it sure goes faster the finer the sandpaper! Baw came down off the boat and with a great flourish, squirted some 3M polishing compound onto the bimini, set up the polishing disk, and BINGO! We have one gloriously shiny bimini bottom! It all happened so fast, and was so magic. From a drawing and a plywood frame, to a rough foam and fiberglass creation, to a dull white rectangle, to a brilliantly shiny yacht‑looking bimini!
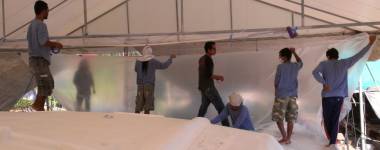 Our team masking Ocelot from gelcoat overspray |
Mike came by from AME for a quick consultation on tomorrow's big cabin top spray. It's a huge area, but he's only doing the outer rims (the gutters, as we call them) which will be the flat shiny areas around the outside of the nonskid. He liked how we laid out the pattern for the nonskid pieces on the cabin. Making a final check he found a few places that needed a bit more sanding (to get rid of any gloss in the Thai gelcoat spray put on by Baw a few weeks ago) and a couple places that were a bit rough and needed smoothing. We got our guys onto it right away and the day ended with 4 guys touching up bits of the cabin top while Jon made vinyl covers for the locker hatches that have already been prepared to spray, but which we'll need to stand on tomorrow.
Saturday, January 19:
Hooray and Yay! An awesome day despite lots of wind, and an afternoon rain threat.
The Big Spray did finally happen, and we're thrilled with the results. But we did learn a few things along the way.
First thing we learned was that we have to be very explicit about just what is expected of our team. We had thought that a lead‑time of 3 days was enough to be clear that the cabin top was to be ready for spraying on Saturday morning. Well, it was, sort of, except for an area that needed more filler, then sanding right in the middle of one of the gutters. Luckily it could all be done in an hour. And much of the deck needed a very thorough wipe‑down with acetone to get rid of dirty hand or footprints. Some of the big flat areas to be sprayed needed a touch‑up of sanding to smooth off some dribbles of filler. All of this was done, but it took some cajoling by Sue and translating by Cris to get the men up to speed. We think they were looking forward to a change of pace down on the ground working on other bits and pieces of Ocelot.
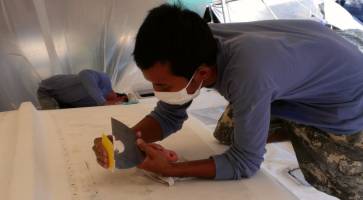 Nut making some emergency filler repairs |
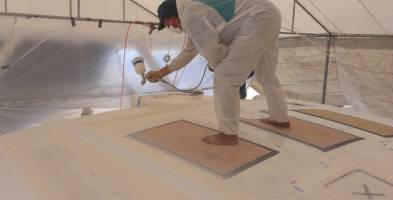
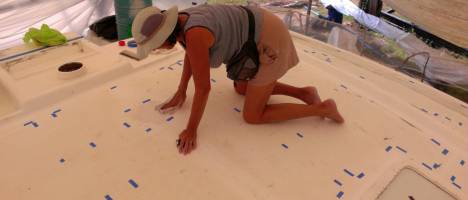 Sue cleaning the top with Acetone, the tape shows Mike where to spray |
We also learned that we need to know ahead of time exactly what areas will be sprayed (yes, we'll be doing this again, and again) so that we can be prepared with the masking. Amanda finished up the hatches and helm area, but we weren't quite prepared for the bigger areas. We hadn't wanted to mask yesterday for fear the wind would rip everything down in the night. We had some last‑minute trips to the hardware store for duct tape, blue tape, white masking tape and more cling wrap, and everything took longer than expected. To be fair, Mike from AME had shown us yesterday what he intended to spray, but then when we checked it out, it included some areas that were "not sure", meaning they didn't quite have the right curve or shape. No worries, when Mike arrived this morning before 9 (an amazing feat, given Phuket traffic) we went around the cabin top with him and Baw. Then Mike put blue tape on his intended borders and our guys cut and taped masking plastic underneath.
What we were spraying was the "gutters" - the smooth areas outside of where the nonskid will go. These gutters will get another good coat after the nonskid is stuck down, but Mike has found that he gets better results by shooting the gutters twice, once before the nonskid is down and once after. The top of the cabin will have 10 pieces of nonskid of varying shapes and sizes, and we wanted to spray a bit over the edge of the cabin‑top as well - about half way down our side windows, to the top of the front window, and just over the curve to the cockpit at the back.
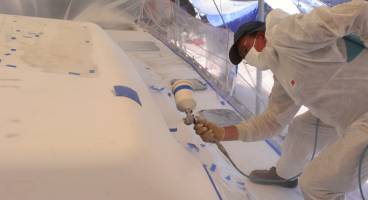 Mike spraying under the eves above the side windows |
 Middle of shoot - tape on near side has disappeared under gelcoat |
By late morning we had the compressor in place, gassed up, tested and ready to go. Mike had brought a couple pieces of thin plywood that were cut appropriately and stuck down to the cabin‑top to help Mike know where he could step. We took a 45‑minute early lunch, then at 1pm Mike was suited up, and he had his team of 3 AME guys ready in the cockpit to filter, mix, and add catalyst. Then, oops. No water‑trap. This is an in‑line filter that removes any moisture or contaminants from the air before it goes on to the spray‑gun. It had been forgotten up at Boat Lagoon. Too far to go to get it. Lesson learned: bring 2 of everything to a shoot! We had a water‑trap, but its seal was misaligned and it was leaking badly, so there was a bit of drama around that. Luckily Mike fiddled the seal back into place and he was off and spraying. Jon and Sue took turns being on deck to take photos or just help out, or being down below to baby‑sit the compressor and release its excess air pressure when it got above 130 psi (9 bar).
Mike wanted to shoot on 2‑3 layers of gelcoat, but it needed to go on "wet‑on‑wet" so he had to keep a wet leading edge. This kept him hopping around a bit, as he couldn't leave an area that still needed more coats for more than 15 minutes. He was using his big 4 mm gun, and filling it with about a quart (800ml). He could shoot that all out in 3‑4 minutes, and then it took his men another minute to reload the gun.
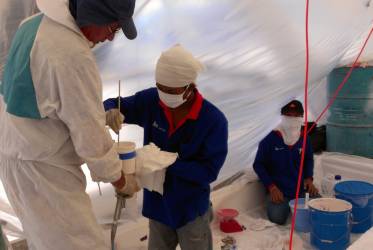 Refilling the gun - MEKP catalyst mixed directly into pot |
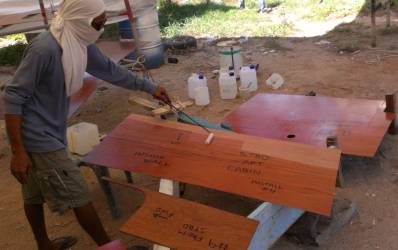 Water-proofing some of the new headliner boards with epoxy |
The entire project, spraying 100 square feet (10 square meters) of cabin top and a few more square meters of smooth deck in front of the helm took 22 lbs (10 kg) of gelcoat, and about 2 hours. Mike increased the mono‑styrene (thinner) from 1% to 3% to give us a bit more time between coats because it was such a hot, windy day. It worked out well, and when we went up on deck to check it out an hour after he was finished, it was already getting hard and looking beautiful. We are beginning to see a boat in our future!
Meanwhile our team (who all showed up today, as it's payday) was busy helping Houa with the headliner/plywood project. They got all the huge new pieces epoxy coated, and more cut out. The epoxy coating will help protect the thin plywood from water incursion should the hatches ever leak again, which should minimize any damage to the headliner.
Thai Refit:
Ocelot Pages:
Top Level: Home | Destinations | Cruising Info | Underwater | Boat Guests | Ocelot | Sue | Jon | Amanda | Chris | Site Map | Make a Comment
|
If our information is useful, you can help by making a donation |
Copyright © 2000‑ Contact: Jon and Sue Hacking -- HackingFamily.com, svOcelot.com. All rights reserved.