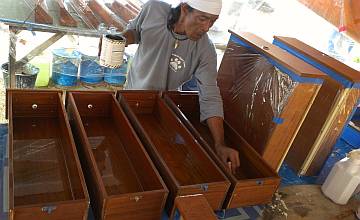
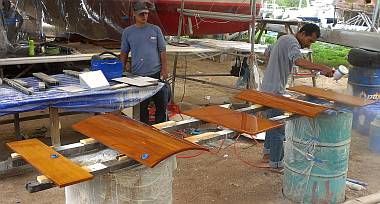
Lek brushes satin varnish on a set of long drawers
96 Start Deck Gelcoat
Summary: This week we tried to wrap up the varnishing so we could move to gelcoating the deck, between the nonskid panels. This week the team:
|
 Lek brushes satin varnish on a set of long drawers |
Monday, September 2:
A sunny start to the week, with the sandy yard pressed flat from the weekend rains, so the dust was less.
And less dust was good for the varnish projects which are, yes, still ongoing. We are so close to being finished with the doors and locker covers that it would be silly to stop the project here and move up onto the deck work. To that end, all 8 of the big people doors and about 8 small locker doors were passed up to the cockpit where they were lined up, awaiting hinge assembly and mounting. Sue located 2 of the 4 door stops which protect the cabin doors from banging the varnished bulkhead, but no sign of the other 2. <sigh> Another sign of being Golfed - The dis‑assemblers were just too casual and didn't give a darn about preserving items for later.
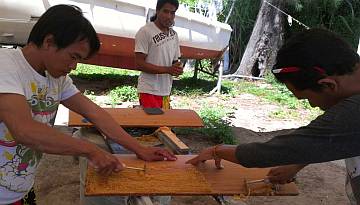 Scraping old varnish from the curved galley doors |
The Indonesians worked on a variety of small jobs. They finalized the last push button latches for silver painting and that got done. They sanded the salon drawers and bunk steps ready for Lek to brush a coat of satin varnish on them.
Pla worked with Baw to get the last items ready for a polyurethane spray. This was the bottom of the salon table and the ex‑topside, now bottom side of the nav table. We're happy to be able to turn it over, as the top surface was a bit pockmarked from 13 years of hard use.
We also took a close look at the 2 curved doors that fit on the end of the fridge peninsula, in the middle of the salon. They had several big stains which were sanded off, but which left 7 silver dollar‑sized places where the sun‑hit golden teak was worn down to the original red teak, so they were sort of spotty. At first Baw tried to do a lacquer paint repair on the colors, but after fiddling with it for several minutes, we all decided that to really make them look good, we should strip all the varnish. So the guys used chemical stripper and triangular scrapers to take back the years of varnish. Then Baw brushed on 2 coats of West System epoxy, wet on wet. This will darken them but give them a deep foundation, over which we'll put polyurethane varnish for strength, and a final coat of satin to match the other salon doors.
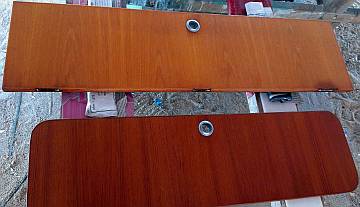 Teak that's been in the sun at the top, shaded teak below |
Not that everything matches. The surfaces and doors that have been exposed to the sun have a gold honey color, and those that were new teak or stripped back, or even out of the sun have a rich deep red teak look. But it's all beautiful.
Houa made good use of his planer today, turning good teak into expensive sawdust. After cutting the big teak planks into finer strips, he planed them down. Then he used the wooden template he made for the corners of the companionway door, and cut out the first big curves. Each corner is different (of course), but all fit the 4x4" (10x10 cm) block and curve. These will be carefully fitted to the needed radius, and then joined on the longer straight horizontal and vertical teak strips.
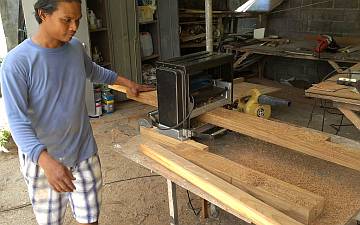 Houa planing down the teak for the entryway frame |
Jon was inside all day again, working on hanging lockers and doors. Sue was outdoor assistant, trying to keep things organized and cleaning up the corrosion on the hinges and handles. This was a satisfying, if finger abusing job, and yes, it could have been done all along the way, over the years, but it wasn't. At the end of the day Jon was disappointed to find a place with soft wood. This is in the bottom cabinet under the engine‑driven freezer (which we never use) and was possibly caused by condensed water dripping from the freezers years ago. Anyway, Houa came up to look and suggested several repair plans. Another job to keep him busy!
After dealing with the soft wood, Jon used the chance and the light to check on the pluming job that was done by Boy, a Thai worker we hired about a year ago for a week. We thought he was really good, as he was more interested in systems and the boat as a vessel, and he seemed like he knew what he was doing. Unfortunately, or fortunately, Jon checked some of his work today and found several problems that we'll now have to correct.
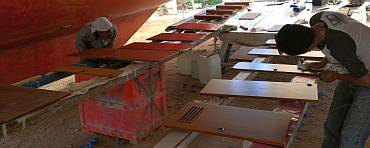 Lek and Baw check the quality of today's varnish |
Nyalic - NOT:
Sue had a dis‑heartening day in that we have decided to abandon the Nyalic completely. There is
just no way we can control the growth of the filiform corrosion under the coating on the 4 big aluminum
spars and all the spreaders and brackets. Places that had 3 coats of Nyalic applied in near‑perfect conditions of low humidity,
and no rain for days afterwards are now getting the characteristic white "worms" of corrosion
growing under the clear coating. It's not going to meet our criteria of having a clear beautiful finish
for years. At the rate the corrosion spreads, within a year we will have gray spars. So, lots and
lots of work and money down the drain.
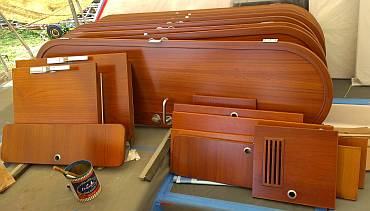 Beautifully varnished doors waiting to be installed |
We would like to send the forebeam, anchor support and accompanying brackets plus mast spreaders to the powder coaters where they can match our "Ocelot white" color. Problem is, the forebeam is 15'3" (4.65m) long. With powder coating, the dry paint powder is electrically charged and sprayed on the (oppositely charged) aluminum, and then the aluminum is baked in an oven where the powder melts onto the aluminum. Our powder coaters use a 13' (4m) long container as their oven, but the corner‑to‑corner distance is 15'9" (4.8m) so our forebeam should just fit, although they want to charge us an extra $60 to build a special bracket to hold it. Fair enough.
Before the parts are sand blasted we need to remove the Nyalic, to be sure there is none left to interfere with the powder coating system. So, Sue, Baw and Jon tested several chemical products to see about removing the Nyalic chemically. The acknowledged Nyalic remover is xylene, which is next to impossible to find in Phuket. So we tried local thinners and paint removers which may contain some xylene or a form of it. Mostly what happened was the Nyalic softened and smeared around. Baw proposed scraping it off with the triangular varnish scraper. Sue proposed just sanding it off, as we already know that works. It's just a lot of hand labor. Again. In the middle of this, Mike called to say that Wiwat had found xylene in Bangkok but we have to buy 8 liters all at once for $100. So we've now got that ordered, and hope it saves us some time. Even if the sand blasting prior to powder coating works to remove the Nyalic (which we guess it will, since we can hand sand it off) we still have to remove the Nyalic from the mast and boom, which are too big to be powder coated.
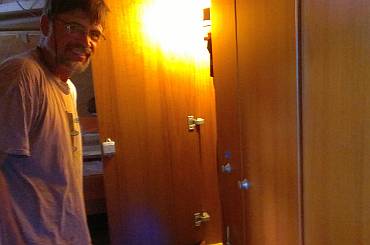 It always feels good to put something back on Ocelot |
We talked to Baw and he suggested a 3‑layer paint system for the mast and boom: a zinc‑chromate etch‑primer, an International 263 tie‑coat, and the final coat (probably International Perfection, but we're open to suggestions here as we've never done this before). We'll buy some cheap PVC pipe and plastic sheeting to build paint‑tents over the spars before spraying them. But that's still down the road a bit...
Tuesday, September 3:
A busy transition day as we wound down the varnish project and geared up for the deck work.
Hot and sunny with only a brief noontime shower.
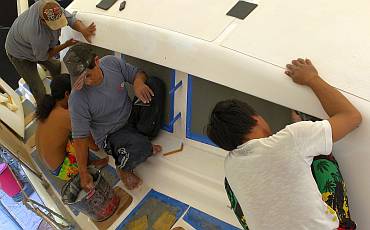 The guys preferred to work together, all on the starboard window |
The whole morning was spent finishing up the last of the varnishing project - well, the last for now, anyway. There's still the salon to do, as well as the floors. Baw got a beautiful polish on the larger section of the salon table and the smaller, bottom section, which are both coated in several layers of epoxy and then 3 coats of polyurethane which polishes up like glass. Sue wrapped the finished table pieces in brown protective paper as we won't mount them until the last minute so they don't get damaged. Baw directed the guys all morning, somehow still keeping track of which items were getting what sort of treatment and how far along they all are. Quite a feat! Baw left at mid‑day which he had warned us about last week, but we forgot (in other words, Sue wasted a bit of emotional energy being annoyed, when she needn't have been!)
The 2 curved locker doors from the salon are the farthest behind as we took them back to bare wood yesterday. So the guys sanded their epoxy undercoats, and in the afternoon Lek got a layer of gloss varnish on them. The drawers in the salon and the big drawers under aft bunks also got attention - after being sanded in the morning they all got more satin varnish.
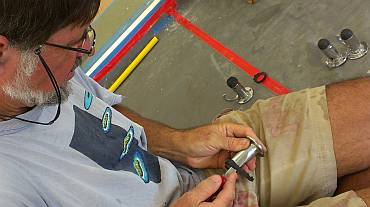 Jon whittling some new rubber bumpers door-stops |
Sue spent the day detailing bits of door hardware and hinges, cleaning, brushing, lightly sanding. Half an hour before lunch the guys were all finished their sanding projects and so she roped them into detailing the hinges and door latches on the people doors. Baw remarked that we should take off the hinges and polish them, but we refused. Too easy to take off, too long to put on, and the varnishing is done, so nothing gained.
With Baw gone after lunch, it was up to us to direct the guys where to work. So we sent them to the deck, and showed them the areas above the windows that never had their first gelcoat sanded (it's still nubbly and slippery with wax). We thought they would work 2 and 2 on port and starboard, but strangely we found all 4 guys bunched up together on starboard, sanding the gutters between nonskid and the tough "new" gelcoat. This new stuff has to be well sanded before it's sprayed again, or else the new gelcoat won't stick. Critical work! Tomorrow we hope Baw will be more hands‑on and directive. With luck, we'll have all day tomorrow sanding and preparing the cabin top and maybe Baw can spray the new gelcoat on Thursday. Can we say Optimist?
Jon was still sweating away on the locker doors. Sounds a bit like a broken record, but don't forget, we have over 50 teak doors to install. Each door has 2‑3 hinges, and each hinge has 3 different adjustments to check!
Sue finally found the 4 door‑stops, hidden behind some plastic masking in the starboard forward cabin, along with a couple of tools we've been looking for. The door‑stops have hinged hooks to hold the door open, and rubber bumpers so the doors don't get damaged, but 2 of the rubber bumpers had gotten lost. So Jon went on a scavenger hunt, found some rubber that was a bit softer but should work, pulled out his trusty Swiss Army Knife and whittled out 2 bumpers about the size of the end of your thumb. Only a close inspection would reveal that they aren't original, and those door‑stops live in the shadows.
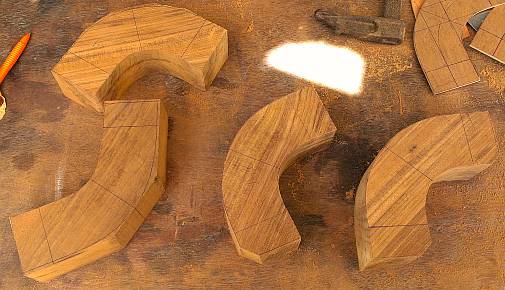 The raw teak beams cut into crude corners for the entryway |
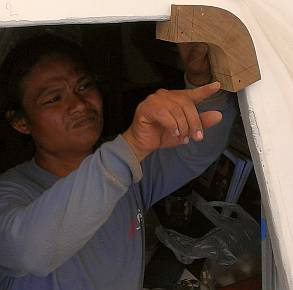 This is where Houa got to today - fitted corners |
The afternoon project was a bit more engineering than door fitting. We found a jammed latch on one of the head doors. It was broken in the "locked" position which would have been very bad news for anyone in the head at the time. When Jon pulled it apart he realized that if this happens again to any of the door locks we'll have to break the teak door down to let the person out. There is no way to fix the problem once it happens without taking the whole mechanism apart, and it can only be removed from the door by taking it out the edge. Sounds like we should inspect the other 7 doors before we install them.
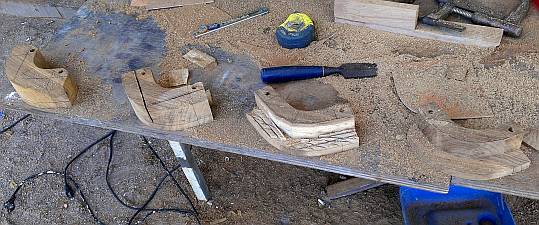 But first the crude corners had to have their insides cut away with a circular saw ... |
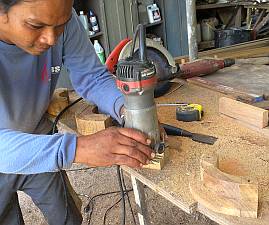 ... and then cleaned up with a router |
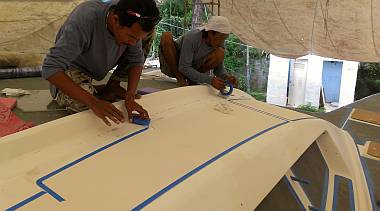 Carefully masking nonskid - gelcoat will come right to the edge |
Houa got some interesting work done today. He transformed his big teak board into 4 gracefully curved "boomerang" shaped corner pieces, each 3" (7 cm) thick, but with cutouts so they fit the 4 different corners of the companionway. The original entryway frame was built of teak strips laminated into a single‑piece frame, but that requires making an exact mold. Houa is building this frame from solid teak, with the corners epoxied to the straight sides. The bottom 2 corner pieces need squared off cutouts, but the top 2 need rounded cutouts. The initial course cuts were made with his circular saw, but then he cleaned them up with his router. It involved a lot of sawing and routing, fitting, checking, more router work and sanding. He feels he's almost done with the corners, so the next thing will be to make the easier straight sections that join them all. But first, he says, the sliding entryway door has to come back out. We know the door frame still needs to have silicone sealant around it, but apparently it also needs to come out for this teak work. We sure hope this is the last time it's got to be taken out.
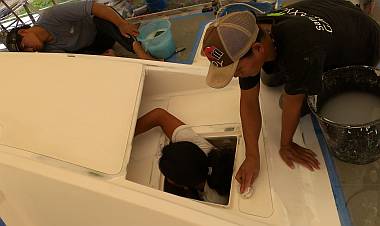 Pla, Chandron, & Heru sanding & cleaning around the nonskid |
Wednesday, September 4:
Impossible that the week is half over. Where does the time go? The seasons are changing.
We had a breeze from the Northwest, then the Northeast, then no breeze, then a big rain cloud with
no rain.
It was hotter than hot where the men were working today. They were 10' (3m) up on Ocelot's deck, under our big white tent, and the temperature soared to over 100°F (38°C). They had our big fan going, but that barely covered a quarter of the deck and cabin‑top. We had Baw and all 5 men up there sanding and cleaning, getting ready for a gelcoat spray later this week. We were happy to see the new guys (well, Heru and his friends are new to gelcoat deck preparation on Ocelot, anyway) dove right in. Chambron climbed down into the portside new tank locker (in which he barely fits) to sand up under the "eyebrow" where the gelcoat was still waxy and bumpy. Heru and Yando were also seen lying on their sides and backs to attack the hard‑to‑get‑to areas above the windows, over the louvers.
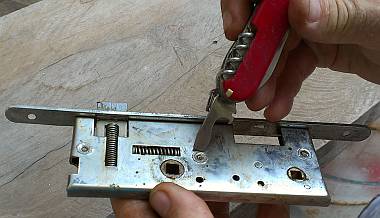 The specialized captive nut that caused the lock failure |
Baw also cleaned and sanded, then went out on a masking supplies run with Lek. It takes 2 guys to transport 4 rolls of plastic and a big bag of tapes on a scooter. Normally Sue does the supply errands, but she hasn't yet learned to ride with a 5' (1.5m) roll of plastic, let alone 4 of them! Baw and Lek spent the afternoon stringing up a new spider‑web of plastic ropes which will hold the plastic sheet (masking) for the gelcoat spray. Sometimes they can re‑use old masking ropes, but usually the area to be sprayed is not quite the same as earlier ones, so the placement of the masking varies with the job.
Jon played locksmith all day, painstakingly extracting the locks from the bathroom doors, making
sure they won't break like the last one (which involves some quality time with a hammer and punch),
inspecting and servicing them, and putting them back in the doors. He also lent a hand to Sue
and her project of replacing the drawer slides for the companionway drawers. Of course, while
Sue might have spent an hour organizing, cleaning, sorting and mounting the slides, it was Jon who
got in the picture, because Sue was free to take one.![]()
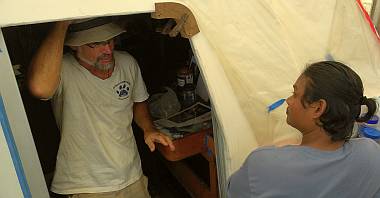 Discussing door height - & the floor will raise Jon 1.5" (40mm) |
Houa continued the shaping, sizing and checking of the big teak corner blocks for the companionway trim. The teak will protrude into the doorway about 3/4" (20mm) on each side, and will be flush with the aluminum door frame at the bottom. But at the top, Houa was planning to have the same 3/4" of teak, and we asked him please to make it less. The doorway is already not full height, so we have to duck every time we go through it. Making it a bit higher will save us (and visitors) several painful head‑bumps as we go through.
We're on the verge of saying "Yes" to having the forebeam and anchor support bracket powder coated, but are now concerned that the local company does not do any sort of primer or etching coat under their powder coat. They claim that their process of cleaning and the actual coating ensures a good bond with the aluminum. Any experience out there? Can't seem to find much hard data about the relative longevity of powder coating aluminum vs. the traditional etch‑primer and 2‑part topcoat.
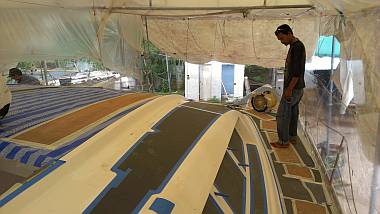 Baw will spray the white, black is masked nonskid & windows |
Thursday, September 5:
Oh dear, the rainy season is upon us once again, after a week of night showers today we got the
daytime deluge. And more to come this week.
Bad timing on the weather, as we are gearing up for the first of the final gelcoat sprays. Mike will be coming by to advise and supervise, and we've got him on alert for tomorrow morning. But the weather forecast is for 6 hours of rain with up to 1/8" (3mm) per hour. Yikes!
The forecast is often wrong so today we just moved ahead as though we'll be able to spray. The whole day was spent masking the decks and building a spray tent on Ocelot's deck, over her cabin‑top. Yando was not here, so we had Baw, Pla, Chambron and Heru working in the heat and high humidity with rolls of cling plastic, duct tape and white masking tape, and bits of plastic string. For a while we had both Chambron and Baw perched high in the tent rafters to set the new strings for the spray tent ceiling. The object of the exercise is to spray gelcoat on the areas between the nonskid panels, so down on deck they used blue tape and thick vinyl to mask the exact edge of the nonskid panels.
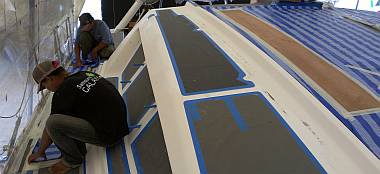 Heru and Pla masking off the deck, where Baw will walk |
It's really up to Baw what areas he wants to spray when. He's decided to tackle some of the hardest areas first, but they're not very big. He'll be spraying the 2 sides of the cabin‑top, but not the center (easy) part. This means he'll shoot the whole new tank areas and the "eyebrow" areas (including underneath the step) then on back to the cockpit bulkhead. He'll work from the side ridge down over the cabin top to the side windows and up under the eave, all the way down to the deck. Complicated stuff. The plan is to spray from the deck up onto the horizontal surface and not have to walk up on the cabin top at all, doing all of one side before moving to the other. Where to walk when spraying is a big deal, as the overspray from the gun makes the "floor" sticky, and so your feet get stuck. The guys taped down big pieces of plywood over the protective vinyl so that Baw will be able to lift his feet without lifting the vinyl or plastic up, too. Fingers crossed for a long sun‑break tomorrow!
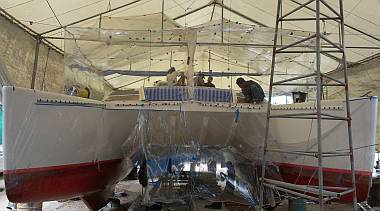 The (spray) tent within a tent over Ocelot's cabin-top |
Jon also worked up in the heat and high humidity, but he was tucked down in the port passageway working on some plumbing issues. It was definitely not as straightforward to fix as he had hoped. When he got stymied he went back to hanging cupboard doors. We thought we had worked out where they all go, but there's some ambiguity so he ended up mounting some, realizing that there's no way he could adjust the hinges to make them fit, and then swapping them with others the same size and orientation. Although he made progress, he ended the day a bit frustrated. But the good news is that our hinges have arrived from Bangkok so we can pick them up the next time we're in town.
Houa got the long straight companionway frame pieces cut and shaped. Tomorrow (if we're not spraying gelcoat) he will fit them into place for some last minute tweaks before epoxying the whole frame and its corners together. It's going to look awesome. Our challenge will be to stay firm that we do NOT want it varnished. We know Baw will push for varnish (teasingly) because it will be so beautiful! We let them bully us into varnishing the cockpit table (despite our rule against outdoor varnish, which is a maintenance headache) but we can cover the table and we can't cover the door. We told Baw that it won't stay beautiful very long in the sun and UV. But he said "No promplem! I come repair!"
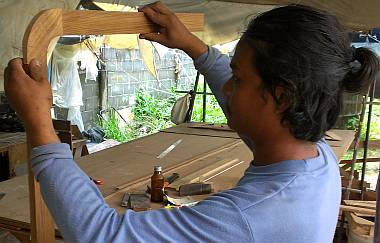 Houa fitting together the teak pieces for his entryway frame |
Sue got the last of the cabin and head doors wrapped up and carted off to the store room before the rain hit, and she even got some errands run as well. Then the rain caught her at the bank, and it was so heavy she had to hole up for awhile. The rain kept her from getting to the big paint stores in town to find aluminum primer for the spars. Probably have to wait until Monday now, with all the rain forecast for tomorrow.
Lek was our one‑man varnish team all day, working alone down under Ocelot in the cooling breeze. We have 5 locker doors that fell a bit behind the masses because they were taken all the way back to bare wood and needed a lot more attention and layers put back on. They are now nearing completion of their 5 coats of Epifanes gloss on each side. So Lek was both sanding the last coat and adding new ones. Once the gloss is done these 5, plus the 4 bunk steps, will all be sprayed with their final 2 coats of satin. Ever the optimist, Baw suggested that if it's too rainy for gelcoat he can still spray the satin varnish.
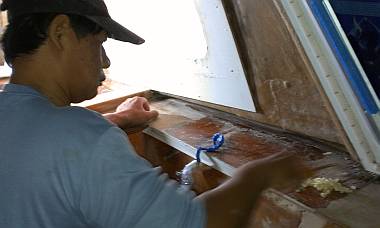 Pla removing varnish from the port forward salon |
Friday, September 6:
The week draws to a close with a major downpour in the morning and rain again at day's end.
The rain meant that we couldn't follow through with our plan to spray gelcoat on the deck today. Frustrating. But nothing to do. It's the weather. We checked the weather gauge on deck just before 9am and had over 89% humidity with a temperature of only 78°F (26°C). No way could we spray gelcoat. So Baw got the men working on a variety of tasks. Baw himself finalized the plastic housing in which he will spray. We spent the rest of the day sort of doing a lie‑down limbo under the plastic ropes to get into the boat. All that plastic also made it really hot and airless up there.
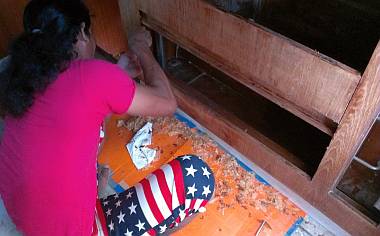 Chambron stripping varnish from under the nav-desk |
Pla and Heru and later Chambron all took turns working in the salon stripping bad varnish from the shelf near the anchor control and under the nav‑desk. These places have gotten too much water on them over the years and the teak under the varnish has turned dark. By stripping the varnish back we can assess the condition of the teak or veneer. Conclusion: both areas are redeemable with a nice sanding and new layers of varnish built up from scratch. Actually both areas might get epoxy first, and then polyurethane which creates a much more water‑proof and durable surface in these high‑wear areas.
Houa may have spent some time on the door frame, but probably not for long up on deck, given all the plastic and awkwardness of crawling under the ropes. His main job was to lay out and cut the newly made plywood/veneer composite (which has already been epoxy protected) and get those trapezoidal shapes trimmed, sanded and fitted into place. He finished starboard and still had some trimming to do on port.
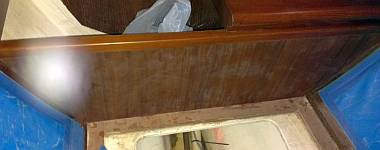 Put some varnish on Houa's teak facade & it will look beautiful! |
Jon and Sue spent the day in gelcoat school. The problem is that Baw doesn't like Mike's ratios of catalyst and monostyrene, as it makes for a rather thick mixture that doesn't spray through Baw's small 1.8mm gun very well, and it tends to make a bumpy final surface that's difficult to sand smooth. Of major concern was trying to figure out why Baw has been getting some areas still sticky after the spray, and Mike never has. We know Baw has sometimes thinned the gelcoat with additional monostyrene to make it spray better through his smaller gun. Baw's response to the question of how to avoid a sticky final product is to add more mono‑wax. Mike is not in favor of this, as the gelcoat comes to us from the manufacturer with the appropriate amount of mono‑wax already in it. Apparently this is now standard with modern gelcoats, but Baw is still used to the older products available locally.
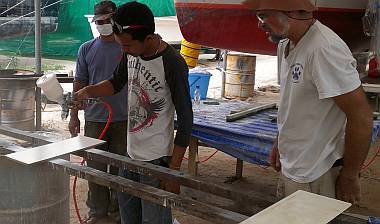 Our first test spray, with Mike's 2.5mm gun behaving badly |
Mike was actually at the neighboring boatyard waiting for his workers to arrive so Jon walked over there and talked to him about appropriate gelcoat percentages for catalyst, monostyrene, and mono‑wax. Jon wanted to know how they all interact with each other, and what happens to the cure time if you add more monostyrene to make a thinner gelcoat mixture for spraying. Monostyrene thins the mixture but also slows the reaction, requiring more catalyst. Mike likes 3.5‑5% monostyrene with 0.7‑0.8% catalyst (MEKP) to give a 10‑20 minute pot life, but he said we could go as high as 6% monostyrene and 1% catalyst if we wanted, and that should thin the gelcoat for Baw's gun.
Mike also let us use his 2.5mm gun if we want. This should help a lot, and make the job go much faster as well, as it can spray the gelcoat much faster than Baw's gun.
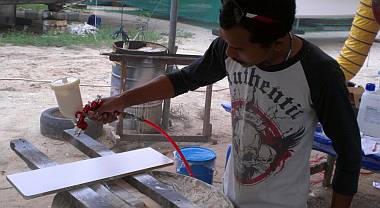 Our second set of test sprays, with Baw's smaller 1.8mm gun |
Lunch time brought high clouds and a much brighter sky. The heat rose and the relative humidity plunged to an acceptable 54%. No rain on the horizon, so should be fine for spraying gelcoat. At first we talked with Baw and got ready for the deck spray. But then we learned that Mike had prior commitments and couldn't join us, so we were on our own. That got us thinking. Did we really want to risk spraying the deck by ourselves when there was so much discussion about curing times, percentages of components, hardness, etc?
After much debating the pros and cons, we decided the best thing to do was to have Baw spray a few test patches. We created 2 test runs, both with Mike's higher levels of monostyrene and catalyst but one with additional mono‑wax as well. As we got everything set up we realized the 2.5mm gelcoat gun we're renting from Mike had been given to us without the high pressure hose fitting. Add 10 minutes for a hardware store run to buy a 75¢ part. Once we got everything ready and Baw began to spray, it was obvious something was not right. The gun was spraying gelcoat in pulses, not smoothly. Poor Baw fiddled with every control on the gun trying different combination to make it smooth out. No luck. He went ahead with the second test with the mono‑wax anyway, as we were interested primarily in the curing aspects. We were distressed over the gun's action, but totally relieved that Jon had insisted on a test run. How awful if we had been spraying our carefully prepared deck and gotten these big uneven globs of gelcoat!
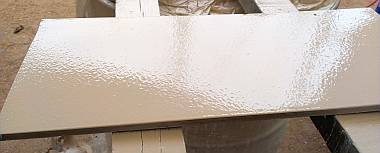 Mike's 2.5mm gun produced a blotchy, spattered final surface |
After that second spray, Jon worked with Baw to strip and meticulously clean the 2.5mm gun. At first it seemed there was nothing visibly wrong with it that would cause the pulsing, but finally Jon discovered that the big needle that pulls back and forth with the trigger and lets the gelcoat out was curved just enough that it didn't slide evenly in and out of the nozzle hole. In contrast, the needle on Baw's own 1.8mm gun is visibly straighter as it slides out of the nozzle hole. This was distressing, as we had planned to use the bigger gun to allow us to get more gelcoat on the decks, to build up a good thick layer around the nonskid panels. We have never been happy using Baw's smaller gun because it wants more monostyrene to thin the gelcoat (gelcoat is much thicker than paint) and it would take a really long time, or a lot of passes to spray the desired 1.4‑1.5mm layer of gelcoat. So, what next? We decided to test our current gelcoat mixture (same percentages of mono‑styrene and catalyst, with and without wax) but this time using Baw's 1.8mm gun.
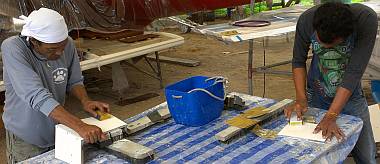 Lek and Baw polishing the test sprays the next morning |
Pla cleaned up another couple pieces of formica‑covered plywood for us to spray, and we got the compressor going again. The mixture sprayed smoothly out of the smaller gun, and Baw was comfortable making 6‑7 passes over the same small area, trying to lay down a thick‑enough coat. We finished all the tests just before 5pm when rain was threatening again. At that time (about 90 minutes after the first spray tests) both tests with the 2.5 gun were curing nicely, although there was a definite surface difference - the one with extra mono‑wax felt waxy and the other one was still tacky. The 2 latest sprays with the smaller gun were too wet to determine anything but they were noticeably smoother than the tests with the pulsing 2.5mm gun. Tomorrow morning will reveal the final overnight results of the tests -- not only their hardness, but also their surface texture.
Saturday, September 7:
A great end to the week, with new gelcoat getting sprayed on the cabin‑top! The weather stayed
hot and muggy, with the humidity over 80% in the early morning, but dropping below 60% by midday, which let us
spray.
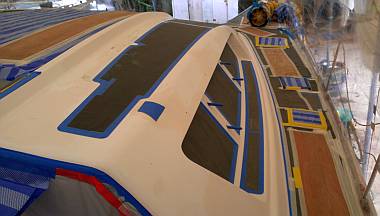 The "before" shot - masked and cleaned in the plastic tent |
The first order of business was to check the results of yesterday's gelcoat test sprays. As expected, the gelcoat sprayed from the faulty, pulsing 2.5mm gun was bumpy and sported many craters in the surface. The 2 panels done with the 1.8mm gun were much smoother. Interestingly, the 2 sprays (both guns) that had no wax added were tacky to the touch, even after curing for the night, and scratched easily. When we peeled a bit off (they were all done over Formica, so not a very adhering substrate) the no‑wax samples were soft and pliable, almost like rubber. The waxed samples broke apart, but were very tough. Highest points went to the wax‑added gelcoat sprayed from Baw's 1.8mm gun.
Next, we checked the thickness of the gelcoat layers put on by the 2 different guns with Jon's calipers. Result: 7 passes with the 1.8mm gun gave a dried layer of .020" (.5mm) or about half of what we want. The same 7 passes with the 2.5mm gun gave a layer almost twice as thick. Since gelcoat (unlike paint) gets sanded and polished after spraying, you have to start with somewhat more than you plan to end up with. A good rule of thumb is to have about 1.2mm (dry) which will sand down (if well done) to about 0.7‑0.9mm when finished. Even 0.5mm at the end is OK but the thinner film is less desirable.
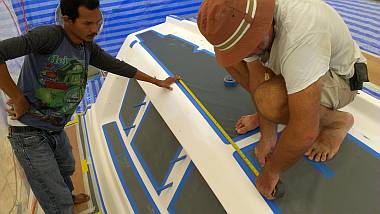 Marking off 1 square meter sections to help gauge progress |
To check the feasibility of using the smaller gun we asked Baw and Lek to polish the 2 wax‑added samples. Lek sanded the sample from the 2.5mm gun using sandpaper grits of 240, 400, 800, 1200 and 2000. Baw sanded the sample from the 1.8mm gun but could start with the finer grit due to the finer textured surface. He used grits of 400, 800, 1200 and 2000. Both polished up beautifully (although we'll use finer steps on the deck). Mainly we learned that that the guys sanded away about .012" (0.2mm) from each sample. If we want to end up with 1mm of gelcoat then we need to aim for a spray that will put on 1.2mm.
Another gelcoat rule of thumb is that to get a dried thickness of about 1.0 mm, you need to spray about 1 kg of gelcoat on each square meter. Having decided that the 2.5mm gun was useless to us, and that Baw would have to spray with his 1.8mm gun (which he prefers anyway) we realized that he would have to make about 15 to 20 passes with his gun over each area in order to get the desired thickness put on. Using the bigger nozzle gun means more gelcoat is laid down at each pass, so the whole things goes faster, which is why we'd have preferred to use the 2.5mm gun, but not while it's acting up. In order to keep track of how much gelcoat Baw was getting on the deck, Baw, Jon and Sue took measurements of the exact area he intended to spray, then marked off the square meters as linear distance down the deck. We put blue tape markers along the deck on the protective vinyl so Baw could see how far along he was.
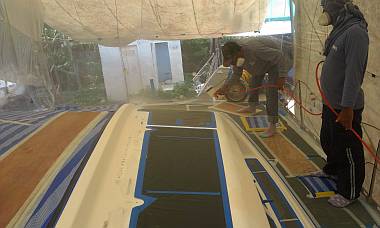 Baw started at the front and worked back - note 1 sq-m tape lines |
Baw assured us he could spray 1kg/square‑meter even with the small gun, but he preferred to work in 2 square meter sections, as he couldn't keep going over and over an area for 20 passes all at once or he would get runs and sags. Fair enough. We figured that with the added monostyrene in the mix (to keep it thin enough for the small nozzle gun) we had about 20 minutes before the gelcoat gelled to the extent that it was too far gone to be successfully sprayed over. (When Mike has used his 4.0mm gun, with half the styrene we were using, he figured 10 minutes before the re‑spray deadline.)
So, with the gelcoat mixing table all set up, the deck marked in 1 square meter sections and already wiped clean again this morning, we took a break for an early lunch. By 1:30 we had the compressor chugging away happily, and Pla doing a final acetone wipe to the deck. No way were we risking another gelcoat-coming-off-too-easily disaster like we had in January. Baw and Pla then donned Darth Vader masks, socks, and long sleeves for protection. Jon and Sue oversaw the weighing of the gelcoat and the addition of the exact amounts of monostyrene and monowax. Baw said he wanted to use a bit less monowax than we had used on our test run, which was fine with us - Baw seems to have an intuitive sense about how much to use. The gelcoat failures we've had have generally been because we asked him to follow a different formula, so this time we're letting him call the shots. Baw decided he wanted to put 1/3kg (3/4 lb) into his gun each time.
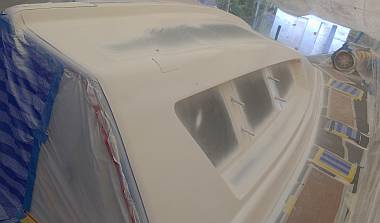 After all the shootin' is over - now the polishing work can begin |
Lek filtered the gelcoat mix through a lady's stocking, then set himself up on the cockpit side bench ready to fill the gun as soon as Baw emptied it, and to mix in the appropriate catalyst amount. Heru got the compressor running, then babysat it throughout the spray, and Chambron hung out aft of the plastic tent, helping guide the high pressure air hose in and out of the tent as needed. Jon stationed himself inside the plastic tent to help Baw be aware of how many pots he had sprayed, how far along he should be, how long things were taking, and to take pictures. Sue sat outside the tent (in much fresher air) to record the number of pots and help orchestrate things outside the spray area. A very coordinated and smoothly running effort.
Even with our big fan blowing fresh air into the spray tent and our extractor fan sucking gelcoat overspray out, the temperatures in the tent were a skimming 99°F (37°C), but the humidity had dropped to 50%. Baw sprayed 7kg (15.4 lbs) of gelcoat on those 6 square meters in 90 minutes. He averaged 3‑4 minutes per pot, and Lek took about a minute to reload it each time. We ended up with a nicely coated starboard cabin‑top, all the way down to the deck, and forward to the front of the eyebrow. Way cool! Well, way hot under that tent!
 Baw still had energy to spray 11 more pieces of teak! |
Houa was sort of the odd man out during all of this. Not that he couldn't have participated, but we prefer him to continue doing his many woodworking projects. Since he couldn't work on the boat itself with all the gelcoat spraying, Houa picked up an old project which was about 80% finished ‑‑ making 25 teak pads for our new aluminum mast steps. He got the 25 new ones cut and sanded, with a couple of grooves cut in them to improve traction.
Amazingly, after all the gelcoat work and the gun cleaning and project clean up, Baw had the energy to lay out and spray a satin varnish layer on 11 loose teak pieces that were arrayed underneath Ocelot. It's fun to see that project slowly disappearing. Of the loose pieces, we think only the bookshelves and the floorboards remain.
It's an Ao‑Po Sumptuous‑Villa weekend for us, so we're off to northern Phuket for some good food, good fun, great folks and maybe an adventure. Who knows? Happy Saturday afternoon!
Thai Refit:
Ocelot Pages:
Top Level: Home | Destinations | Cruising Info | Underwater | Boat Guests | Ocelot | Sue | Jon | Amanda | Chris | Site Map | Make a Comment
|
If our information is useful, you can help by making a donation |
Copyright © 2000‑ Contact: Jon and Sue Hacking -- HackingFamily.com, svOcelot.com. All rights reserved.