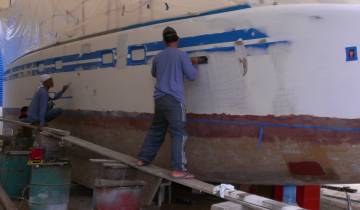
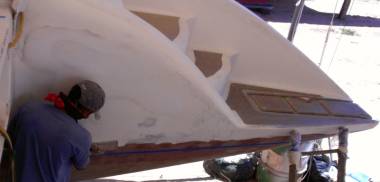
Nut, Lek, & Pla fairing port topsides, preparing it for gelcoat
69 Spray Portside
 Nut, Lek, & Pla fairing port topsides, preparing it for gelcoat |
Summary: A good week as we made visible progress on several fronts despite Sue being out with a head cold for much of the week and Amanda having to fly to Penang to renew her visa. The port topsides were filled and faired smooth, masked, scaffolded, and shot with 30 kg (66 lbs) of gelcoat, which was then completely wet‑sanded with 360 grit. It needs some touch‑up re‑spray but it's looking nice. Mike also gelcoated the nonskid gutters on the starboard side‑deck while the guys wet‑sanded the starboard topsides to 400. The bulk of the prep‑work happened between the hulls and by the end of the week it had all been filled and faired smooth and the gelcoat line marked, with new filler around the emergency hatches and the trampoline holders. The big news was that we got the new rudder bearings machined, aligned and epoxied in place, with release tape around them to facilitate removal. Houa made good progress in the aft cabins, replacing some water‑damaged wood, remounting the headliner supports, building a new bed to repair the whale‑damaged one and extending both aft beds a few inches. Jon completed several small jobs - a drain‑hole in the port topsides was found and opened up, 6 drain‑holes were de‑cored and filled, several tools were repaired, and much of the starboard gelcoat lip was faired. Sue and Amanda put in lots of time polishing the mast, and Amanda chipped back some gelcoat that wasn't adhering correctly on the port sugar‑scoop.
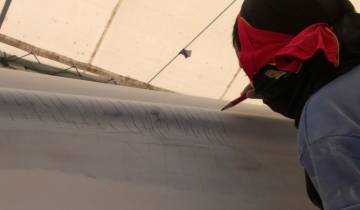 Nut marking the tramp holder so he knows where he's sanded |
Monday, February 25:
Rain drizzled down all day today, our first rain during the work day in ages. Forecast says
more rain is due, which unfortunately signals a changing of the seasons. We've become
accustomed to this never‑ending string of beautiful days.
Sue has a bad head cold so she stayed home today, and Amanda is in Penang, Malaysia, getting a new Thai visa, so Jon had to hold down the fort by himself.
The day started with Jack trying to explain that he thought we'd said the port topsides were fine early last week, but that Baw disagreed. Jon had to explain that he didn't understand what Jack was asking then, and that we depend on them to tell us when something is finished. Jon explained that for sanding and finish work, they are the experts, not us, and that it was our fault for misunderstanding. It took some time, as Jack's English, while better than our Thai, isn't very good. But after that the men all happily worked with Baw on the port topsides (when they appeared to be shunning Baw on Saturday). So a good start to the day.
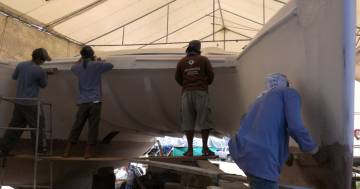 Pla, Jack, Yoong & Lek working between the bows |
Chai never showed up today but everyone else (except Houa) started out on the port topsides, sanding down the filler Baw had put there on Saturday. By the end of the day it was looking very nice and Baw pronounced it ready for gelcoat. Then the guys taped and masked everything off with plastic. They also rearranged the scaffolding (to give a grandiose name to various boards balanced precariously on several rusty old steel drums) to give Mike some better footing. Now the question is: will the rain let Mike spray tomorrow?
Then the guys moved back to the area between the bows, smoothing down the filler they'd smeared under the trampoline holders. Ocelot's bridge‑deck (between the hulls) isn't seen by many folks, but it's a complicated area with many nooks and crannies. It's a bit of a pain to sand, and probably more of a pain to spray, which is probably why it's being left until last.
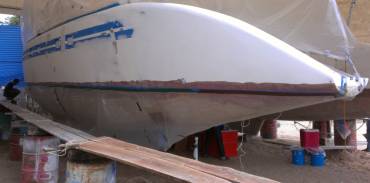 Port topsides masked and ready for spraying with gelcoat |
Houa was working in the starboard aft (guest) cabin, replacing some bits of plywood that had been damaged by water leaking through the decks at the rearmost stanchion base (really, what passes for a pushpit on Ocelot). Those screws have apparently been leaking for some time, as the balsa in the deck right there was completely waterlogged. The foam was removed from that area when we re‑laid the deck, and replaced with epoxy filler. When we replace the pushpits, we'll tap the screws going through the epoxy filler and bed them in with silicone, which should be much stronger and will certainly stop any more leaks.
The aft cabins have always been just a smidge short for us, but now that we have the wall panels off, Jon noticed that the wall panels closest to the cockpit are actually spaced several inches away from the walls! So Jon asked Houa to remove the spacers, which should give us an extra 2‑3" (5‑8cm) of legroom when lying on the bed.
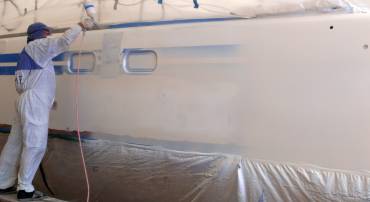 Mike sprays several layers, keeping track with 1m marks |
Jon spent much of the day trying to decide how to mount the rudder bearings. They'll be set into phenolic‑epoxy mud but we want to prevent the bearings from spinning. Jon eventually decided to have 2 flats machined into the sides of the bearings. This should prevent them from spinning while still allowing us to remove them relatively easily if/when they need replacing. The forward sides of the bearings shouldn't have any load, so we'll mount the flats on the forward side. Then he whipped up a quick drawing of what he wanted on a bit of cardboard and took it and the bearings to our local machine shop. They don't speak much English, but they understood the drawing instantly. The bearings should be ready tomorrow.
Tuesday, February 26:
After the constant drizzle all day yesterday, we were concerned that our planned gelcoat shoot would
be rained out. The day dawned with high overcast but bits of blue in the distance, and what
passes for a weather forecast was saying no rain until 7pm. Mike called us at 7:30am and we
decided to go for it. Turned out to be a good decision.
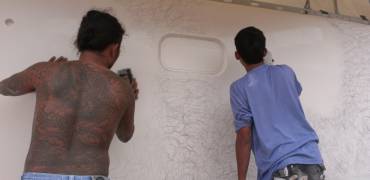 Chai & Nut sanding stbd topsides, pencil tells where to sand |
The guys had done most of the masking yesterday and made a nice scaffold for Mike to walk on, but there was a bit of sanding that Baw wanted Nut to do. That went quickly but then Jon realized that a cockpit drain that should come out of the port topsides wasn't there! In their haste to smooth the hull, the guys had filled in this necessary hole! There followed a mad scramble to find where this PVC drain‑pipe should come out. It's often very difficult to find exactly where a point is on both the inside and the outside of the hull, as there are seldom any common reference points. Jon eventually drilled a test‑hole, hit the edge of the pipe, drilled a second hole and hit the center of the hole. Then he opened up the hole to the ID of the pipe. It will need a little post-gelcoat touch‑up to fill Jon's first hole, but it shouldn't be a problem.
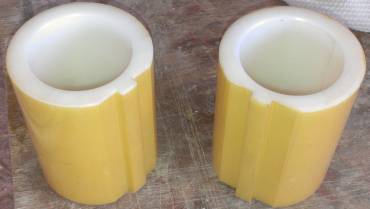 New rudder bearings, with flats cut & wrapped in release tape |
Mike and the AME team arrived about 10, set themselves up, and Mike started spraying gelcoat at 11. The starboard topsides took Mike 4 hours but port went faster, and Mike was finished by 2:15 (with a trainee/helper spraying the final hour or so because Mike wasn't feeling well). Two bugs crawled onto the wet gelcoat, each making a small bit of a mess, and we found a few dips in the hull that will need more attention, but the shoot went reasonably well.
Surprisingly, on starboard, the phenolic‑epoxy at the waterline disappeared pretty easily but the blue stripes were much harder to cover. But on port the reverse was true - Mike found the blue stripes easy to cover but the phenolic down at the waterline was much harder to make disappear.
While Mike was spraying port topsides, our team was back to wet‑sanding the starboard topsides. They finished with 320 grit and moved on to 400. It's starting to look nice - very exciting!
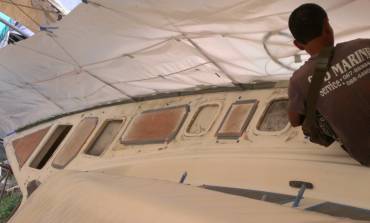 Starboard side-deck prepared with plywood foot-pads |
Houa was working in the port‑aft cabin, replacing the headliner supports. The bed in this cabin fell down a couple inches when the whale whomped us in the Mozambique Channel in 2007. Much of the wood has been cut out and now needs to be replaced.
Jon collected our rudder bearings from the machine‑shop. They did a good job cutting 2 flats into each one, just like we wanted. Jon wrapped the outsides of the bearings in ordinary packing tape. It turns out that epoxy doesn't stick to this tape! By wrapping the outside of the bearings, we hope to be able to remove them if they ever need replacing.
Wednesday, February 27:
Another gelcoat spray-day! Sue's still under the weather with a chest cold, but Amanda flew back from
Penang last night, so Jon had her company at the boatyard.
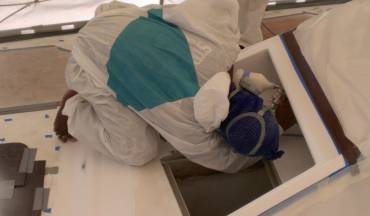 P'Wat fits into places that Mike really doesn't |
Today the starboard side‑deck was to be sprayed. Unfortunately, Baw and his normal partner Nut were both absent today, and they were the ones who prepared the area to be sprayed. But when we were doing our last‑minute masking, we found that there was still a bit of work to do up there. Some areas were only rough‑sanded, and the whole deck was dirty with footprints. The other 5 guys were not happy going up top to repair what they considered Baw's job, but when Jon told them to go, they went.
We eventually ended up hand sanding the entire starboard side‑deck with 120 grit, per Mike's suggestion. This removed all of the greasy footprints. Then the whole area was blown clean, masked, and wiped down with acetone. Several plywood sheets were taped down to the deck as safe areas for Mike to step (these areas will be covered with antiskid later). Amanda marked the edge of where the antiskid will go with blue tape and then the whole deck got another acetone wipe before Mike proclaimed it ready to be sprayed. Since it was now almost noon, we decided to break for a short lunch before starting. The sky was still clear of rain, but we didn't want to tempt the weather.
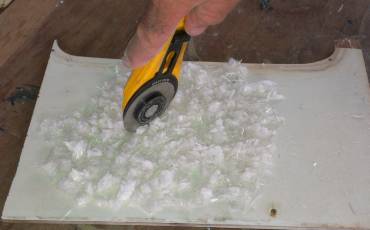 Cutting up fiberglass cloth into fine fibers to reinforce mud |
The actual shoot went very quickly - under 2 hours. Mike is training up a protégé, P'Wat, so the 2 of them traded off, which was much less tiring for Mike. It was interesting to note their differing styles. Mike likes to shoot a lot of gelcoat quickly, with a lot of air, while P'Wat prefers less air and less volume. P'Wat's approach results in less overspray, less misting, and more precise control of where the gelcoat goes because he brings the gun closer to his target, but it takes longer. On a large or complicated shoot where you want to maintain sometimes several wet edges, being able to get more volume sprayed quickly can be an advantage.
P'Wat's helper was also a bit more clued up. He could fill the gun with exactly 750ml (just under a quart) of gelcoat, squirt in the catalyst (pre‑measured in a syringe), mix it up and hand the loaded gun back in well under a minute. Mike's previous helpers never pre‑measured the catalyst, despite being asked to, so it always took longer, even with 2 of them.
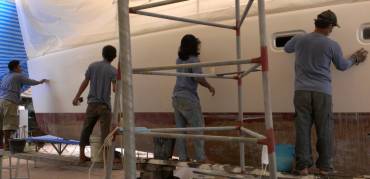 Yoong, Jack, Chai & Pla wet-sanding yesterday's gelcoat |
Mike also brought a cool tungsten carbide cutting wheel for cutting fiberglass. When making reinforced epoxy mud, mixing in some shredded fiberglass (sometimes called "milled fibers" in the US) will make a much stronger filler. But cutting up fiberglass is slow and difficult. Mike's "pizza cutter" let Jon cut up a small bag of fibers in only a few minutes, using a bit of formica as his cutting surface. AME now sells these tungsten bladed rotary cutters, made by Olfa.
Yoong, Chai, Jack, Pla and Lek spent the afternoon wet‑sanding the new gelcoat on the port topsides. Letting this ISO‑2500 gelcoat cure for too long makes it difficult to sand so it's better to start the sanding/polishing process fairly soon after the gelcoat is sprayed on. Even so, 5 guys worked for about 4 hours with 360 grit and only got to about a third of the port topsides.
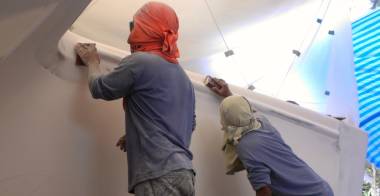 Chai and Nut sanding Ocelot's bows smooth |
When Jon wasn't watching or helping Mike, he was sanding the starboard waterline. Mike sprays a bit more than 1.3mm (.055") of gelcoat, but we don't want a step that big to show. We taped it off about 2" (5cm) below where the antifouling paint‑line will go, so the transition will be covered, but we still want it faired down to a feather edge. But it's slow going and hard on the arms. Jon has now done about half of the starboard outside waterline.
Just before quitting time, Jon went on deck to remove the plywood and masking. This is an ugly, messy job. Where the gelcoat is thin, like on the masking, it doesn't cure and it remains wet and/or sticky. Also, the duct tape we used to hold the plywood down goes all gooey, probably because of some of the chemicals in the gelcoat (or maybe the acetone). Whatever the reason, it's very gooey to peel up, and it leaves a messy, sticky residue behind that usually requires gasoline to remove.
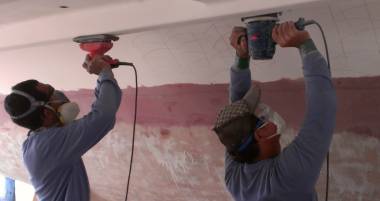 Baw and Pla sanding under the bride-deck - hard work! |
Thursday, February 28:
A landmark day! What passes for a weather report here in Phuket was predicting rain all day, but in fact
we had a gorgeous day.
Sue seems to be on the mend, as she was feeling good enough to come to the yard and spend the morning cleaning up the sticky residue of the duct tape (using gasoline) and extracting the last bits of tape from yesterday's gelcoat event. Baw and Nut were both present as well, so we had a full herd of workers.
Yesterday Mike had said that he wants to spray the insides of the hulls and the underside of the bridge‑deck next, so we pulled most of the workers off of wet‑sanding the port topsides and put them underneath. Baw and Pla used the "dancing" (orbital) sanders most of the day under the bridge deck -- meaning they pushed those heavy motorized sanders over their heads all day. Hard work! Chai and Nut were on the scaffolding up near the trampoline lines hand‑sanding and using polyester filler to get a smooth surface.
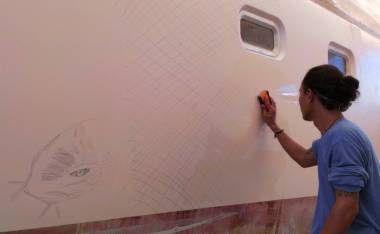 Artist Jack and his catfish - the guys really like wet-sanding |
Out on the port topsides we had Lek, Jack and Yoong using 360 grit sandpaper with soapy water to knock off the top gelcoat bumps. This ISO‑2500 gelcoat is manageable for the first couple days but then goes rock hard, so it's good to get a start on the sanding process. One of our workers is a pencil artist and gave us a nice fish face on the white hull.
Amanda spent the morning scraping back gelcoat from the top of the port sugar‑scoop wall where it wasn't adhering. We first noticed this problem a few weeks ago and were quite concerned, but Mike said these things happen, and just to get it all off and he'll have to re‑spray a few areas. Why it isn't adhering has to do with the surface preparation, which is why we worked so hard to be sure yesterday's deck was really clean and ready to be sprayed.
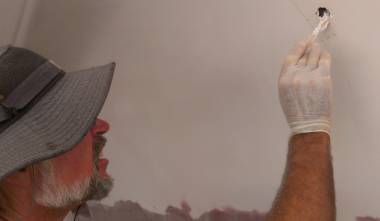 Jon filling de-cored drain-holes under the bridge-deck |
Houa has begun the big job of repairing the port aft cabin bunk. We think of it as Amanda's cabin, as that's where she lived for 6˝ years! It's also the cabin that got whapped by the whale in 2007 in the Mozambique Channel, cracking her bunk so that it dropped off its frame. Unfortunately the carpenter that first worked on Ocelot last year was brutal in taking the bunk apart, and, as Houa said, "He not careful to take apart so can put together!" So now that's Houa's job. It starts with a $100 sheet of 15mm (5/8") marine plywood.
Jon started the day by de‑coring 6 drain‑holes that come through the bridge‑deck. Four serve our 2 chain lockers and the 2 new ones go to our new tank lockers. Some of the old drain‑holes had a bit of gelcoat protecting the interior foam, but none were properly de‑cored. Jon used a screwdriver to cheese out some of the foam and then an Allen key driven by a drill to remove the rest. But Jon mis‑calculated how long it would take to fill the holes with epoxy mud, so he and Sue ended up working through much of lunchtime before all the holes were nicely filled.
The landmark job of the day was the rudder bearings. In the afternoon, Jon and Amanda wrapped each rudder shaft in packaging tape, which epoxy won't stick to. They positioned the bearings on the shafts and taped them loosely to the shafts, so the tape will let go and release the bearings when we drop the rudders down after the epoxy has cured. They also taped the tops of the rudder‑blades as well as Ocelot's hull around the rudder‑hole.
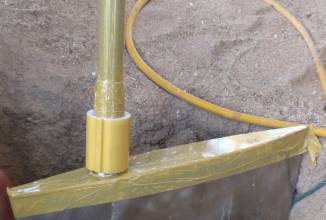 Rudder taped with the taped bearing sitting on the shaft |
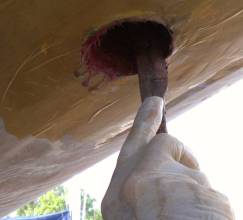 Smearing epoxy mud into bearing hole |
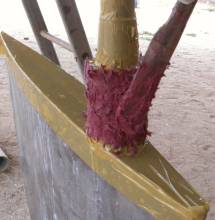 Epoxying the outside of the bearing |
Then Jon brushed epoxy resin up into the hole in Ocelot's hull where the bearing will go and smeared an epoxy mud made of phenolic micro‑balloons and some strands of chopped fiberglass up into the bearing hole. Once the holes were lined, he coated the taped up bearings as well. The holes in the ground under Ocelot were cleaned out, the rudders placed in those holes, and ropes were fed down the rudder tubes from the deck and tied to the tops of the rudder‑shafts.
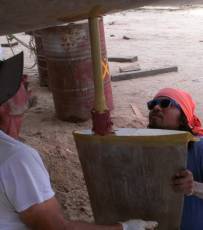 Jon & Chai guiding stbd rudder |
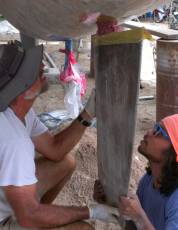 Stbd rudder almost in position |
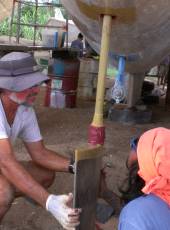 Ready to lift port rudder |
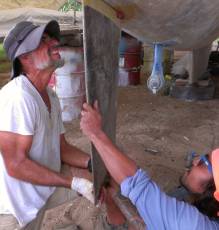 Port rudder bearing snuggles home! |
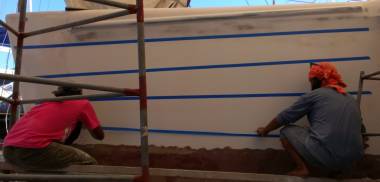 Nut & Chai using blue-tape to look for ripples in the hulls |
Then the moment of truth. Two guys up on deck pulled the rudders up while Jon and Chai guided the bearings into position and Amanda, in the engine room, pinned the rudder‑shafts in place. She pinned them slightly higher than they'll go normally, so we have some extra shaft length if we need it. Port gave us some trouble but snuggled home on our second attempt. Now they just have to sit overnight to let the epoxy cure. In the morning we'll drop the rudders back down, leaving the new bearings correctly aligned and epoxied in place! Fingers crossed!
Friday, March 1:
A bright, sunny, breezy day with a beehive of activity on Ocelot.
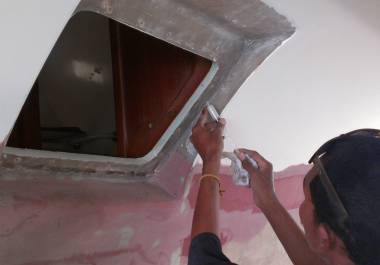 Baw injecting epoxy into screw holes around our escape hatch |
The best news of the day was that Ocelot relinquished her epoxied‑in rudders, thanks to Jon's careful "release tape" wrapping. With much excitement we gathered the "rudder team" -- Amanda in the engine room, Pla on the upper rope holding the rudder up, and Jon and Chai below to catch the rudder. First sign of good news was that Jon was able to wiggle the rudders from side to side, so we weren't permanently epoxied into a "rudder straight ahead" mode! Then, while Pla took the rudder weight, Amanda knocked the wedges and the pin out, then Pla was told to lower away. Zwip! Down it came! Leaving the new bearing epoxied firmly into place! YAY! Ditto on starboard! What a relief to have this angst‑causing engineering job done, and successful!
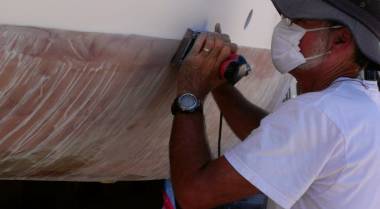 Jon sanding down the gelcoat lip at the waterline |
On more mundane chores: We had the teams split again, today into three groups. Out on the port hull we had Yoong, Lek and Jack enjoying full shade and water‑play as they wet sanded the new gelcoated topsides. By day's end, they had finished about 90% with 360 grit sandpaper. The next step is to repair any defects in the gelcoat, or indents, or thin spots. Then they can move on to finer and finer sandpapers as they polish out the hull.
On the inner bows, we had a colorful team of two -- Chai with his bright orange head covering/mask and Nut in a bright pink T‑shirt. They continued with the filling and fairing of the topsides between the hulls, and finally laid out 4 strips of blue tape on the inner starboard hull to determine if there were any low, indented places. Sue tried to see what they were seeing and completely failed. Maybe it needs to be done with younger eyes, and without glasses!
Under the bridge‑deck we had Pla and Baw, who got a break from the arm‑wearying, back‑breaking work of sanding over their heads. Instead they concentrated on the waterline. Baw used his magic curved long‑board, finding places where the phenolic was not sufficient to be fair with the gelcoat. They got more epoxy and phenolic in place just before lunch, and began sanding it by day's end. Ocelot's old emergency hatch areas also got some attention, with the guys injecting epoxy resin into the bolt holes and smoothing filler around the rims.
Houa was busy with the big pieces of marine plywood that will make the new bunk in Amanda's cabin. He got the pieces measured and cut, and the "hatch" opening cut out. He also went out at lunchtime to find a new stator winding for one of our grinders. Jon plans to install this in the next couple of days, which will give us a virtually "new" grinder, as this is the one that he put a new rotor into a few weeks ago.
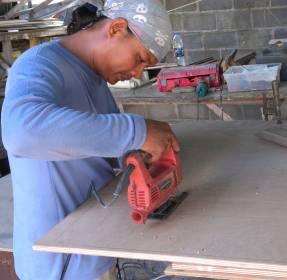 Houa cutting the new bunk in his workshop |
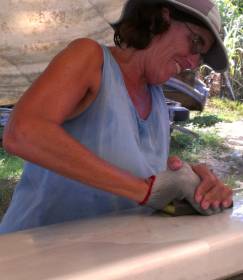 Sue wet-sanding the mast with 320 grit |
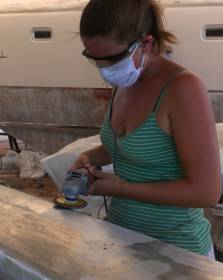 Manda plugged in, polishing the mast |
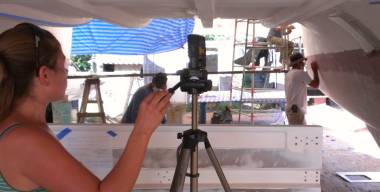 Amanda driving the laser while Jon chases red dots on the hull |
Amanda and Sue were the in‑the‑shade Mast Queens again. Amanda worked with the grinder and polishing pad, rocking out to music from her phone. Sue worked a good distance away with wet sand paper, 320 grit, giving the mast its first level of hand burnishing. Jon faired more of the gelcoat on the starboard waterline, and also spent much of the day running errands, looking for tinned speaker wire. We'd like to get our stereo functional again so the guys can have better music while they work.
Saturday, March 2:
A smooth ending to a good week. Bright sun, but hot. Luckily there was a nice breeze today.
Lek, Yoong and Jack spent the day finishing up the gelcoat dit‑dot repairs on port topsides, getting them wet sanded and blended in. All the pencil marks are gone so it looks like the 360 grit sanding is done, and with the repairs done, we hope to see them on 600 grit on Monday!
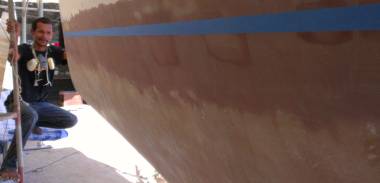 Baw checking the gelcoat-line after marking it with blue-tape |
One of the "gotchas" on the port topsides is that the gelcoat is not opaque enough to cover some of the underlying repairs completely. We can see ghosts of the dark red phenolic at the water‑line, and some other features higher up. The surface is smooth, but we're seeing color variations. Mike from AME came by after lunch to look at them and we decided they'll need to be masked and re‑sprayed. Hopefully we'll only need one more layer of gelcoat, but polishing the gelcoat makes it thinner and less opaque, so we're a bit worried that stuff might show through later. It's surprising to us that 1.3mm+ of gelcoat can be so translucent, especially since Mike sprayed considerably more gelcoat (13%) on port topsides than starboard.
Mid‑morning, Baw came over and asked us to mark the masking line for the gelcoat between the hulls. Like the outsides, we'll mask it 2" (5cm) below the eventual antifouling line, which should make it 1" (25mm) above the actual waterline. So Amanda dug out the laser and the tripod and we setup the laser as close to the middle of Ocelot as we could. This put 2 legs of the tripod on Sue's lock‑box and the third leg on AME's lock‑box. It took about an hour for Jon and Amanda to setup the laser, adjust it to the correct height, and mark both inside hulls.
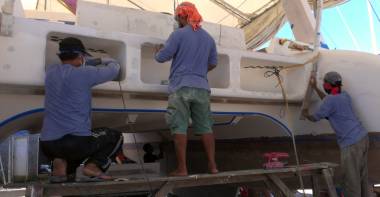 Pla, Chai and Nut working on the 3 aft storage-bays |
Pla and Baw were at it again under the bridge‑deck. They finished the filler around the old emergency hatches, and got that all sanded. Once Jon and Amanda did the laser line marking of the gelcoat line, the guys put tape on the line to check for fairness, dips, bumps, etc. All looked good, apparently. Then Baw put tape around the perimeters of the 3 areas to be gelcoated under there. When Mike dropped by in the afternoon we clarified what he wants to gelcoat when. Baw conferred with the other men and a schedule was agreed to. We're aiming for 3 days of spraying next week to finish the whole under‑bridge deck, including the insides of the sugar‑scoops and the 3 big open aft storage‑bays.
Chai and Nut worked on both the inner bows and the inner sugar‑scoops, sanding and checking for areas that need filler. They, together with Pla, also began the final sanding and checking of the 3 aft storage‑bays. We gave them the OK to do the interiors to 90% perfect, as no one can see in there once the covers are on. The middle bay stores our life‑raft and the other 2 have typically held dinghy fuel and/or diesel jugs.
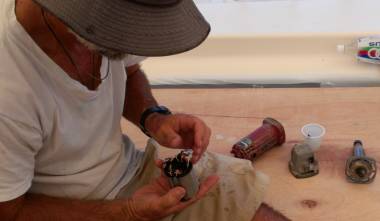 Jon reassembling our powerful grinder, holding the new stator |
Jon was #1 Electrical Guy for the day. He replaced the stator winding on the powerful grinder, put it all back together, and had no sooner finished testing it when Houa handed him a misbehaving orbital sander with a stuck trigger. Luckily that was somewhat easier to fix and Houa has now promised not to break any more tools for a few days... Jon also repaired our old step up/down transformer to take back to the apartment so we can run our sewing machine and laser printer/copier if we want to.
Houa was seen in and out of his carpentry workshop, measuring, cutting, and gluing the wood that will become half of the bed in the port aft cabin. He's putting a couple of lift‑out hatches in the bed so we'll have access to the engine and to neighboring areas.
 Nut long-boarding the inside of the starboard sugar-scoop |
Houa is still trying to find us good sound insulation for the underside of the bunks that are over the engines. The old stuff (about 1.5" or 4cm thick) is very dense foam with a metallic covering and two sheets of 1/8" (3mm) rubber sandwiched between the wood and the foam layers. We have always been so happy to have very quiet engines, and that insulation is a large part of the reason. Now to see what Thailand can come up with. Why not use the old stuff? Well, it crumbles to the touch, and is soaked in salt crystals. Hmm, how did that happen?
Sue and Amanda got all speckled in aluminum once again. That darn mast is soooo long. Grind, grind, grind. They realized in the past few days that the grinders that were used to take the paint off were wielded rather aggressively, leaving a mass of dimples which need to be smoothed out with the harsh grinding pad before it can all be polished. A step backward, since 1/3 of this side of the mast had already been polished (with dimples), but it will look much better in the end.
Thai Refit:
Ocelot Pages:
Top Level: Home | Destinations | Cruising Info | Underwater | Boat Guests | Ocelot | Sue | Jon | Amanda | Chris | Site Map | Make a Comment
|
If our information is useful, you can help by making a donation |
Copyright © 2000‑ Contact: Jon and Sue Hacking -- HackingFamily.com, svOcelot.com. All rights reserved.