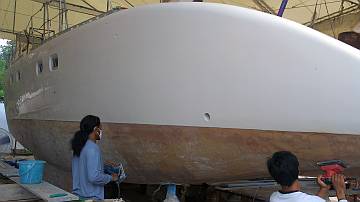
Candron & Yando sanding Ocelot's hulls, preparing for epoxy
91 Epoxy Hulls
Summary: The big push this week was getting the hulls cleaned and sanded so we could apply our epoxy barrier coat below the waterline, and do it before the forecast rains halted all epoxy operations. This week we:
|
 Candron & Yando sanding Ocelot's hulls, preparing for epoxy |
Monday, July 29:
A typical SW Monsoon day: high overcast, alternating with hot sun, and warm breezes. One hour
north of us it poured. We barely got a sprinkle.
As we see the end of laying nonskid in sight, our thoughts have turned to "What's Next?" And what we realized is that once we begin getting gelcoat sprayed on the deck between each piece of nonskid, the guys will be wet sanding for days and days. And all that water will pour down onto the topsides and bare hull. Not ideal. It's time to get the epoxy resin barrier coat on the hull, Pronto!
So we explained to Baw that we want to stop the varnishing and nonskid work for a few days and concentrate on getting the bottom of Ocelot sealed up. He was in total agreement, which was great, and in fact he suggested that the two inside workers come out to do the hull preparation.
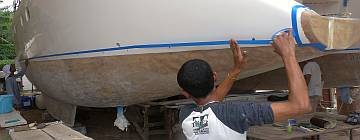 Lek and Baw tape the antifouling paint line! |
So Yando and Chambron spent the day outside, which must have been a nice change for them. First they hosed off the bottom and scrubbed it with plastic scrubbies. Then, with Chambron on the big heavy‑duty Bosch sander and Yando on the smaller Maktec, they worked their way around both sides of each hull.
Lek had already put in an hour preparing the bimini surface for nonskid, so at least that sanding won't have to be done again, at least not as deeply.
Baw recognized the need to finish the transoms (the aft, aft most bit of Ocelot) before we can put epoxy resin on the hulls. These have been left with epoxy and red phenolic filler for months, as we've slowly gotten the swim ladders and hinges set up. Today was the big day to spray them with gelcoat. To that end, Baw hand sanded each area, concentrating on getting rid of shiny bits of epoxy, but keeping the shapes as close as possible, as AME needs to fit the new stainless steel stern protectors over those same edges!
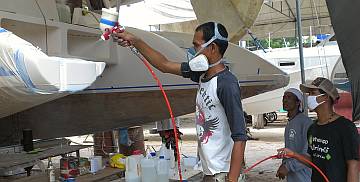 Baw spraying gelcoat on the transoms |
Heru worked on cleaning up Saturday's nonskid projects on the port swim platform and the big piece on the bimini. Late in the day he was Baw's "hose holder" while Baw sprayed several coats of Ocelot White gelcoat onto the prepared transoms. They are looking very spiffy, and very "real"!
In order to place the epoxy resin up to the correct height, Jon put in time with the laser marking the accurate (and level) paint line. This should be the final antifouling line - quite exciting. With Heru's help they got all the hulls marked before lunch. In the early afternoon Lek and Baw laid the blue tape on that paint line.
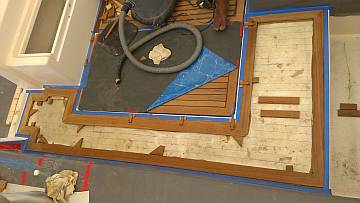 The complicated frame on the starboard side of the cockpit |
Jon got the last of the mainsail track and traveler control blocks assembled and mounted up on top of the targa bar, getting himself pretty stuck up in Duralac in the process (Duralac and TefGel are anti‑corrosives that we put between dissimilar metals like stainless steel and aluminum). The last thing to be done is to mount the rod that connects the targa bar and track to Ocelot's hull behind the cockpit seat.
The cockpit is looking very teakish now. Houa got the fancy port section of floor stuck down with brown Sika 298 and weights. Then he worked on the frame for the even more complex starboard side section, the one just aft of the companionway. He sanded the cockpit floor just where the frame is to go, and got all his little markers glued into place, and bigger pieces of wood glued down that are used to wedge the frame tightly up against its surrounding gelcoat rim. Then he cleaned the floor with acetone, applied Primer to both the floor and the teak frame, then squeezed out the brown Sika 298, judging how much to put down to be sure it is forced up and around the sides of the teak, as well as covering the bottom completely. Once down, he walked on the frame to press it in, then used the wedges to drive it against the rim, then added cross planks to hold water jugs to weigh it all down.
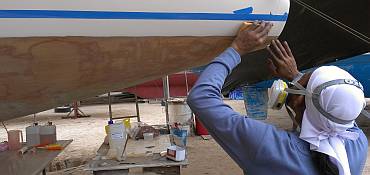 Lek sanding the gelcoat under the taped paint-line |
Tuesday, July 30:
Wow! A great Tuesday, and a real milestone day! (We are easy to please!) But one
new worry, just to keep us humble.
The weather forecast was for a massive front and rain, but we were happy to find it wrong (again) as we wanted to do some epoxy work. We dove into the day with all 6 of our workers (minus Houa, the carpenter) preparing the bottom of Ocelot for an epoxy treatment. And that needed a No Rain Day.
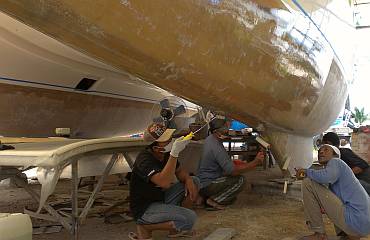 Heru, Pla, Lek & Baw putting on the first (clear) layer of epoxy |
Polyester hulls like Ocelot's are not completely waterproof, strange as that sounds. Over
time, water can sometimes work its way into the hull, creating blisters (the dreaded Boat Pox).
But epoxy is much more impervious to water, so polyester hulls are often protected by a
"barrier coat" of epoxy. According to the West Epoxy web page, in order to preserve a
polyester hull, it should be kept far from the water.![]() In this case, West suggests .020" or ½ mm of epoxy as a barrier coat. So we measured our hulls
weeks ago, calculated the area, and worked out that we need to put on 36 liters (about 38 US
quarts) total, or about 9 liters (9.5 quarts) onto each side of each hull.
In this case, West suggests .020" or ½ mm of epoxy as a barrier coat. So we measured our hulls
weeks ago, calculated the area, and worked out that we need to put on 36 liters (about 38 US
quarts) total, or about 9 liters (9.5 quarts) onto each side of each hull.
With the orbital sanding of the hull finished yesterday, today's first order of business was hand sanding all the waterline gelcoat that will be covered with epoxy. We wanted to get the job done fast, so Baw told Chambron and Yando, the Indonesian workers, to join the others outside. Everyone sanded and helped with the acetone wipe‑down.
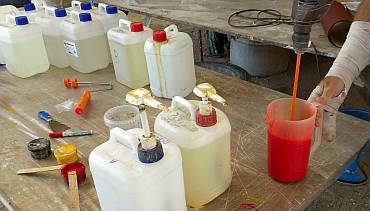 Mixing station: 50 liters of epoxy, colors, pumps, & mixing rod |
Jon marked the final waterline on the two newly gelcoated transoms with the laser, so they could be prepared as well. Sue ran a dozen errands to the local hardware stores to find the right epoxy mixing container, rollers, roller handles, paint trays, and even more sand paper.
By 10:45 Jon was mixing the Epotek epoxy in a big juice jug with a paint stirrer attached to his electric drill. Our varnish sanders went back into the cabins to carry on that work (Baw had checked it, and they weren't being thorough enough) and we kept 4 men outside. Baw and Lek worked on the starboard hull, while Pla and Heru worked on port. The first man of each team used a large, small napped roller to get as much epoxy on the hull as possible. The second man used a mini‑roller to smooth it all out. In less than an hour they had the first layer on all four hull sides.
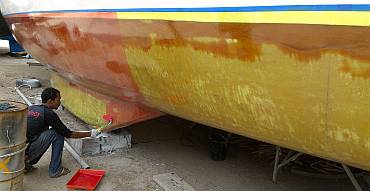 The first red layer going on top of the yellow layer |
But we'd only mixed up 6 liters or 1/6 of what we wanted on the hulls, so we'd obviously have to do this several times. And rolling the epoxy on too soon was difficult, so we had to wait until the epoxy had at least started to cure. Today, that time seemed to be about 90 minutes, so even though the team had finished in an hour, we had to wait an additional 30 minutes before we could begin applying the next coat.
The plan was always to apply the epoxy resin "wet on wet", but the trick is, how do you see where the additional coats go when the whole hull is shiny from the previous application? Answer: add pigment to the resin. We checked with the epoxy and fiberglass shop in Phuket town and they said they just use the pigment paste that can be added to paint or gelcoat. Luckily there was some at the yard, so we got small jars of red, yellow and black. For the second coat, Jon added a dab of yellow, and made up a batch of resin that looked like orange juice.
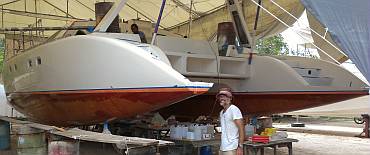 Ocelot with new epoxy on her bottom |
After an hour that layer was on, and the guys took an early lunch break, then retuned to apply the first of 2 red layers. It seems a bit trivial to be so excited about the look of the hull, all shiny and red, but it sort of looks like a BOAT again, with a bright new bottom paint. Of course, after this epoxy coat we will be applying a primer and then the antifouling, so we're not even half way to a water‑ready bottom yet.
The good news is that we did get more than half way on the epoxy, having put 24 of the desired 36 liters of epoxy onto the hulls today. Tomorrow morning the men will be sanding the cured epoxy and getting ready for the next 2 applications.
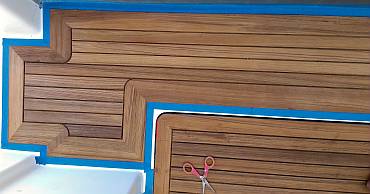 Houa's excellent teak work on the port side of the cockpit |
Houa did some beautiful teak work in the cockpit today. He shaped the interior boards on the long port‑side teak section, making lovely curves around the inner corners. Difficult to describe, but easy to show. He then cleaned out all the routed grooves, applied Sika Primer, and then the black calking. Cool! It's all looking great!
The worrisome news of the day is that Pla motioned Sue over to the mast, to a part that was Nyalic-ed months ago, and pointed out corrosion under the Nyalic. This is not good at all. Checking along the mast, it seems that there are parts that were still pristine and smooth, just like the day the Nyalic was applied, and other parts that look like they've been sprinkled with dark gray specks, like a rash. It's all under the coating, and doesn't wipe off. We'll be firing off an email to the Nyalic folks in the USA tonight.
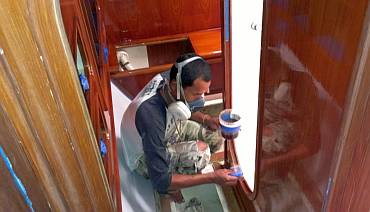 Baw's beautiful varnish work in the starboard forward cabin |
Wednesday, July 31:
A great send‑off for July, with some steps actually "finished". But it was a
long, hard day.
Baw worked the first half of the day inside Ocelot ("No rain come inside boat!") along with Lek and Pla. Together they got a third coat of gloss varnish on the whole starboard side (both cabins and passageway) and a second coat of gloss on port. Starboard is now ready for its satin finish topcoats, and port gets one more coat of gloss.
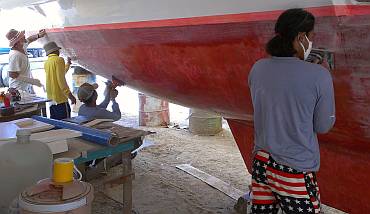 Jon, Yando, Heru & Chambron sanding the inside of port hull |
The (hugely inaccurate) weather reporting here has been forecasting several days of rain, supposedly starting 2 days ago. We've learned, over time, that the rain does usually come, but often several days after it is forecast. We're now in those "several days" so we waffled a bit as to whether or not to continue the epoxy work on the hulls. But the Phuket weather radar (which shows what really IS, so it's pretty accurate) was saying that it was pretty clear for 200 km (120 miles) upwind of us. With rain clouds typically traveling at about 20 mph, we figured we had at least 6 hours of clear weather and probably more.
By 9:30 the day looked bright, and we decided to go for it. Baw set up Chambron, Yando and Heru with orbital sanders and instructions to rough up the (now hard) port hull epoxy. They spent the morning on it, and Sue and Jon added more finger and hand sanding to the junction line with the gelcoat, and at the fiddly bits around the emergency hatches and swim ladder grooves. By 11:45 they were finished enough that we sent them off to lunch, and Jon and Sue took turns eating BBQ chicken, chips and water while the other prepared to roll epoxy.
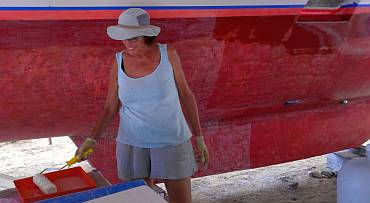 Sue rolling today's first layer of epoxy on the port hull |
Jon mixed up about a liter of clear epoxy and Sue got to roll it on. It's a job she's totally comfortable with and it has a nice feeling of "being home with the boat" since rolling the antifouling paint on the bottom at haul‑outs is usually her job. In 2 hours she and Jon had applied almost 6 liters of epoxy to the port hull.
After lunch the guys continued sanding, but this time on the starboard hull. It seems to take a good 2 hours with 3 men sanding to complete both sides of a hull (but these are our lowest paid men). Jon encouraged (pushed them!) to finish the sanding quickly, because we really wanted to get epoxy on the starboard hull and finish the whole job today.
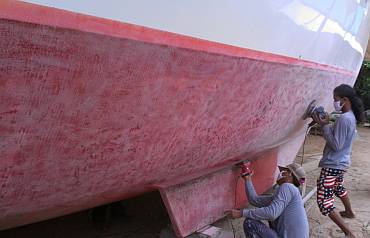 Heru and Chambron almost finished sanding the starboard hull |
They got done just after 3pm and we added Baw, Lek and Pla to the epoxy‑team. By 4:30 we had a second coat (yellow, this time) on port and 2 full coats, clear and then yellow, on starboard. Near as we can figure, we got a total of about 40 liters (10.5 US gallons) of epoxy on the hulls. This is slightly more than we were aiming for, but it allows for some to be sanded off. It should form a good water barrier.
It all sounds so smooth and easy when written this way, but it wasn't without minor panics. The biggest problem was that our "local weather indicator", The Big Buddha atop a local hill, went hiding in the clouds. When Buddha is out, we know it's a Buddha‑full day. But when he hides, we know we're about to get drenched. And Buddha went hiding under an angry black cloud at about 1:45, just as Sue was finishing the first layer on the port hull.
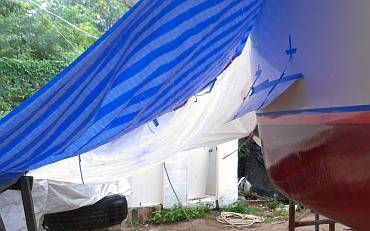 Makeshift tent and drip protector for Ocelot's port bow |
Our tent is very nice, but it doesn't completely cover Ocelot, especially if the wind is blowing. Both sterns and the port bow can be exposed in certain conditions. Ocelot faces slightly north of west, so in this SW monsoon time, her port bow, although it's under the tent, can be exposed to blowing rain. With the SW wind whipping the canvas and plastic awnings and tent, and the rain beginning to pelt down, we managed to construct a (very temporary) tent/shelter for the newly applied epoxy on the port bow.
Then the rain let up and the skies began clearing. We weren't fooled - we knew the rain would be back, but there are often gaps in the rain before a weather system becomes firmly established, so we decided to go for the starboard epoxy treatment. It was a toss‑up: if we quit the whole project then we would have wasted a half day of 4 men sanding and we'd have to do it all over again another day (like next week, as it's supposed to rain all of this week). It we applied the epoxy and it didn't cure we would also have wasted a day, and lots of epoxy. But if we quit we were sure to lose something, and with some extra hardener in the mix, and the fact that our big tent was keeping the starboard hull totally dry, we decided to go for it. The drizzle continued on and off, and Sue was sent out on panic errands for more rollers and roller handles, riding in the rain. If the epoxy hardens, then we'll have won the toss!
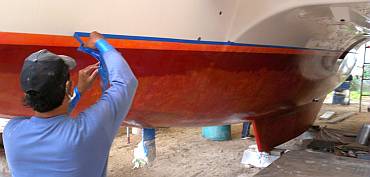 That delightful time - finally taking the masking tape off! |
Houa was out today, possibly having had some sort of accident, maybe an injury to his leg. He phoned to say he hopes to be back tomorrow, but we've been having some uncomfortable strangeness with Houa:
Last week we decided to give Baw's brother‑in‑law, Heru, a raise (from $16 to $18/day). Heru's been a good asset to the team despite his inexperience. He's bright, always cheerful, he's brought us more workers, and he's got reasonable English skills. This got us thinking - Baw's English has improved markedly in the year he's been with us, he's now taking a more active role in directing the other workers, he's managing several different projects on Ocelot at the same time, he checks the quality of the work performed and has it redone if it doesn't meet his quality standards (which are often higher than our own), and with Mike and AME backing down on their involvement in Ocelot's decks, Baw is stepping in to do more, spraying gelcoat around the nonskid, etc.
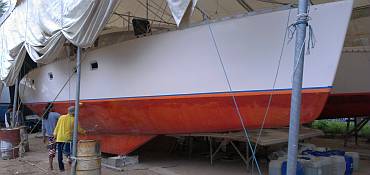 Chambron and Yando finishing up the outside of starboard hull |
So yesterday we told Baw that we were giving him a raise as well, from $29 to $32/day, the same as Houa has been making (they'd be tied as our highest paid workers). These numbers seem low by western standards, but they're actually higher than the norm here in Thailand (the yard pays much less than we do, and Phuket's nominal minimum wage is only about $10/day). Of course, Baw told Houa which was awkward because we hadn't yet decided if we were giving Houa a bonus for the teak work, or a raise, or some combination. It must have caused some strife, as Houa phoned us, and even had his sister phone and ask if he was also getting a raise. Not the way we do business in the West, but then again, this is a very different culture.
Houa produces superb woodwork and also does fiberglass work when necessary, and has done a lot for us. And while Baw is only 25 and has only 1 daughter, Houa's got 4 kids and he owns his own tools, which Baw should but doesn't yet. Houa's also been with us the longest, over a year and a half and hasn't gotten a raise since he started working directly for us 9 months ago, so it's probably time. Too bad it feels more like having it pulled out of us, rather than offered. We really just didn't think this one through too well ahead of time.
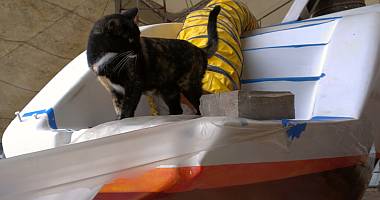 Turtle, the boatyard kitty, surveying "her" domain |
Thursday, August 1:
Bit of a slow day after the frantic activity of the last 3 days. It began with a massive
downpour that caught Sue already at the yard (by Scooter) and Jon about to walk, but having to
postpone a bit. Houa was out with a big glass cut on his leg, and the Indonesians were not at
work today.
The first good news of the day was that yesterday's massive epoxy event worked! We won! It cured, hard and shiny all over the hulls!
With the rain, our Steady Team of Four, Baw, Pla, Lek and Heru worked inside doing a huge varnish sanding. Heru worked alone in the salon getting the epoxy sanded on the trim around the galley and handrails. He's using a dry 220 grit sandpaper, so it's pretty dusty, and we have requested that he vacuum and clean as he goes. It's a pain to keep having to clean dust off the tools and hardware that we have in the salon.
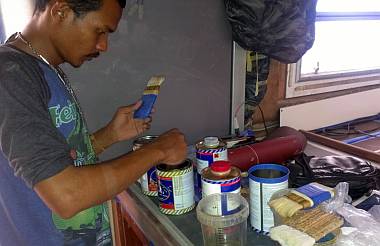 Baw's varnish station in the galley |
The other 3 worked in the starboard cabins all day, giving that 3rd coat of gloss varnish a nice sanding (400 grit wet) preparing it for the satin top coats. This will give us 5 new coats over the (still good, but thin) old varnish. Mid‑afternoon Baw declared that some of the varnish was "not perfect" so he got himself set up and did some gloss varnish touch up in the starboard aft cabin.
Jon attacked the rigging bar that runs from the mainsheet track on the targa bar down to the aft seat. We have to mount the bottom of the bar to the back of the aft cockpit seat before we can really finalize the mainsail track, as 3 of the track bolts also tension the bar. The mounting plate at the bottom takes 4 bolts. This was one of the places that leaked water into the (then balsa, now foam) coring, requiring us to rebuild the whole back of the seat. In the process of rebuilding, we reinforced where the mounting plate goes with 2" (50mm) of epoxy fiberglass. But we also have the old backing plate, which we'd like to reuse, so the holes have to be very accurately drilled.
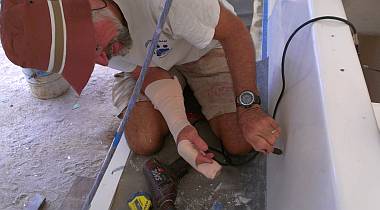 Tapping a thread through 2" (50mm) of epoxy glass - left handed |
We don't have accurate markings for exactly where the mounting plate needs to go so we had to generate the location. To find Ocelot's centerline we measured in from the toe‑rails and again from the bottoms of the targa‑bar. These gave close but slightly different "centerlines" so we split the difference. To get the right height, we set the tensioning bolts in the mainsail track to give us ¼" (6mm) of slack - we don't want to pull the center of the targa‑bar down any more than that. This let us position the mounting plate and draw where the holes need to be drilled.
To make sure the holes are drilled as accurately as possible, we set up squares above and to the side of the drill. With Sue watching the side and Jon watching the top, we drilled pilot holes of about 1/3 the final diameter. These appeared to come out pretty close to where they were supposed to, so we opened them up to their correct diameter and Jon tapped the 2" (50mm) of fiberglass for 8mm bolts. Running the bolts in from the outside we found that one of the holes had drifted about 1/8" (3mm) from where it was supposed to be, which we thought was pretty good. It meant that the only modification necessary to the backing plate was that one hole be moved slightly, which took Jon about 5 minutes with his Dremmel.
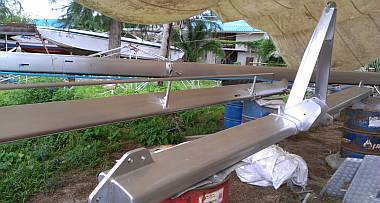 The mast, boom, and forebeam - uncovered per instructions |
Unfortunately, we couldn't finish this job as we need to replace the bolts with new ones. The local hardware shop only has stainless steel bolts up to 50mm (2") in length, and these need to be at least 70mm (3"). So Mike will bring us some bolts from AME when he comes down tomorrow morning. Unfortunately, they'll probably have to be allen key drive, which looks good but doesn't allow very much twisting force on the bolt.
We got good news, sort of, on the "rash" corrosion on the mast under the Nyalic. Our email to the Nyalic folks resulted in a personal email back from the president of the company! From our photos it was determined that what we have is filiform corrosion. This is caused by moisture getting in through pinholes under thin films such as lacquers or paints (or, in this case, Nyalic) and causing thin lines (filaments) of corrosion to appear. It is not deep, nor much more than a cosmetic problem.
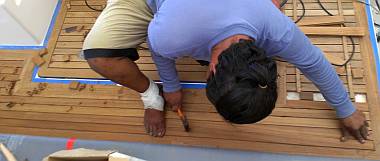 Houa, foot bandaged, works on the starboard side of the cockpit |
For us, the repair is easy ‑ sand back the Nyalic (400 grit, wet does it neatly), re‑clean, and re‑apply Nyalic. He suggested we apply a 3rd layer on the entire mast, and that we leave it uncovered to cure in the heat. It is possible the tarp we covered the mast with was put on too soon, which would have trapped moisture, thus aggravating the filiform corrosion. There are some interesting websites to read about metallurgy and corrosion, and they address a lot of corrosion issues we have in the marine environment. One of the suggested solutions to prevent filiform corrosion is to reduce the ambient humidity. We like that! Maybe we can reduce the humidity here in Phuket, and the whole island will be happy!
Friday, August 2:
Ay, Yai, Yai. Another wet wet day in Phuket. Luckily most of our ongoing work doesn't
care about moisture! But the rest of the boatyard was pretty empty - nobody else was working.
Houa returned to work today, with an ace bandage wrapped around his right ankle and foot. Seems a broken bottle was shot like a stone out from under a passing truck, and it sliced his ankle, deeply and long enough to require 19 stitches. He seemed in good spirits and was able to get about, squat, and climb the ladder to the boat, but he can't really lift his foot up without lifting his whole leg.
Houa fitted all of the interior teak planks on the starboard‑most cockpit section. He apologized that he couldn't use Sika today due to the rain (actually, just the very wet air) but it was fine with us. Better to not do something than to do something that won't turn out right!
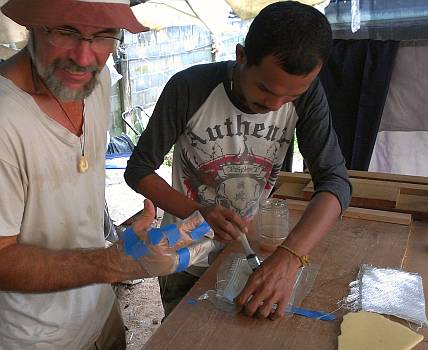 Dr. Baw wetting out the glass with polyester, on a sheet of polyethylene |
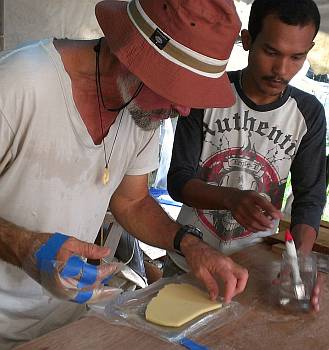 A scrap of thin foam goes on top of the wetted out glass |
Jon's primo project of the day was to fabricate a new cast for himself. On the evening of
the accident that broke his finger, the emergency room folks put on a big, plaster half‑cast that went most
of the way to his elbow. The next day, the doctor took off the cast, wrapped his 2 fingers together with some
gauze, and sent him home! The gauze didn't seem nearly enough, but the cast was too much (and
was very light duty, so it was already starting to break). He needed something in between -
enough to immobilize his 2 small fingers, but still let him move his wrist. Rather than go
back to the hospital, he took matters into his own hands (so to speak![]() ).
).
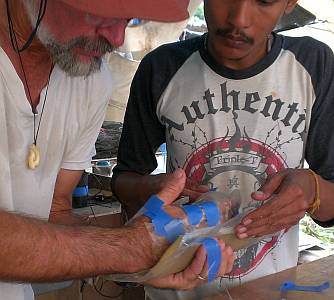 Wrapping the foam, glass, & plastic around Jon's hand |
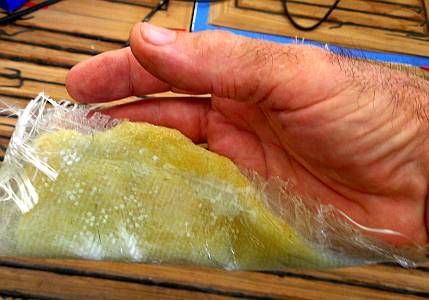 After 30 minutes the resin had hardened - The raw cast, before trimming |
He cut some thin foam from one of our old headliners that's being replaced. Dr. Baw cut him 4 small pieces of fiberglass cloth and mixed up some polyester resin, wetting the glass out on a small piece of polyethylene. Jon wrapped his hand in polyethylene (just in case), put the foam on top of the wet fiberglass, and wrapped foam, glass, and plastic around his hand. After a few minutes it started getting warm so he worked it into the right shape around the bottom of his hand. When it cured (about 30 minutes) he took it off and trimmed the excess glass away with jigsaw and grinder. And VOILA! A custom fit cast that immobilizes his 2 small fingers but lets him use the rest of his hand (and wrist!) His broken little finger has better support and protection, and Jon has a lot more mobility with that hand, and can even drive a scooter now!
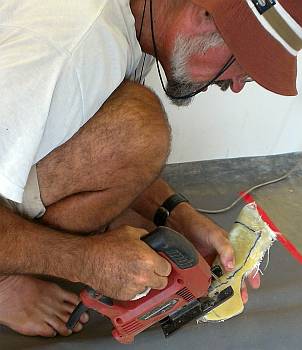 Trimming off the excess glass with a jig-saw |
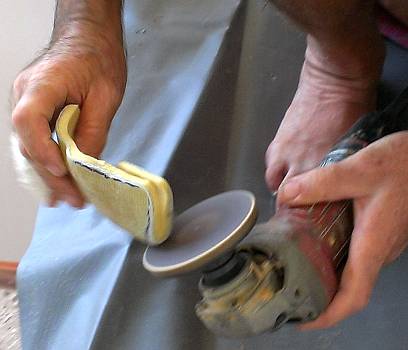 Final shaping and rounding of the sharp edges with a sanding grinder |
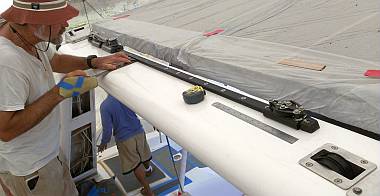 Jon & cast - fittings at extreme left & right interfere with the bimini |
Jon's main boat project for the day involved figuring out just where to mount the bimini on the targa bar, i.e. how far aft or forward to position it. We have about 2" of play and we don't need to mount it all the way back for strength. But some of the hardware on top of the targa‑bar is mounted where the bimini will go. Moving the hardware is not an option, so some of the mounting surface at the back of the bimini, where it sits on the targa‑bar, will have to be cut away. This will not be visible from below, and will not significantly reduce the strength of the bimini, but it's easier to make templates and trim back the bimini now instead of waiting until we're trying to mount it and it's balanced precariously up above Ocelot.
Finding out where to cut the bimini means finding out exactly where it will mount. Jon and Sue (once again) spent time looking for reference points, this time balanced on a thin board that sat (unevenly) on a pair of big 55 gallon (200 liter) drums above the cockpit - even finding the center of the targa‑bar is not a trivial process.
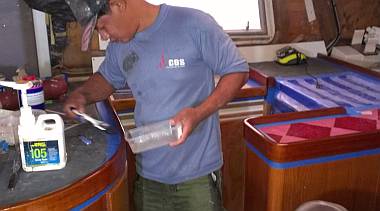 Pla brushing a 3rd layer of epoxy on high wear areas of the galley |
The mounting surface at the back of the bimini is 4" (10 cm) deep, with the mounting holes 1" (25 mm) in from the back edge. This mounting surface is solid fiberglass, with no core, as it has to bend slightly, like a big hinge. The top surface of the targa‑bar actually points a bit too high, so the bimini needs to slope down a bit to give Ocelot back her nice lines. So we'll put 2½" (6.5cm) of the mounting surface on the targa‑bar, and let the remaining 1½" (3.5cm) take the bend.
Inside Ocelot we had Heru and Chambron sanding the port cabins and companionway, and when that was finished they moved to the salon to sand the epoxy trim. By mid‑afternoon they, together with Pla, were applying another layer of West epoxy to that trim.
In the starboard hull, Lek and Baw did the final touch‑ups to the sanding, then cleaned and wiped everything down and applied the first coat of satin varnish ("Rubbed Effect" in Epifanes‑speech). It is looking awesome! And there's more to come!
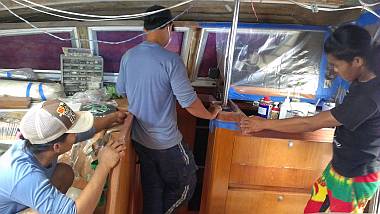 Heru, Pla & Chambron sanding the salon and nav-station |
Sue spent several hours reacquainting herself with the aluminum mast, the part under the Nyalic (and under the tent!) She debated using the polishing grinder, but as Jon pointed out, it burns the Nyalic, and then you have to sand the burned edges away. Using wet 400 grit sandpaper seemed to remove the filiform corrosion, and still left the exposed aluminum nicely "brushed". If it ever stops raining, a whole middle section of the mast just needs a touch up sand with 600 and 1,000 and is then, once again, ready for Nyalic.
Saturday, August 3:
A surprisingly dry day, after dire weather predictions. It was a reasonable end to a
productive week.
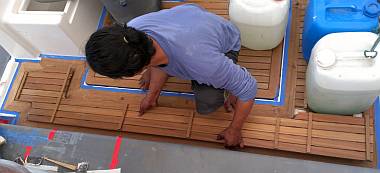 Lowering a glued together center section into its outer frame |
Sue took advantage of the blue and partly cloudy sky to finished preparing the damaged mast sections, and after lunch took the leap, and got 2 more coats of Nyalic on the sanded, cleaned and dried mast section, plus another full coat of Nyalic on the boom. This latter move was to try and forestall any filiform corrosion. We're still not sure how it works, whether one can encapsulate and stop it from spreading, or if it continues to expand/grow under the protective layer. More research and emails are in the offing.
Houa continued his good teak work in the cockpit, getting the long complicated port side section Sika‑d to the floor. He also spent time planning the layout for the step in the companionway, and cleaning up the Sika on other parts of the cockpit.
All the other men were down in the boat all day, making good use of the drop lights we bought for them. The mantra of the day was sand, Sand, Sand. Baw brushed a first layer of satin varnish on starboard side cabins and passageway. Then he put another layer of epoxy on some of the salon trim. Unfortunately this one didn't turn out so nice, as there was lots of dust in the air, and we have a slightly bumpy epoxy now. Oh well. These things happen. Nothing for it but to sand it smooth.
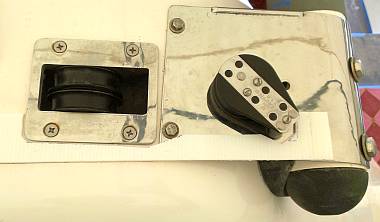 Narrow white template marks where bimini must avoid 2 blocks |
Jon worked on the Big Bimini Plan. Up on the targa‑bar he used future board (essentially plastic cardboard) to make 2 templates of where existing targa‑bar hardware (blocks, etc) would interfere with the bimini. These interference areas are only on the extreme outer edges of the targa‑bar. Once the 2 templates were built, he positioned them on the mounting surface of the bimini and drew in where the bimini has to be cut away to clear the hardware. Then he cut away the interfering fiberglass and smoothed the cutouts. The strength loss is minimal, but a couple of the mounting bolts will have to be repositioned. It's much more convenient to get this shaped correctly now, rather than try to cut and fit it once it's up in place, and supported by who knows what.
Sue made it a slightly short day, as she wanted a head start on the 1‑hour scooter ride to Ao Po to visit friends in their "Sumptuous Villa" for the weekend. Jon followed soon after, and we both hit the worst traffic jams ever. A relaxing Sunday on the horizon with good friends, good food, and (always) good fun...
Thai Refit:
Ocelot Pages:
Top Level: Home | Destinations | Cruising Info | Underwater | Boat Guests | Ocelot | Sue | Jon | Amanda | Chris | Site Map | Make a Comment
|
If our information is useful, you can help by making a donation |
Copyright © 2000‑ Contact: Jon and Sue Hacking -- HackingFamily.com, svOcelot.com. All rights reserved.