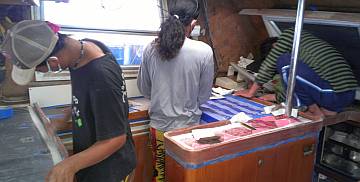
Heru, Chambron and Yando sanding the galley teak
90 Broken Finger
Summary: Some good accomplishments this week, despite a 3‑day Buddhist holiday. But Jon's broken finger from the end of last week certainly slowed him down, as he can't (or shouldn't) really use his right hand. Our accomplishments for this week include:
|
 Heru, Chambron and Yando sanding the galley teak |
Monday, July 22:
Although today is a Buddhist Holiday in Thailand, all the men chose to come to work, but asked to
leave mid‑afternoon, which was fine.
This day could be characterized as a Day Of Sanding. We had 4 men in the salon all day, sanding the teak trim that got epoxied last week. We had a new man to replace the one who left, another friend of Heru's. After dry sanding, the trim was all wiped down with thinners but we had to keep reminding the men to NOT touch the wood again once they had wiped it. We're not sure what they think they are wiping it for. Some of them obviously don't understand fingerprints and skin oil.
Speaking of oil, the spotty pox in the AwlBrite finish on the cockpit table was remedied today by Baw and Lek who attacked those damaged sides with soapy water and 400 grit sandpaper. While they let the table dry, Baw got another (undamaged) layer of epoxy on the salon table pieces.
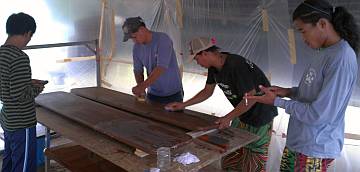 The guys sanding the cockpit table quickly before they leave |
At 3pm Baw was brushing more AwlBrite onto the salon table, when he realized he had a problem once again! Craters of the moon, all across the table's shiny surface. Contaminated rags were not the problem this time. But no one could figure it out. We called our friend Toi, of Yacht Solutions in Boat Lagoon, where we had bought the AwlBrite to see if she had some ideas on what went wrong. We wondered if we should be using acetone instead of methyl alcohol to do the final wipe, or maybe thinner. Or maybe the brush was contaminated.
It wasn't until Houa wandered into the paint shelter and started talking that they realized the mistake. Houa uses an air nozzle to blow off his tools when they are too dusty. But this morning the nozzle was stiff and difficult to pull, so he sprayed the Thai equivalent of WD‑40 on it, unbeknownst to Baw. So when Baw used the same nozzle to air spray the tent and the surface of the tables before applying AwlBrite, he inadvertently introduced a fine mist of oil onto everything. Oil is not compatible with polyurethane finishes! Luckily just as we were discovering the culprit, the 4 men who had been sanding in the salon all finished, and Baw immediately put them to work sanding and soap‑cleaning the latest debacle. It meant they all stayed an extra half an hour into the short (holiday) day, but we were very appreciative.
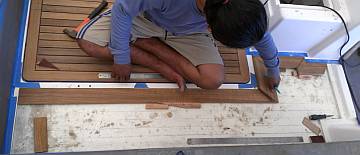 Houa having fun building a king-board for the cockpit |
Houa was working in the cockpit, shaping the "King" boards that go around the teak sections of the cockpit. King‑boards are usually slightly wider than the other teak in a given section. Ocelot didn't really have king‑boards before - all the teak was pretty much the same width - but Houa has certain notions of how things should be done. For him, teak floors have king‑boards! So he was cutting, fitting, and trimming the king‑boards for the port‑most section of the cockpit.
King‑boards look good but they introduce lots of complications. Ocelot's cockpit used to be made up of teak strips that were all just under 40mm wide (about 1.5"). Since the gelcoat strips between the teak sections are also about the same width, all the teak lined up across the different sections, from the salon right back to the aft‑deck. Houa is still trying to get the boards to line up front to back, but the king‑boards make for some interesting challenges. But Houa doesn't seem worried - indeed, he's in his element and having fun!
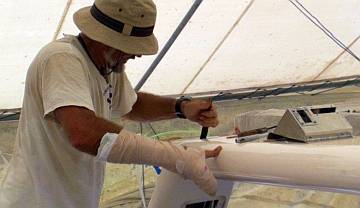 Starboard shoulder piece, with Jon filing open a rope hole |
Jon went back to Phuket International Hospital on Sunday to see the orthopedist. The temporary half‑cast put on by the emergency room crew immobilized Jon's arm to the elbow, so as the doctor was removing it Jon commented that he'd like a bit more mobility. So the doctor wrapped his broken little finger (only!) in some self-adhering gauze and said he could go home! Jon looked askance at the doctor so he wrapped a bit more (flimsy, stretchy) tape around both of his small fingers and sent him home with an $80 bill (the emergency room charges were $120). This had the benefit that he could take the scooter home (it had spent the night at the hospital, 20 minutes from our apartment) but it seemed WAY too delicate, so he's been wearing the half-cast ever since. But besides being overly restrictive, that cast is very light duty and won't last long, so it's certainly not an optimal solution either...
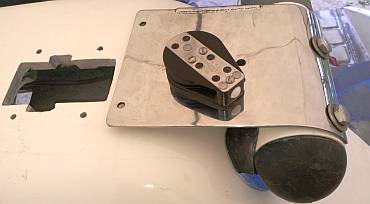 The portside stainless steel shoulder piece getting mounted |
Jon got some good work done, despite his right arm being pretty useless. We found and reassembled the blocks that go in the 2 stainless steel "shoulders" for the targa‑bar. Then Jon (with some wrench holding by Sue and Houa) got the shoulder pieces re‑installed on the targa‑bar. There were a few head scratching moments when it because obvious that the bolt holes on the starboard side shoulder didn't match up with the holes in the targa bar. Maybe it was the bit of filler that was put on the corners of the targa bar to round it out. Never thought it would be a problem. Live and learn. Jon remedied the situation by extending one of the holes in the stainless steel shoulder piece with his Dremmel so that all 3 mounting holes lined up with their pre‑drilled holes in the targa‑bar. Now both (newly polished) stainless shoulder pieces are happily bolted down and the targa bar is ready for the mainsail track to be re‑installed. Yay! Putting Ocelot back together!
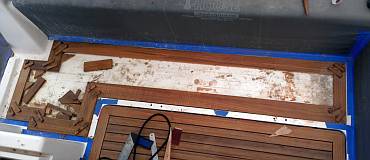 Houa's elaborate frame around the port-most cockpit section |
Tuesday, July 23:
A strange, slow day, as it was still a holiday, but no one thought to tell us! So Pla and Lek
didn't come in, Baw left after lunch, and the others stopped work at 4.
Despite the short work day, some good things got done. Houa made the most visible progress by getting the very complex teak frame built for the cockpit far port side section. This has 10 right angle miter‑joints, and when you figure he's doing this all without any sort of miter box, it's pretty amazing. His challenge, it seems, is that the gelcoat trim "walls" around the teak sections are not straight, so he's dealing with curving edges and not-square corners (although, as we recall, he made some of those walls...).
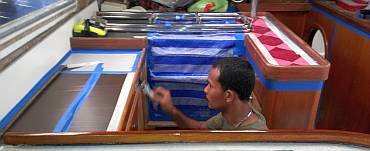 Baw brushing a second coat of epoxy onto the high wear areas |
Baw worked over in the varnish tent sanding the cockpit table once again, to prepare it for another layer of AwlBrite. Not sure if he got one on or not, as both Jon and Sue were running around doing errands or concentrating on other tasks most of the morning. We do know that Baw got the second coat of West Epoxy put on the teak trim in the salon, so that's looking very nice!
We had only 3 other workers today, Heru, Yando and Chambron, and the latter two were set the task of sanding, sanding and more sanding. They worked inside on port forward cabin getting the varnish ready for another coat. Then they worked over in the varnish/epoxy tent getting the salon table ready.
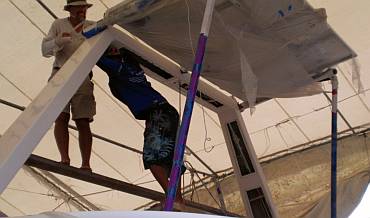 Heru and Jon bolt a traveler block onto the top of the targa-bar |
Jon commandeered Heru as his right arm (literally!) by getting his help mounting more hardware on the targa bar. Unfortunately a couple of the turning blocks for the mainsheet have disintegrated in the sun (the plastic ball bearings have just rotted away). So a trip to Rolly Tasker was in order, and Jon was not up to driving the scooter himself.
Not wanting to risk his life with newbie Sue as driver, he again commandeered Heru, who got to chauffeur him the few miles to Rolly Tasker, the huge sail loft and sailing candy shop in Phuket that also stocks a nice supply of rigging hardware. Dangerous store! No doubt Heru learned more about sailing hardware than he wanted to. Jon did find a couple appropriate blocks. Now all we have to do is un‑mount the old ones from the sail car (that bolts to the track) and mount the new ones. We left the parts with a generous spraying with some German penetrating oil to soak in overnight, with hopes that we can loosen the stainless bolts from the alloy car...
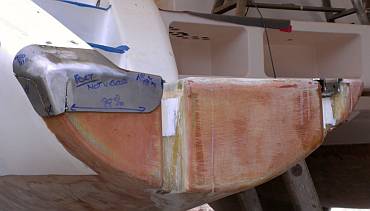 Testing the fit of a stainless steel transom protector |
Sue ran errands on Scooter, our manual shift Suzuki Smash, dodging rain clouds and holiday traffic. She also spent some quality time in the store room boxes locating all the hardware for the targa bar, then cleaning things up prior to assembly. Exciting stuff! Putting the boat together!
Mike stopped by, shot the breeze for 20 minutes, and was about to give up on his stainless steel workers when they pulled in. So we got to see another "pre‑fit" of the bow and stern steel protectors. Mike claims that with these 2mm pieces of armor we'll be ready for anything, including a whale. We had to remind him that our encounter with a whale was a side‑of‑the‑boat event, not a head‑on collision and we really don't want to do it again! The AME machinists pounded and fitted and marked and mumbled for about 20 minutes, then took the pieces away again. The final sizing to accommodate the handrail bases and the ladder hinges will have to happen in situ, at the last minute. Meanwhile, they still have some work to do to get the shapes just right.
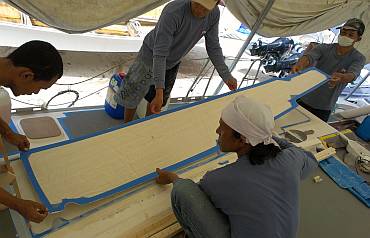 Baw, Heru, Lek & Pla guide the first piece of nonskid down |
If the weather holds, we hope to see Mike again tomorrow for laying more nonskid!
Wednesday, July 24:
Up to full speed, now that it's the middle of the week! We had our full contingent of men, and
many projects going on despite massive morning squalls with wind and rain. The rain was so
bad, in fact, that we almost cancelled our nonskid afternoon with Mike, but we decided to hold off
judgment of the weather until after lunch.
All morning our auxiliary team (Heru and his friends Chambron and Yando) worked inside Ocelot, sanding and vacuuming and wiping the bulkheads in both starboard and port cabins. It was definitely too muggy/rainy for epoxy work or AwlBrite application.
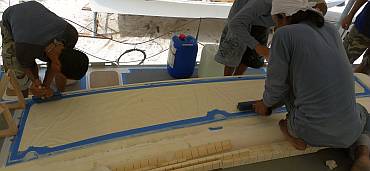 Rolling the air and excess glue out from under the nonskid |
Baw, Lek and Pla worked on getting the nonskid areas ready for the (possible) afternoon nonskid laying event. We had to go ahead as though we would do it, because we didn't want to be caught out not ready. So the port and starboard aft side of the salon top were sanded with gnarly 40 grit (again) and wiped down with acetone to ensure their cleanliness, then covered in vinyl.
Sue was paranoid about the swim platforms being clean enough, so she scrubbed starboard platform with acetone before they guys sanded it. We have been climbing up and down onto this surface for weeks. It was pretty dirty and the grunge didn't show on the dark epoxy/foam. There is a theory that if you sand a dirty or greasy area, you actually embed the grease into the scratches. Clean first, sand second, and clean again is a good mantra.
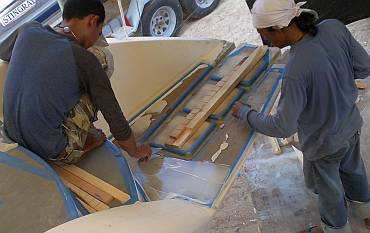 Smearing nonskid glue on the starboard swim-platform |
Just before lunch Baw and Pla worked on the starboard swim platform areas, checking the position of the nonskid, then doing a final sanding.
After lunch the skies were looking bluer and there were no more signs of squalls, so at 1:30 we checked in with Mike, who said he'd be at the yard by 3 at the latest. Baw took this as time enough to get some varnishing done! So together with Lek as mixing assistant, they got another layer of Epifanes varnish in the starboard aft cabin. When Mike arrived, Baw turned the bamboo brush over to Lek who continued the varnishing right up into the forward cabin.
As much as we had tried to be sure we were ALL ready for Mike and the nonskid, there were still hold‑ups. The bottom of the tooth‑shaped nonskid for the swim platform was still shiny and needed last minute grinding and cleaning. There was so much excess resin on it that it gummed up Houa's grinder, so we continued by hand. Also, Baw discovered that the jugs were NOT going to stay on the wooden pressure frame on the sloped cabin top, so he had to build a last‑minute "jug wall" to hold them back.
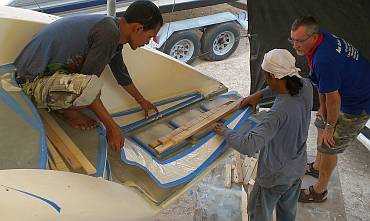 Our first piece of nonskid goes onto the swim-platform! |
Houa spent the morning finalizing his frame for the portside teak section, and discussing with Jon what to do about the fact that the gelcoat frames around the teak sections are not straight (probably due to over‑zealous sanding). Houa wanted to router out a groove around the edge of the teak and put black Sika calking along the edge, between the teak and the gelcoat. But we're not fans of having lots of black Sika calking showing. If Jon had his way there wouldn't be any, just the teak showing, but apparently that's prone to cracking.
There are actually 2 problems here: what to do about the teak already stuck down, and how to prevent this problem from happening in the remaining 3 teak sections. Houa didn't really see it as a problem at all, as he doesn't mind putting down lots of Sika - he doesn't mind how it looks, putting it around the edges hides a multitude of flaws, and he doesn't have to pay for it. We take the view that he should have stopped building teak frames when he noticed that the gelcoat borders for the teak areas weren't straight, and done something about the gelcoat (or the teak) right then. But he was having too much fun.
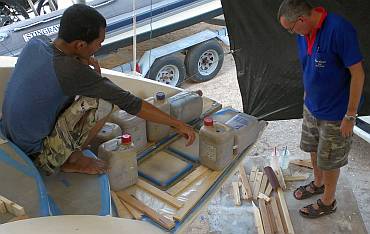 Holding the nonskid down with plastic jugs filled with sand |
Eventually we compromised. For new areas, Houa will make sure the teak follows the gelcoat, even if it's not straight. It's straighter than the eye can tell, so nobody will notice. Also, the brown Sika that's used to stick the teak down is close enough to the color of teak that it won't be noticed, so we'll put some on both the vertical edges of the gelcoat borders for the teak AND the edge of the teak itself. This will ensure that there are no pockets around the edge of the teak where water can sit, at the cost of a bit of Sika (and some mess). For the existing teak areas where there's a gap between the teak and the gelcoat, we'll try to open the gap up enough to shoot some of the brown Sika down into the gap to seal it up.
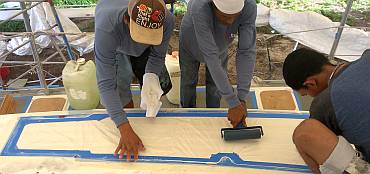 Wiping off excess glue from the third piece to go down today |
When Mike arrived, Houa gracefully and cheerfully left his workshop and teak projects to mix polyester glue and hardener for us, using Mike's suggested percentage of hardener. Lek, Pla, Baw and Heru were the gluing team. First to get laid was the starboard aft, outer cabin top, a long but relatively narrow strip. We used 0.8 kilos (2 lbs) of glue and 0.7% catalyst. It was a lot of glue, but better too much than too little. The guys really wanted to do the matching piece on port next, but we wanted to be sure that we got the swim platforms going, as these will take multiple days to finish (given that we need access to the platforms, and we can't put all 4 pieces down in one event). We finally convinced Baw to change his plan, and realized that he had a bit more wood‑planning work to do, so we took a break for some refreshing fresh squeezed lime soda drinks from the drinks lady who visits the yard almost daily.
The tooth‑shaped swim platform piece went down well, but with lots of excess glue, so lots of finger‑wiping was necessary as the glue sploobed out for the next hour. Our third piece for the day was the port aft cabin top. So, now we are fully nonskidded (is that a verb?) from the aft deck forward! At least on the deck level. We still have 8 small pieces on the louvers to do, 7 left on the swim platforms, 2 near the davit supports, the port engine hatch, and the bimini. The 4 bimini pieces will be quite big, but the other 18 pieces are all quite small.
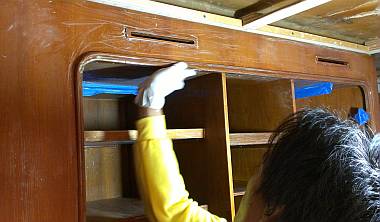 Yando sanding varnish in the port aft cabin |
Between supervisory tasks and errands, Sue worked on the boom details and got out the grinder to begin the machine polishing of the aluminum support for the anchor chain (the big hunk of metal that separates the trampolines!) Pla jumped in to help when he had a free moment, which was very nice.
Thursday, July 25:
A no‑rain, sunny day that seemed to drag on and on, probably because Sue started the day early with
a walk to the local market for fresh salad veggies and fruit. The live catfish jumping out of
their concrete tub were amusing but not appealing. We may go back for the huge tiger prawns
one day.
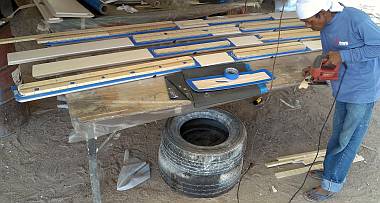 Lek preparing the 8 nonskid pieces for the louvers |
Today was a "prepare to lay nonskid" day so we had to measure progress in small steps. Sue was gone much of the morning to Phuket town to deal with immigration and our retirement visas. Under this non‑immigrant visa we can stay in Thailand for a year, but have to "check in" every 90 days. There is a grace period on each side of the 90 days, but we don't like to push it. So today, with no rain on the horizon, was a good day for Sue to take Scooter to town. Seems like she spent most of the rest of the day on the scooter as well, running errands to the chandlery and hardware stores.
Jon rallied the men to move the bimini back under Ocelot so it's completely out of the rain.
It was nice to see the new bimini once again, as it hasn't been uncovered for months. One
distressing thing is that we have found small bumps in the gelcoat where the water was sitting for
all those months. We swept it off when we thought of it, so it wasn't wet all the time, but it
has been raining a lot for 3 months now. These bumps are reminiscent of the bubbles we got in
our old gelcoat in places that stayed wet, and it was precisely to avoid this problem that we went
with Mike's expensive ISO‑2500 gelcoat, a theoretically harder and more water‑impervious gelcoat
than the plain vanilla gelcoat sold here in Phuket. Hmmm... Some discussion necessary.
(Gotta be careful here. Mike's one of the 2 people who actually reads these posts - and you're
the other one!![]() )
)
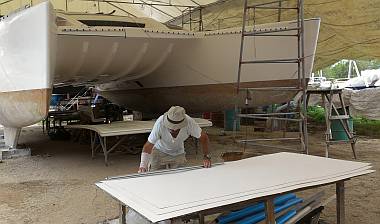 With the bimini under Ocelot, Jon straightens nonskid edges |
With the bimini exposed, Jon was able to picture just how the big pieces of nonskid will be placed. Of course, the raw nonskid arrived from AME with very wiggly edges, so Jon spent several hours with a long straight edge, going cross‑eyed staring at little raised diamonds, to try and mark out the straight edges on the last 3 full‑sized sheets. Tomorrow these sheets will be trimmed to those lines, the edges long‑boarded straight, and then we can fit them to the bimini.
Baw and Lek concentrated on the louver nonskid pieces. It was an amusing puzzle in the morning sorting out which of the 8 similarly sized, sausage‑shaped pieces went where on the long, curved louvers. Sue finally got Baw sorted out, but he had to resort to writing in Thai and numbering each piece to know how to position each piece. The louvers were then cleaned and blue tape put down around the pieces, with super‑glued blocks to position the nonskid exactly. The men hand sanded the spaces on the louvers, and put the plastic on the tops of the nonskid. Tomorrow they'll do the last‑minute bottom check, cleaning and grinding as necessary.
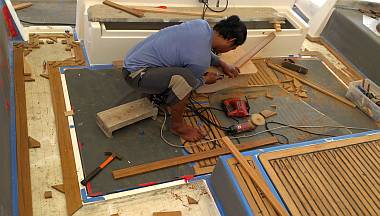 Houa having fun and making a serious mess in the cockpit |
Heru, his 2 buddies, and Pla worked inside again, sanding the varnish and cleaning both port and starboard cabins for the next coat. Baw would like to carry on with this job, but he realizes that getting the nonskid on the deck is top priority. It's just a bit crazy making for him to be wearing the varnish hat one day and the nonskid hat the next, or even worse, one in the morning and a different one in the afternoon. Unfortunately, we found out later in the morning that Baw was only going to be working half a day, so we checked with Mike and mutually cancelled today's nonskid event. Luckily the men know the routine for preparing for nonskid even without Baw there.
Heru worked on the starboard swim platform in the afternoon. He spent a little time cleaning up the edges of yesterday's gluing, then cleaned and sanded the 3 nonskid squares inside the "tooth‑shaped" nonskid that we laid yesterday. We had a bit of a scare in the morning when we felt the glue around the edge of the "tooth‑shaped" piece, and it was tacky. We expected it to be non‑tacky and hard. Both Baw and Mike reassured us that it would be fine after several hours in the sun, and indeed it did get harder as the day wore on. It was put down fairly late yesterday, and is in a place vulnerable to the evening rains, so it didn't set as fast as we had hoped. We'll be checking it again tomorrow.
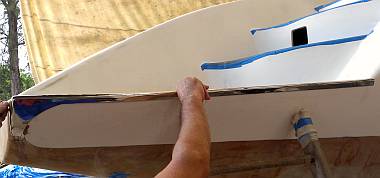 Ocelot's new stainless steel edging for the swim platform |
Houa made a glorious saw‑dusty mess in the cockpit as he planed, trimmed, sanded and cut the teak frame pieces for the starboard cockpit floor. This section has 12 right angles to be mitered and fit, and it is quite a work of art! Houa seemed happy to have a day without nonskid happening so that he could concentrate on his teak and commandeer the whole cockpit.
Friday, July 26:
A glorious Friday, weather‑wise, with lots of things accomplished despite the lack of electricity
most of the day.
Knowing that Mike was due to come just after lunch, we had the men prepare today's nonskid projects. These involved 8 small pieces on our 4 louvers, and the 3 small squares on the starboard swim platform. What we really wanted to get done, though, was one of the big pieces on the bimini, but there was no power for the sander. So the men cleaned the whole bimini really well with acetone, but then had to leave it. No way it could be hand‑sanded rough enough. Baw trimmed the big sheets of nonskid to the line that Jon drew on them yesterday, then long‑boarded the edges smooth and rounded off the corners, so they should be almost ready to stick down.
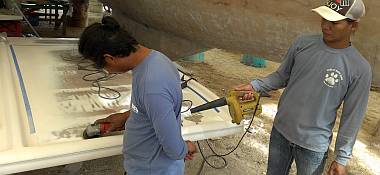 Houa and Heru grinding bad gelcoat off the front of the bimini |
Once Mike was there and we had all looked over the gelcoat bubbles at the front of the bimini, we agreed that when possible we would sand/grind off the gelcoat down to the bare fiberglass. We all figure that water seeped under the overspray gelcoat, worked down the fiberglass fibers or through the filler under the hard gelcoat. With luck, this problem will not repeat itself once we have a full gelcoat barrier and nonskid. Plus, we will have drains in the corners of the bimini so the water won't just sit there as it has been for these last few weeks. (Houa was able to finish this sanding in the late afternoon, after laying the nonskid.)
Jon and Mike spent awhile discussing the stainless steel legs that we'll have built for the forward end of the bimini. We figure a 2½‑3" (6.5‑7.5 cm) stainless pipe, with 1/8" (3mm) walls, will not only be very strong, but will be a good diameter for grabbing hold of. They played with cardboard and PVC mock‑ups of the legs to get an idea of how it would all work. Mike also brought out a show‑and‑tell piece, a polished but not quite finalized stainless steel "bumper" for our port side swim‑platform. Mike figures we'll have to put a big sign on our aft deck that says "Beware, Ocelot's sterns have teeth!" It will be a pretty strong steel bumper, but it's surprisingly light.
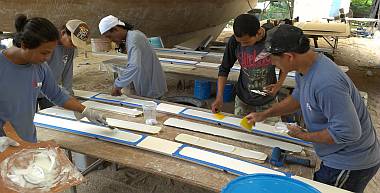 The team, spreading glue and laying nonskid down on the louvers |
Chambron and Yando were pretty invisible most of the day, still sanding the varnish down below. They made a cameo appearance to help fill the big 20 liter water jugs which we needed for weighing down the new nonskid pieces.
The actual nonskid project involved Mike as supervisor, Houa as glue/hardener mixer, Baw as overseer, and Heru, Lek and Pla as glue spreaders. Oh, and Jon the "Big Boss" and Sue, the photographer and occasional QA person in terms of complete acetone cleaning, catalyst amounts, finger‑wipes, etc. In 90 minutes they got all 8 louver pieces down, plus the 3 small squares on the starboard swim platform. We would have liked to get the new nonskid "step" under the davits done as well, but Baw said it wasn't ready.
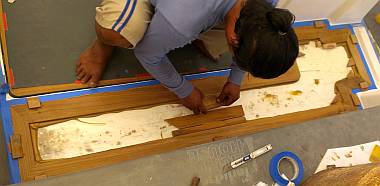 Houa gluing down a teak frame for the port side of the cockpit |
When Houa wasn't playing Glue Master for the nonskid team, he worked on the cockpit teak. He got the complex frame for the port side Sika'd to the floor. Per our request, he used more than normal on the floor, and also put both primer and Sika 298 on the sides of the frame. With all this extra, it helps insure that the teak is bonded to the gelcoat frame.
Houa also chiseled off the tops of the black calking strips next to the battery compartment, and it was then fun to stand on the "new" teak floor without the bumpy black calking. His final project of the day was checking the fit of the very complex starboard frame, and rounding the interior corners of 3 of the 12 right angles. This rounding mimics the round corners of the center hatch and looks really cool.
We had some interesting wins at the end of the day. Ocelot's mainsheet track is out of reach while we're sailing, on top if the targa‑bar, so the traveler needs to be pulled from one side to the other by ropes and blocks (pulleys). Jon has been bolting the track down to the targa‑bar when he gets a few free moments throughout the day, and he knew that the blocks on each end of the track that control the traveler were broken. The balls that form the bearings appear to be light sensitive, and the ones facing the sun had rotted away.
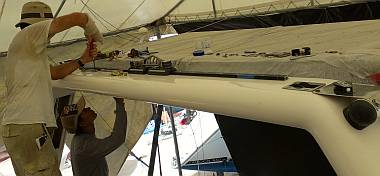 Jon and Heru bolting the mainsail track to the targa-bar |
Since we knew that the bolts holding these traveler control blocks would be seized (stainless steel bolts threaded into aluminum) we dosed them with penetrating oil a few days ago. Surprisingly, the bolts came out easily! Even more surprisingly, we found that the plastic ball bearings in one of the blocks were OK. And our final win came when Jon found that we have spare 3/16" plastic balls, so we could repair the the broken bearing!
For some strange reason, we can buy imperial sized plastic balls easily, but metric sizes are almost impossible to find. 3/16" is 4.76mm, so it's possible that the (metric) block is supposed to take 5mm balls, but these seemed to work just fine. Unfortunately, 1/4"=6.35mm, which is too big to fit into our blocks that want 6mm balls, but it's nice to know we can repair our smaller blocks this way.
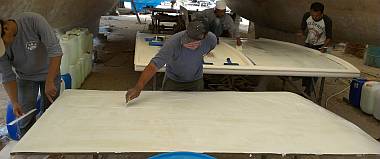 Spreading polyester glue on the nonskid and on the bimini |
Saturday, July 27:
A hot, sweaty, dirty, industrious end to the week!
The main event of the day was, once again, Mike's arrival after lunch to oversee more nonskid. We're getting so close to the end now, it's fantastic! The guys split up the work this morning. We had Pla and Heru cleaning up the edges of yesterday's nonskid gluing. Lek spent the morning perched on top of the bimini, breathing mask on and power sander going, making the surface rough enough for the nonskid glue. Baw got all the supporting wood pieces cut and organized for holding up the water jug weights.
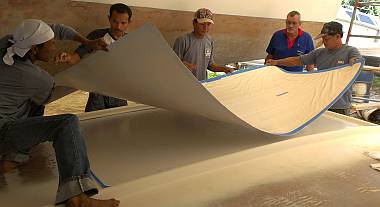 Gluing a full sheet of nonskid down on the bimini |
Mike arrived a bit later than expected due to horrific Saturday traffic jams. But by 2:30 Houa had mixed up the biggest pot of glue yet, 2 kgs with 12cc of catalyst. This was almost enough to cover the big (full) sheet of nonskid and the equivalent area on the bimini. It took another 300 grams to be sure we had enough coverage. It was quite a feat to flip over that heavy, wobbly 4x8' (1.2x2.4m) piece of nonskid and get it into position on the bimini. Then came the fun of rolling the excess glue out, from the middle outward. The guys used Mike's huge stainless steel roller for the first time, with Lek walking behind it, putting his weight on it. We put 12 water jugs (240 kg or 500 lbs) on top of the new nonskid, and then to be sure the bimini didn't twist out of shape, we put the same amount of weight on the starboard side as well.
We gave the guys a cool drink and cigarette break, had them make another finger wipe around the edges to remove excess glue, then attacked the port swim platform. It was nice that all the little pieces for the day were already cleaned, sanded, taped and ready to go. No waiting around today! They got the "tooth‑shaped" piece down first, then moved up to the base of the davit poles and got our 2 foot‑step pieces glued down. Quite cleverly, Mike suggested we use the some black tacky tape to hold the sand jugs in place on the sloping deck!
 Houa's teak work - note rounded internal corners |
Meanwhile, inside Ocelot, Heru's friends (who we learned today are Indonesians from Jakarta) continued with the sanding of the varnish. Baw is pretty sure they finished all of the starboard side cabinets, so they're now ready for 2 layers of satin varnish. The big bulkheads have to be checked for complete sanding, and some are ready for satin spray, and one area for a 2nd coat of gloss. It's a bit disconcerting to have several projects going on at the same time, especially when there are multiple coats/layers involved. We just hope that Baw is keeping good track. We're trying as well....
In the morning, before the Great Nonskid Event, Houa cleaned up the excess brown Sika 298 from the port cockpit section. He was then able to cut, plane, sand, check, and finally super glue together the 9 interior planks to give us a nearly completed port cockpit floor! It's going to be beautiful!
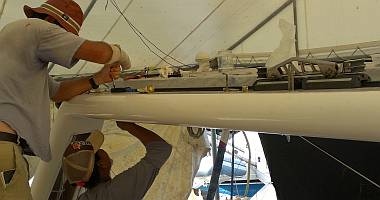 Jon and Heru working on the mainsail track on the targa-bar |
Jon worked either alone, or with Heru when he was free, to get more of the mainsail track correctly bolted into place on top of the targa‑bar. This assembly is for real, as Jon was using both clear silicone and Duralac to bed the bolts! Some time ago the original holes were filled with epoxy, then drilled and tapped for the 8mm (~5/16") bolts. Since the holes are threaded (and therefore a very close fit) a bit of silicone should prevent water getting in, even with the incredible loads on the mainsail track. The nut on the bottom of the bolt, inside the targa‑bar, now acts as a lock‑nut, making sure that nothing moves.
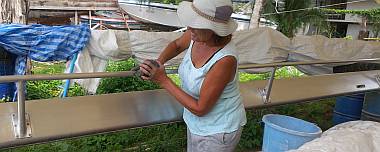 Sue sanding the boom with 600 grit - hope to Nyalic tomorrow |
Jon also spent time trying to draw in Ocelot's centerline on the back wall of the aft cockpit seat. This is where a piece of rod‑rigging mounts that goes up to the targa‑bar and takes some of the mainsail loads from the center of the mainsail track. The center 3 mainsail track bolts actually tension this piece of rod, so the rod needs to be mounted before the track is really finished. But Houa's poor quality spirit (bubble) level had Jon pulling his hair out as his double‑checks weren't checking. So Sue went out and bought a decent Stanley spirit level. Ocelot is as level as we can make her right now, but we have no use for a level when we're on the water, so it will probably end up in Houa's toolbox. Drilling exactly aligned holes through 2" (5cm) of fiberglass reinforcing so we hit the backing plate correctly is going to be a challenge...
Sue spent time with 600 grit sandpaper, beautifying the boom. She even had both Baw and Pla out there helping at different times when they had a few minutes of "down time." The goal is to get half the boom Nyalic‑ed tomorrow. Fingers crossed for a bright sunny day!
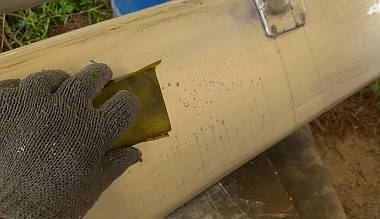 Wet-sanding the boom with 1000 grit and detergent |
Sunday, July 28:
Drum‑roll and Bugles Blaring! Clearly the shiniest award today goes to ... Nyalic Sue!
Yep, she scootered off to the boatyard at 8am, and went through the critical steps for Nyalic application. Rinse off the yard dust with local hose water. Wet sand with 1000 grit paper and detergent. Rinse with clean drinking water. (Hooray for 30¢ jugs of water.) Sand again with detergent and 1000 grit, using long, smooth strokes to "comb" the sanding lines uniformly along the boom. Rinse really well with clean water. Check for contamination in the form of water not running off smoothly. (Re-wipe with detergent and 1000 grit if necessary and rinse again.) The shiny wetted‑out surface of the aluminum shows what the Nyalic will look like. Now is the time to fix streaks or scratches. Allow to dry.
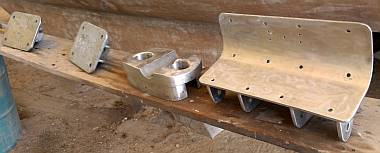 Forebeam supports, mast base, & the anchor support bracket |
While the boom dried, Sue gathered the 2 forebeam supports, the mast base, and the anchor support bracket and cleaned, sanded and rinsed the bottoms of them (Nyalic had been put on the top surfaces weeks ago).
Back on the boom where a clean rag wiped away the last lurking water droplets, and dried out the insides of bolt holes. Failure to do this puts water in the alcohol wipe and you have to toss the rag.
Gloves on, and time for an alcohol wipe with a clean dry cloth. If contamination shows up now, it can sometimes be fixed with further alcohol wiping with a new white rag. Alcohol wipe the ancillary pieces.
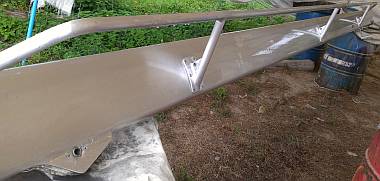 Rinsing reveals what the final finish will look like |
Prepare the brush: clean white sheeting taped over the bristles so they don't come out. Nyalic application for half of the 25' (8m) boom: 25 minutes. Could have gotten a second coat on, but there was a flurry of small hard‑shelled bugs which were attracted to the shiny boom and committed bug‑a‑cide in the wet Nyalic. Some could be picked out and the Nyalic smoothed over. Other were too deeply embedded, and it will be better to clean them up tomorrow.
Total elapsed time for the last‑minute preparation and application: 2 hours for about 31 sq‑ft, or just under 3 square meters. Haven't added up the time to get it ready for today. Now who got the 3 (rather feeble) puns at the beginning?
Off to Flints‑One for brunch, then Skype time with the family followed by an afternoon of leisure!
Thai Refit:
Ocelot Pages:
Top Level: Home | Destinations | Cruising Info | Underwater | Boat Guests | Ocelot | Sue | Jon | Amanda | Chris | Site Map | Make a Comment
|
If our information is useful, you can help by making a donation |
Copyright © 2000‑ Contact: Jon and Sue Hacking -- HackingFamily.com, svOcelot.com. All rights reserved.